
August Monthly Update


A summary of Week 2:
A summary of Week 3:


A summary of Week 4:


A summary of Week 5:


August Week 1:
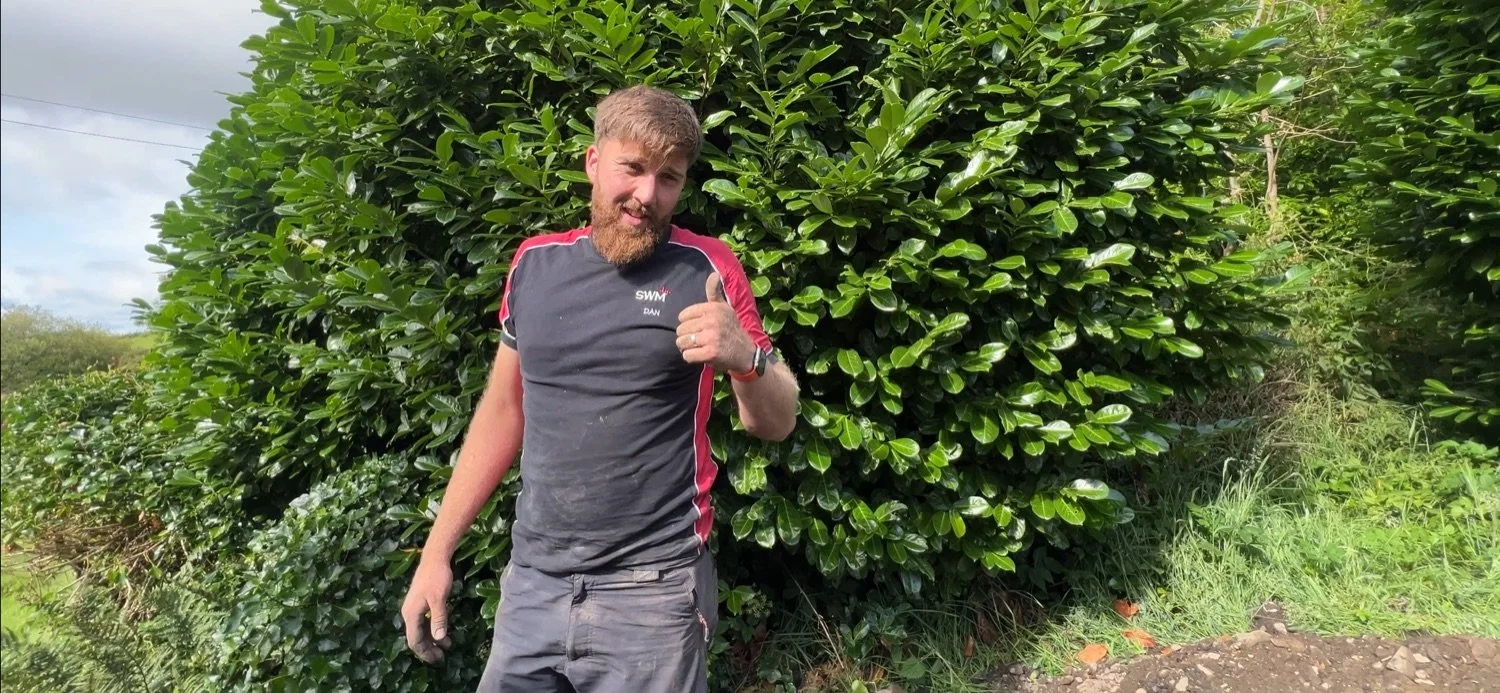
Technically this all started in the last couple of days of July, but for simplicity, we’ll keep it all together here. Monday of this week began with a very important visitor: cousin Dan. He is a great digger driver and complete with work boots and a “No farmers, no food” #backbritishfarming top, he made the trip from East Yorkshire to come help us with a set of projects. The only rule was that he absolutely had to be back in Yorkshire to lead wheat and help with harvest, which gave us roughly one week to get our bits done up here.
From here on out, cousin Dan will be called Little Dan, because our DanDan is older and taller, and therefore he is Big Dan. It’s been confusing!
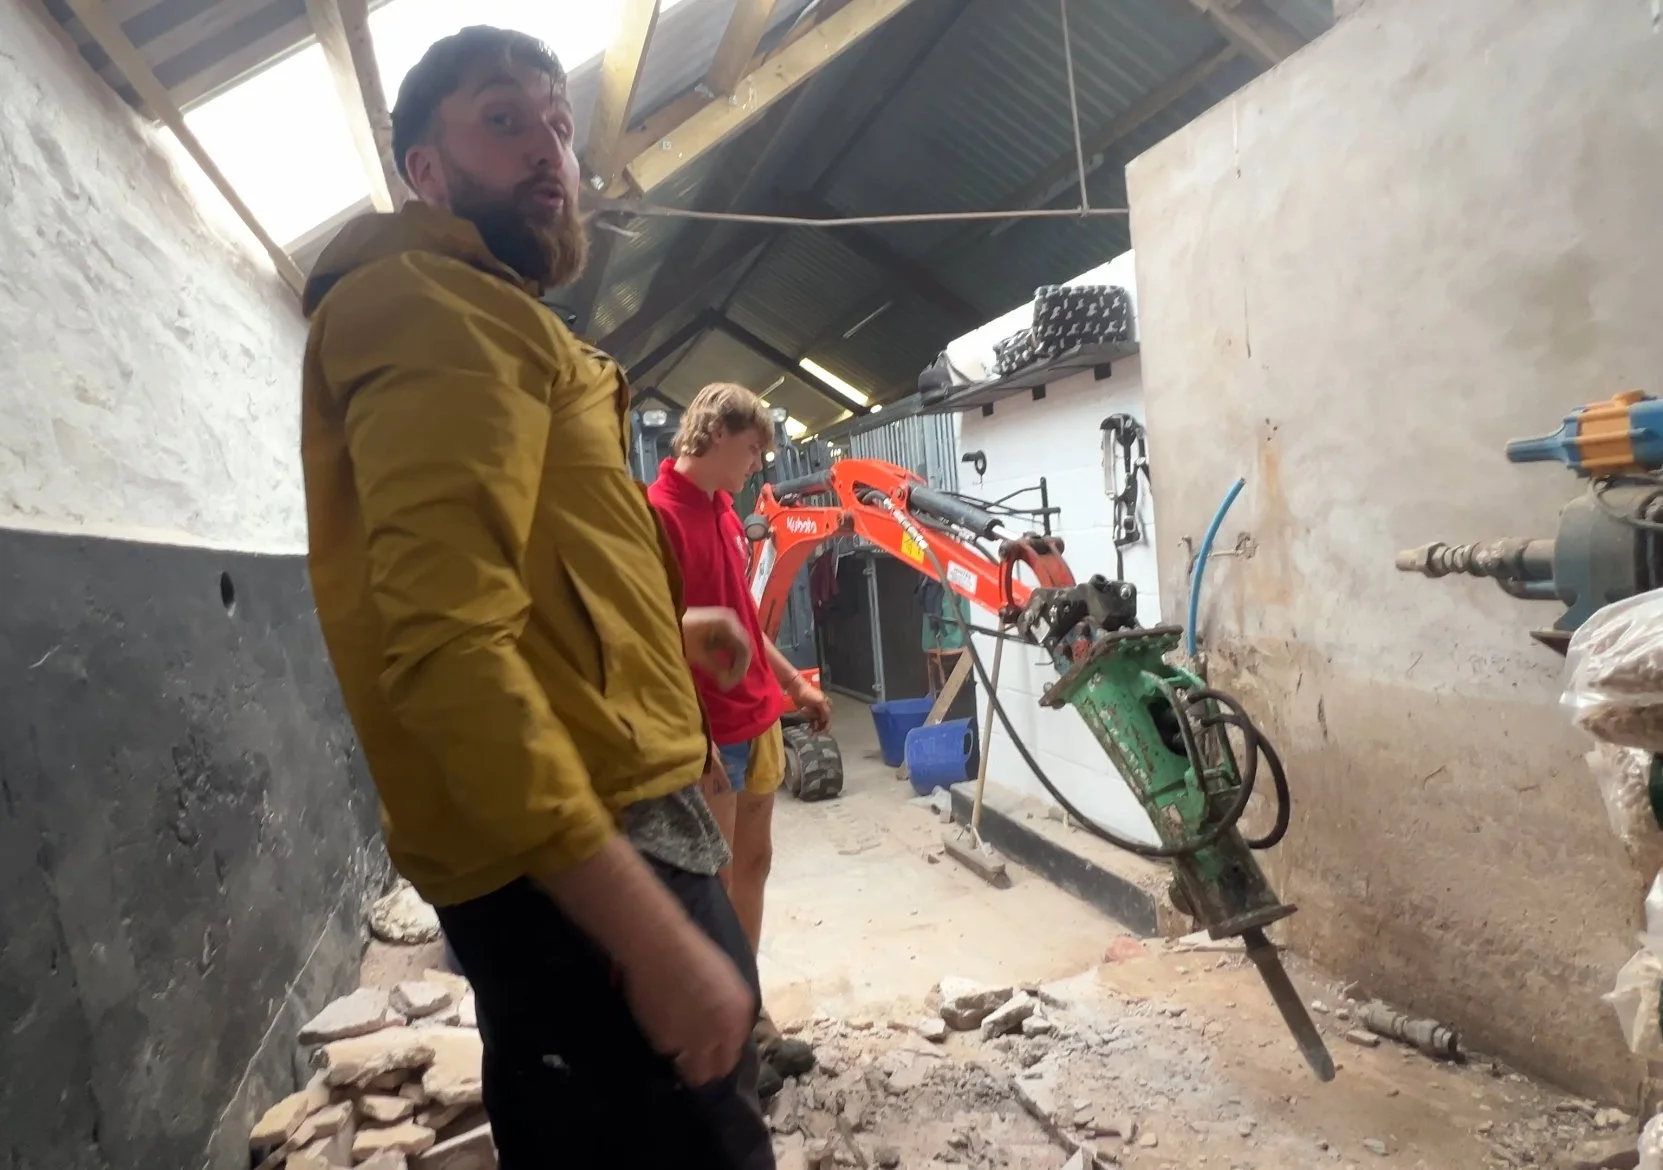
Whilst awaiting all our machines, Big Dan and Little Dan tackled one thing that would be good to see gone - the giant trough in the Dairy. Starting manually with sledehammers and an SDS drill to break apart the joints, it transpired that it was in fact made of brick. That made it a bit quicker to dismantle, and Big Dan ended up with more bricks for his reclaimed brick collection too.
When the digger and pecker arrived on site, Little Dan did demolition of the concrete pads that footed the trough. Some of the shed floor was cast around parts of this, so there’s two sections that need some filling in but, at last, this trough is gone!
Of course, with the machines now here, the attention turned to the actual mission for the week. At the time of writing, we’re on the final bits but I’ll add these to this section tomorrow.
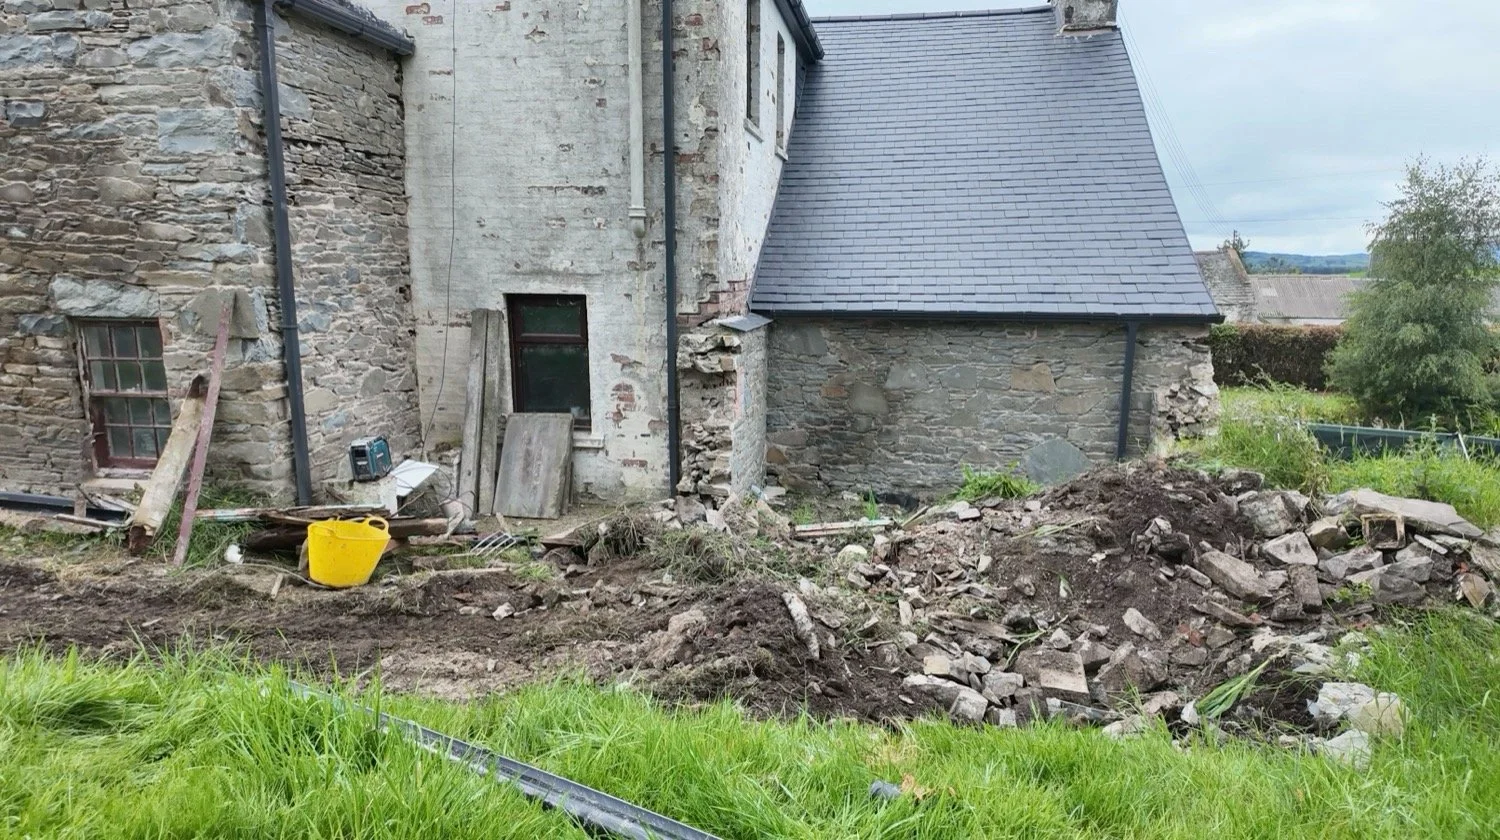
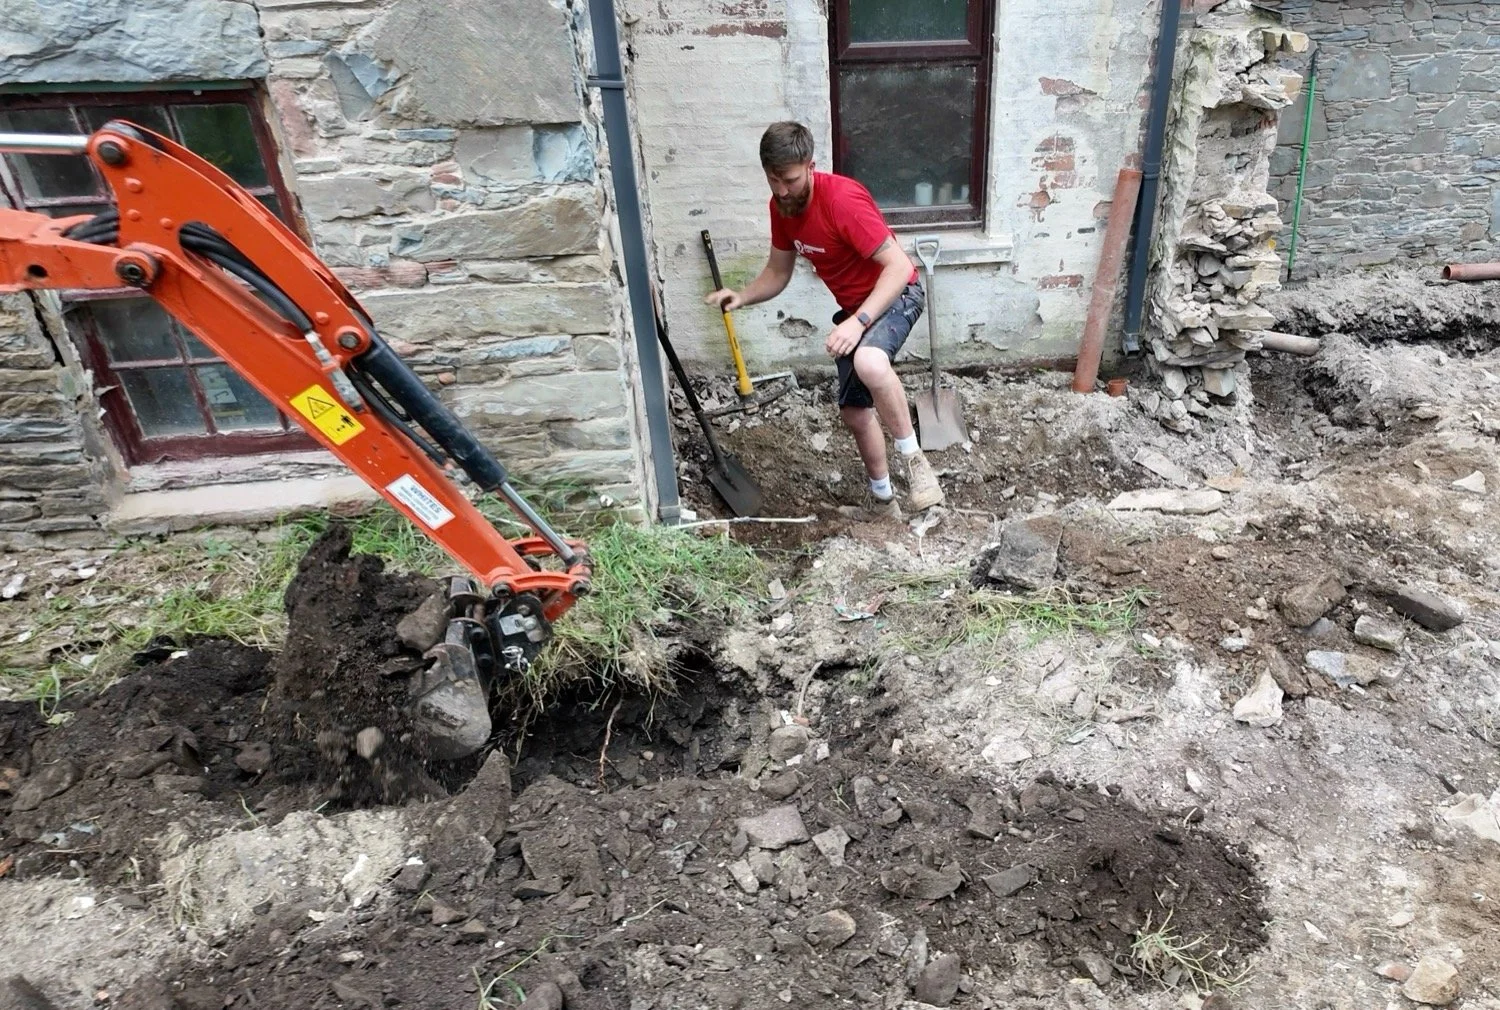
Let’s go back to the main farmhouse, where, if you remember from our roofing mission over a year ago, a potting shed aound the north side, at the end of a long slope of roof, simply had to go. The entire structure was rotten and it was compromising the house itself (it wasn’t tied in).
Then, for drains to go to the soak-away that we had popped in during January, the foundations and walls needed to go. These bits were left in a giant heap of stone and smashed concrete, and had become a lovely mound of rubble and weeds.
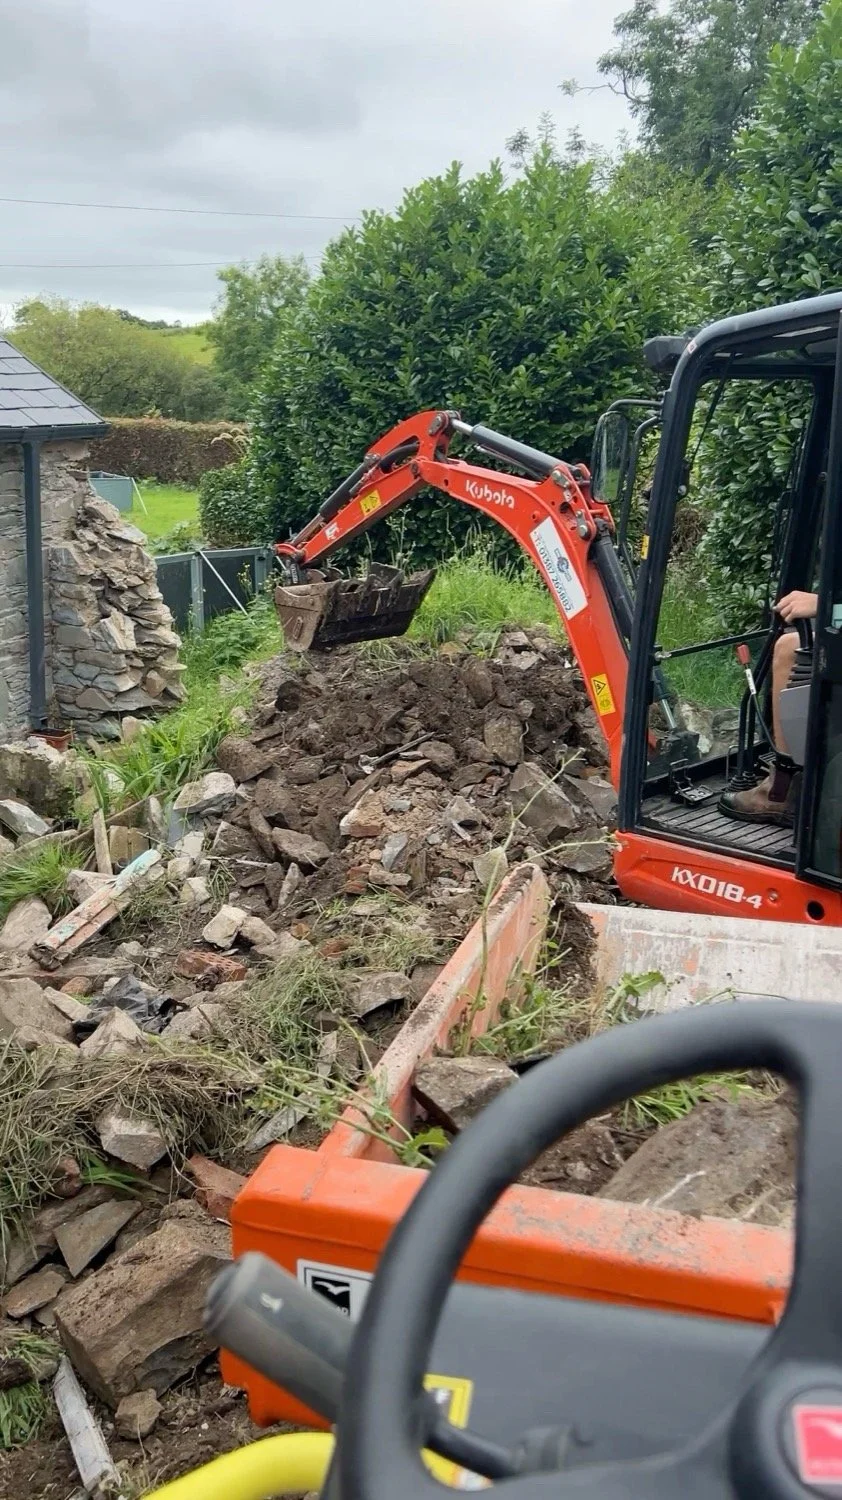
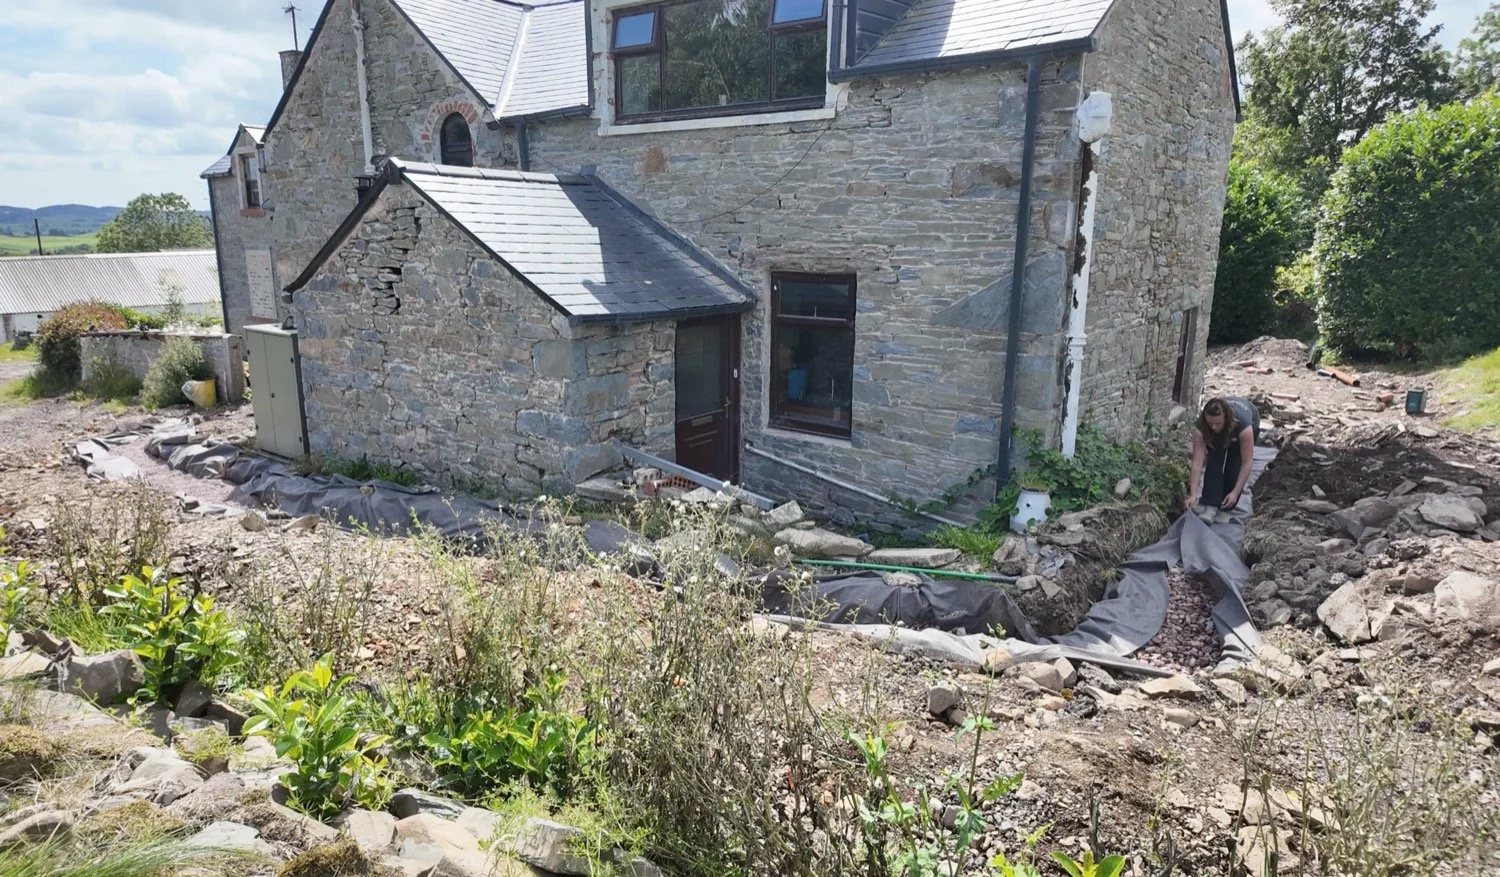
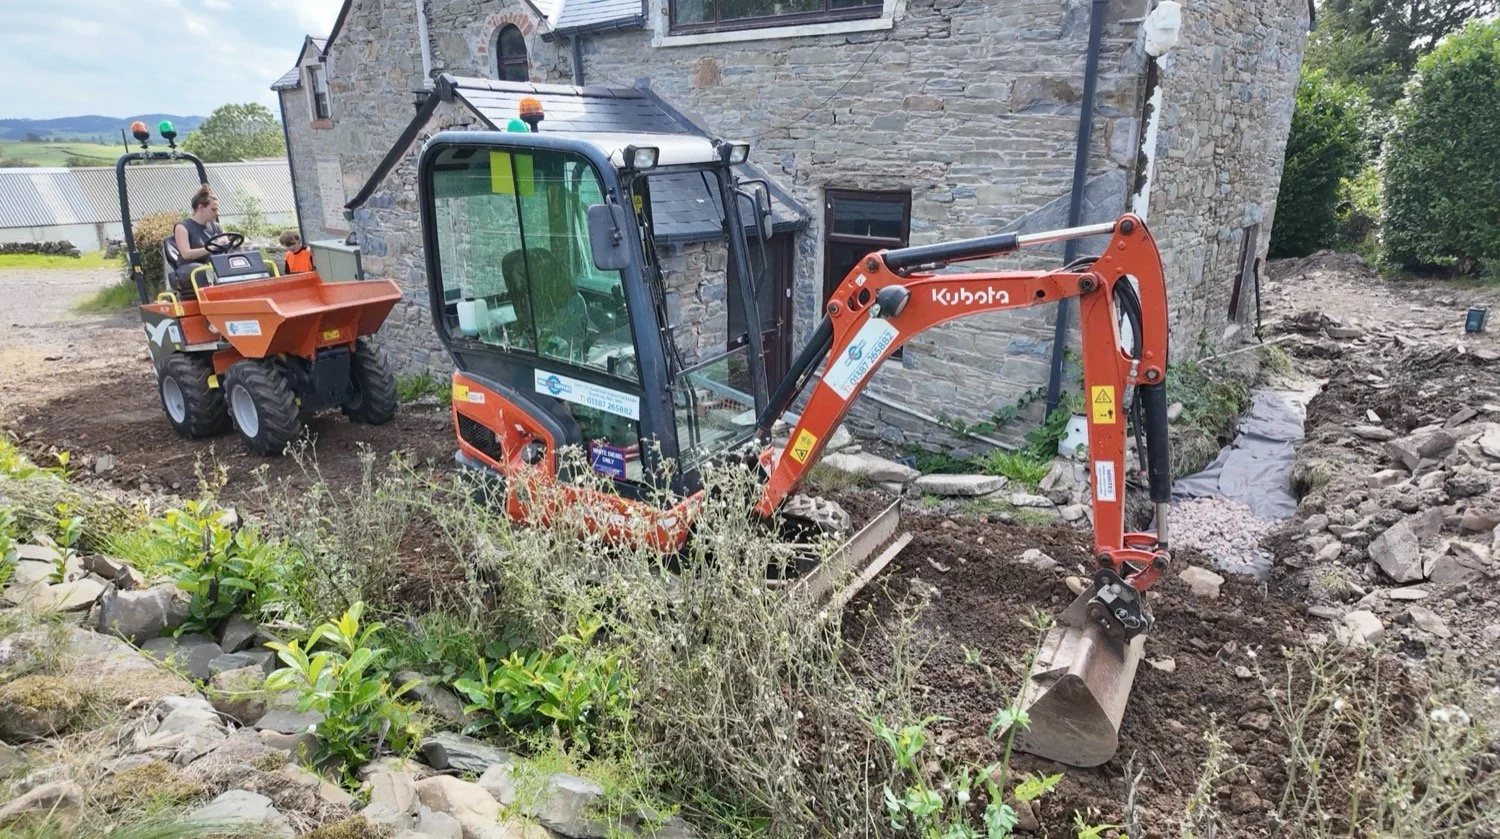
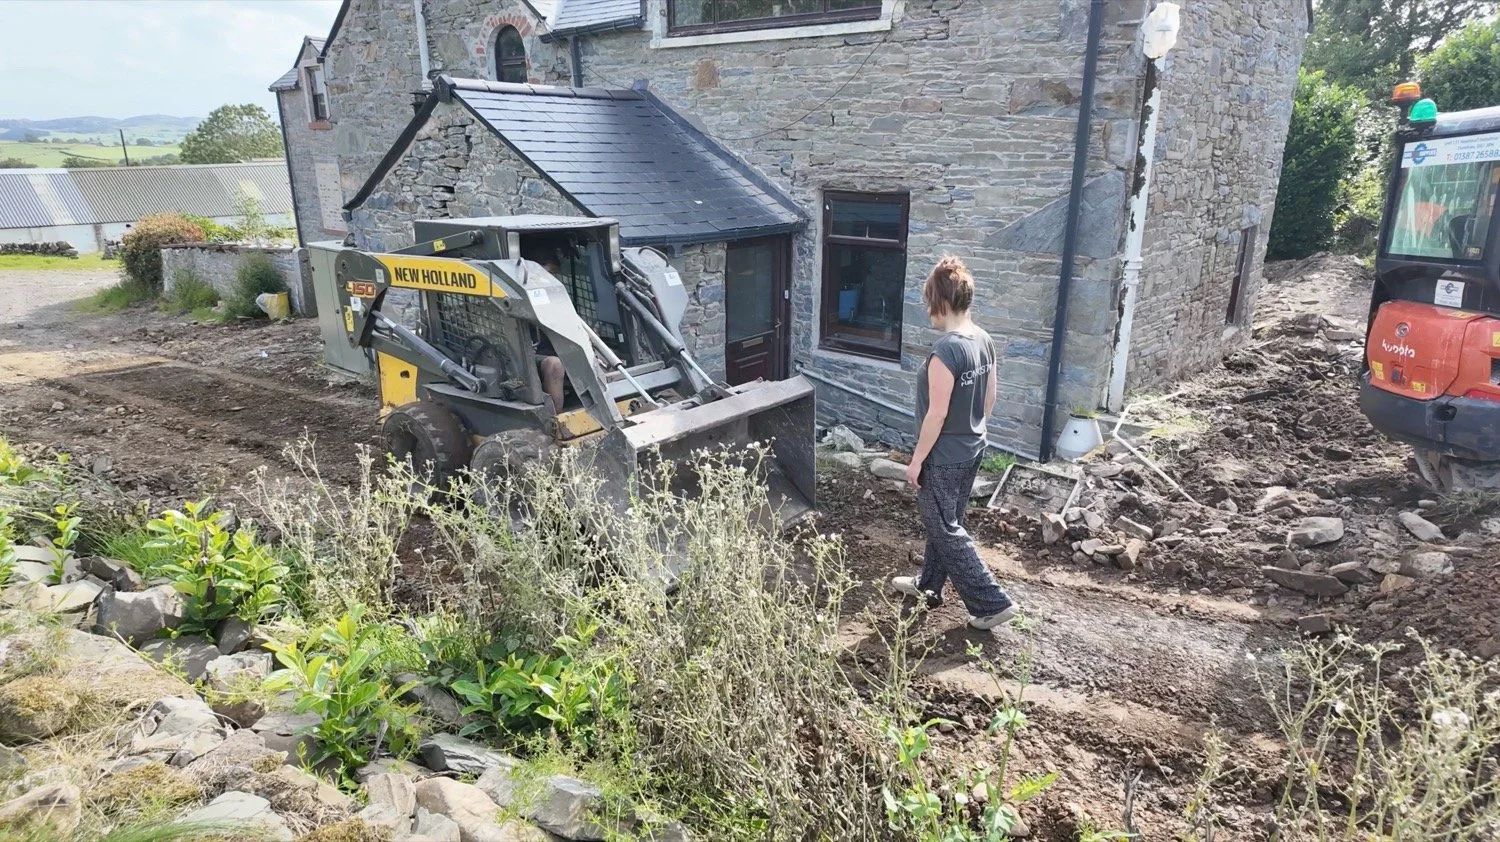
Mission 1 was to clear this mound. Armed with a skidsteer borrowed from a neighbouring farmer, a dumper and the digger, we all chipped in to get this mountain out of the way.
The ground here slopes steeply towards the house itself, and the access is narrow and tight. That meant a fair amount of clearing, flattening, building up, compressing, pushing and excavating over and over again.
Little Dan challenged himself for how large the rubble boulders could be on their way into the dumper. A solid 60:40 success rate of monsters made it into the removal vessels and the rest were either broken up or handballed out instead.
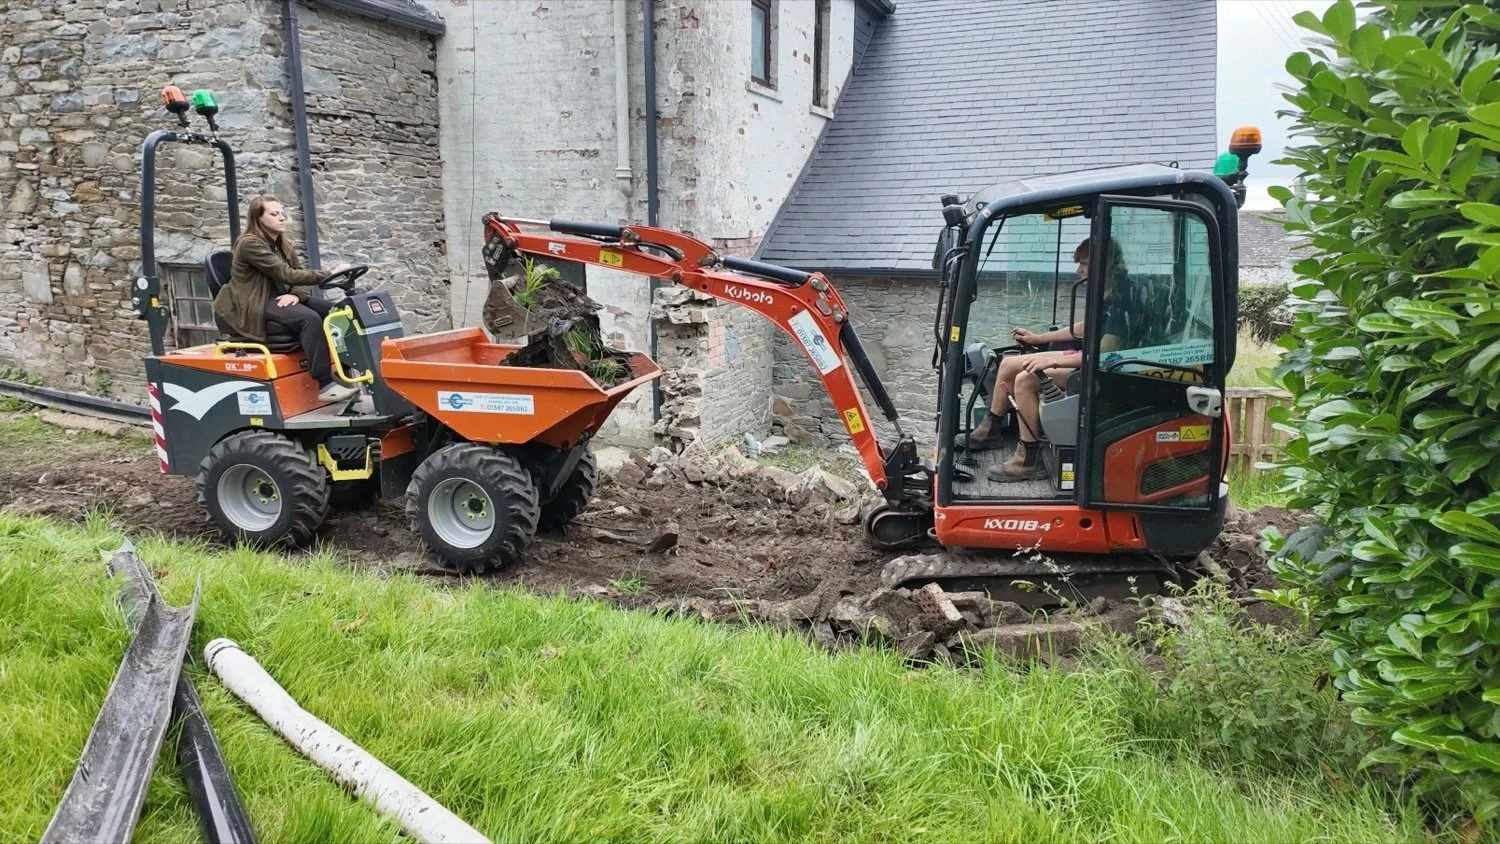
As you can see, Dumpers are not built for 5’4’’ people because I could barely reach the pedels even with the seat at its minimum options, but after a day and a half, the rubble mound was gone and we were onto Mission 2.
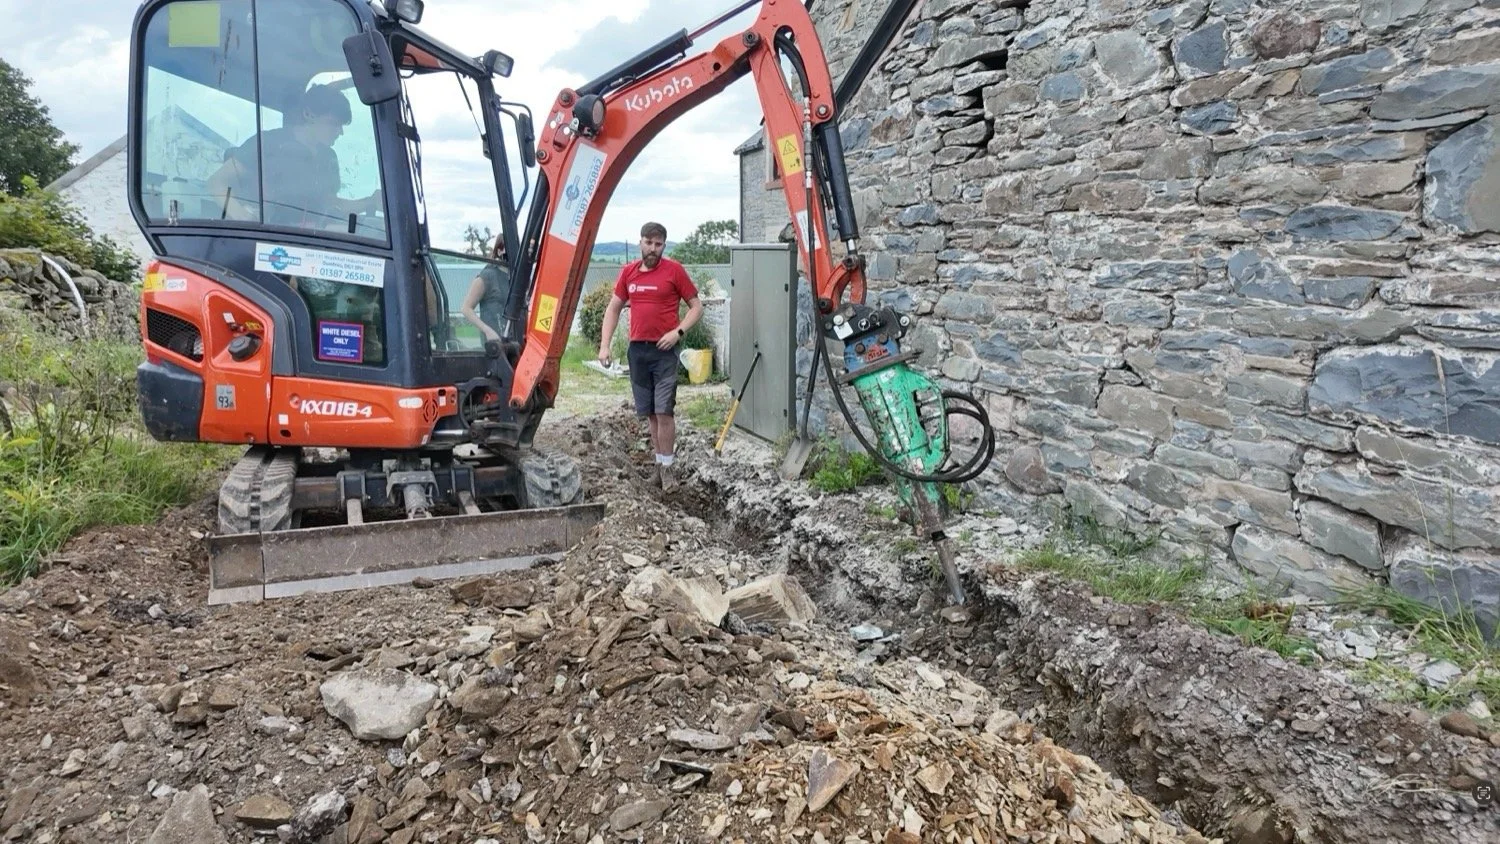
Mission 2 was to plan, source and commence the installation of a long-term-temporary french drain around this top most part of the farmhouse.
Installing a French Drain [aka Land Drain]
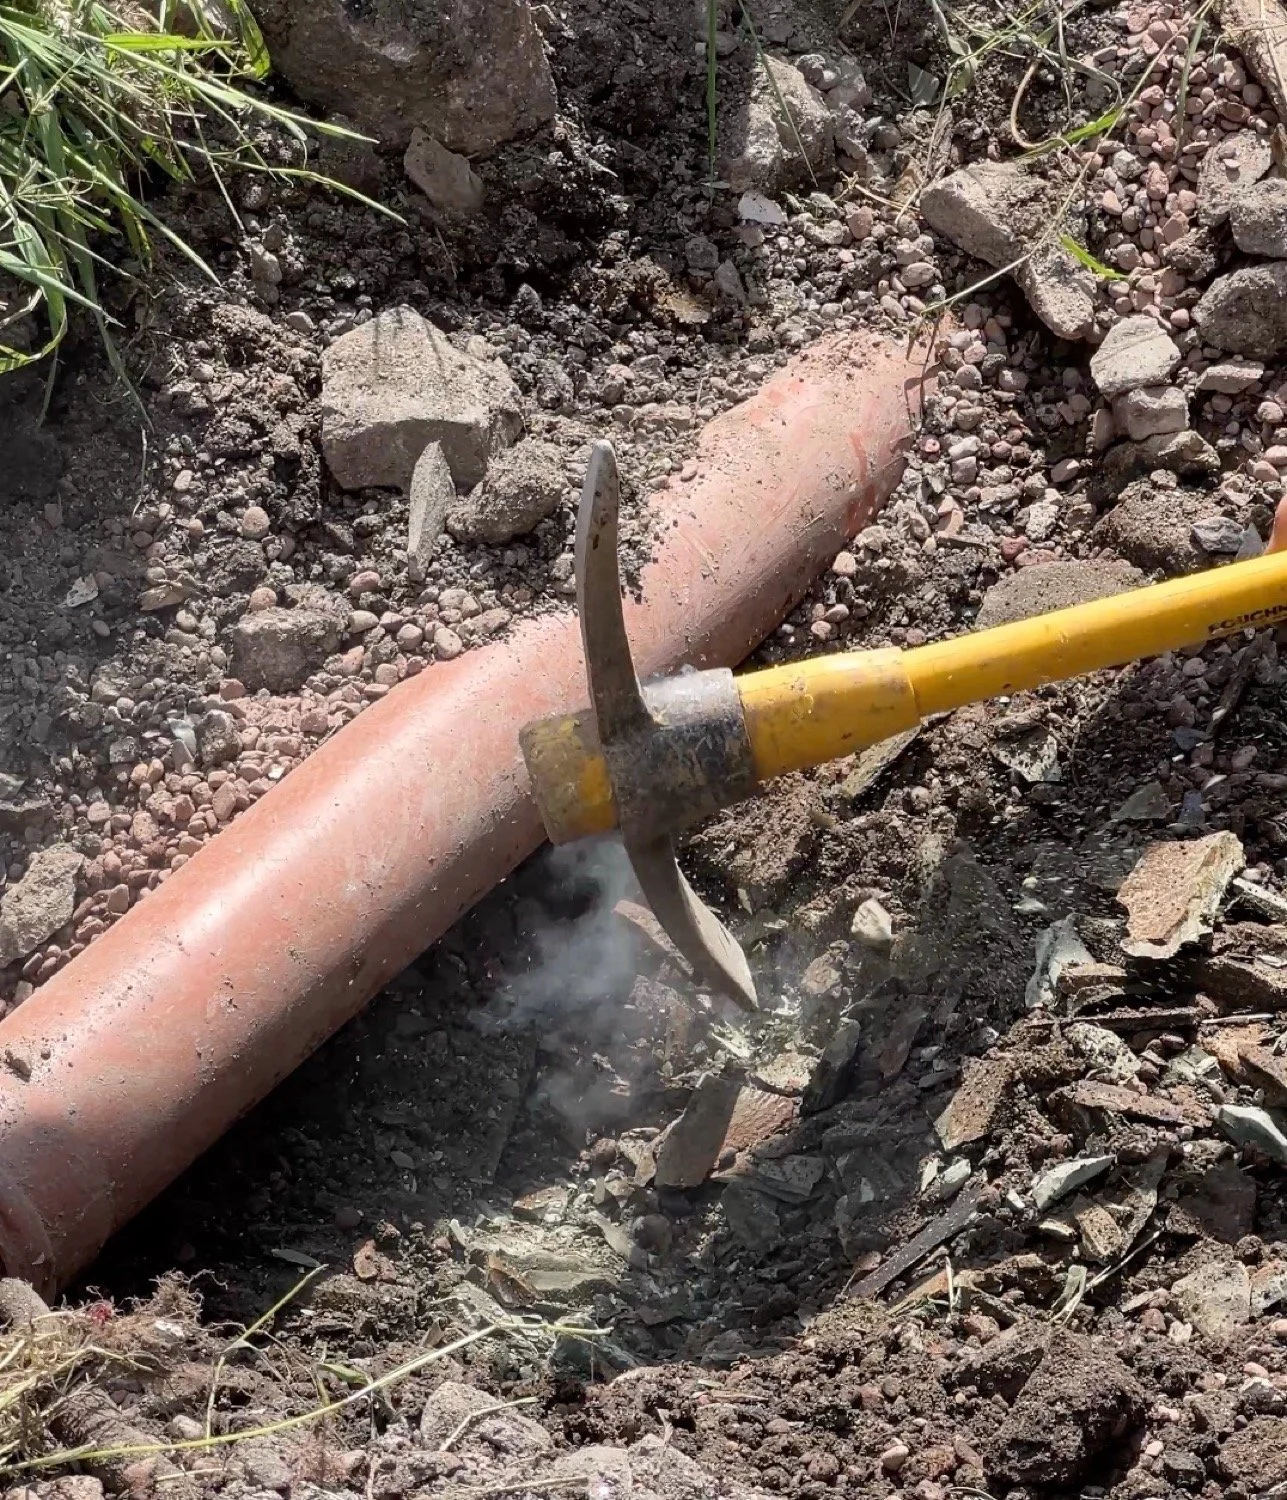
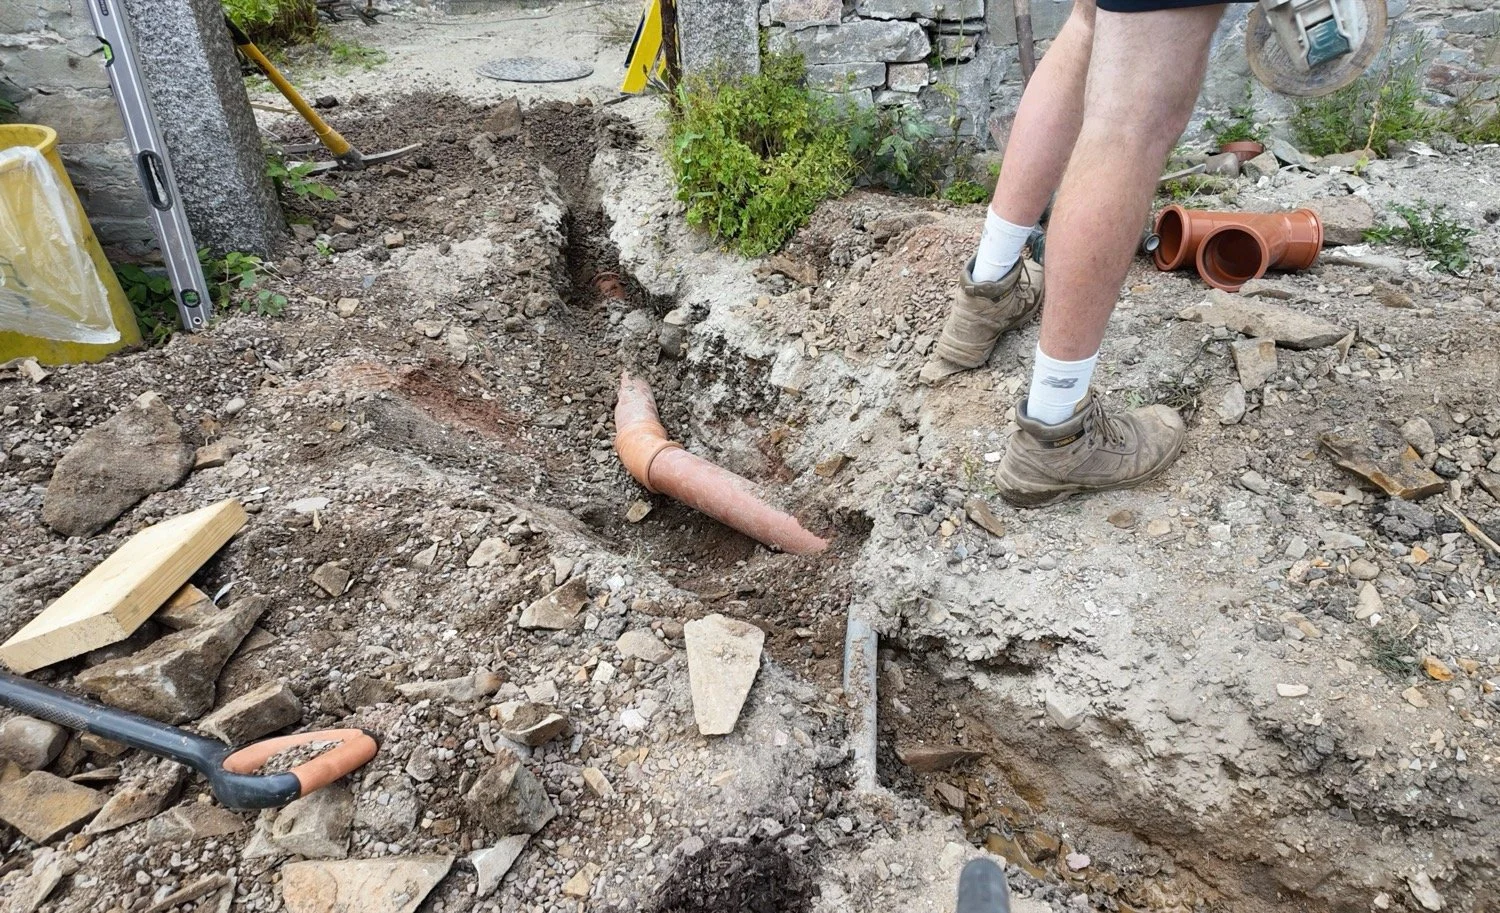
What we’re dealing with here… sharp hard rock preventing any digging!
That is no small feat, as the entire site is solid rock, there were some existing pipes and drains, and there was the problematic poop pipe to contend with here too. We were using this opportunity as our re-route Poop Pipe moment, because the existing one goes uphill after exiting the building. You can see why that’s not a good thing, I hope.
The plan on this back corner was to:
Uncover the drainage laid in January (ideally without complete demolition)
Uncover the poop pipe where it heads uphill, then comes back downhill
Remove the problematic poop pipe sections
Remove the outside toilets cast iron poop pipe connection
Trench around the house to at least 15cm below the internal floor height, which thankfully for us steps up as the house goes uphill
Trench down the driveway and past the porch area but somehow make the french drain pipe connect into January’s soak-away drainage.
The highest point of all of this would be at the top of the porch steps, so we’d lay one continuous perforated pipe with two outflows, one to that soakaway, and the other will be temporarily kicked out into the lower garden, where the soil drains well.
The specs of this drain, and all purchasing decisions, was down to me (Jess), so what you have here is a drain created by someone who has never done a drain before, but has researched as hard as possible and had advice from farmers for land drain knowledge. Little Dan has also assisted in construction and repairs of land drains on his farm, so we thought we’d be able to tackle it. Let’s go!
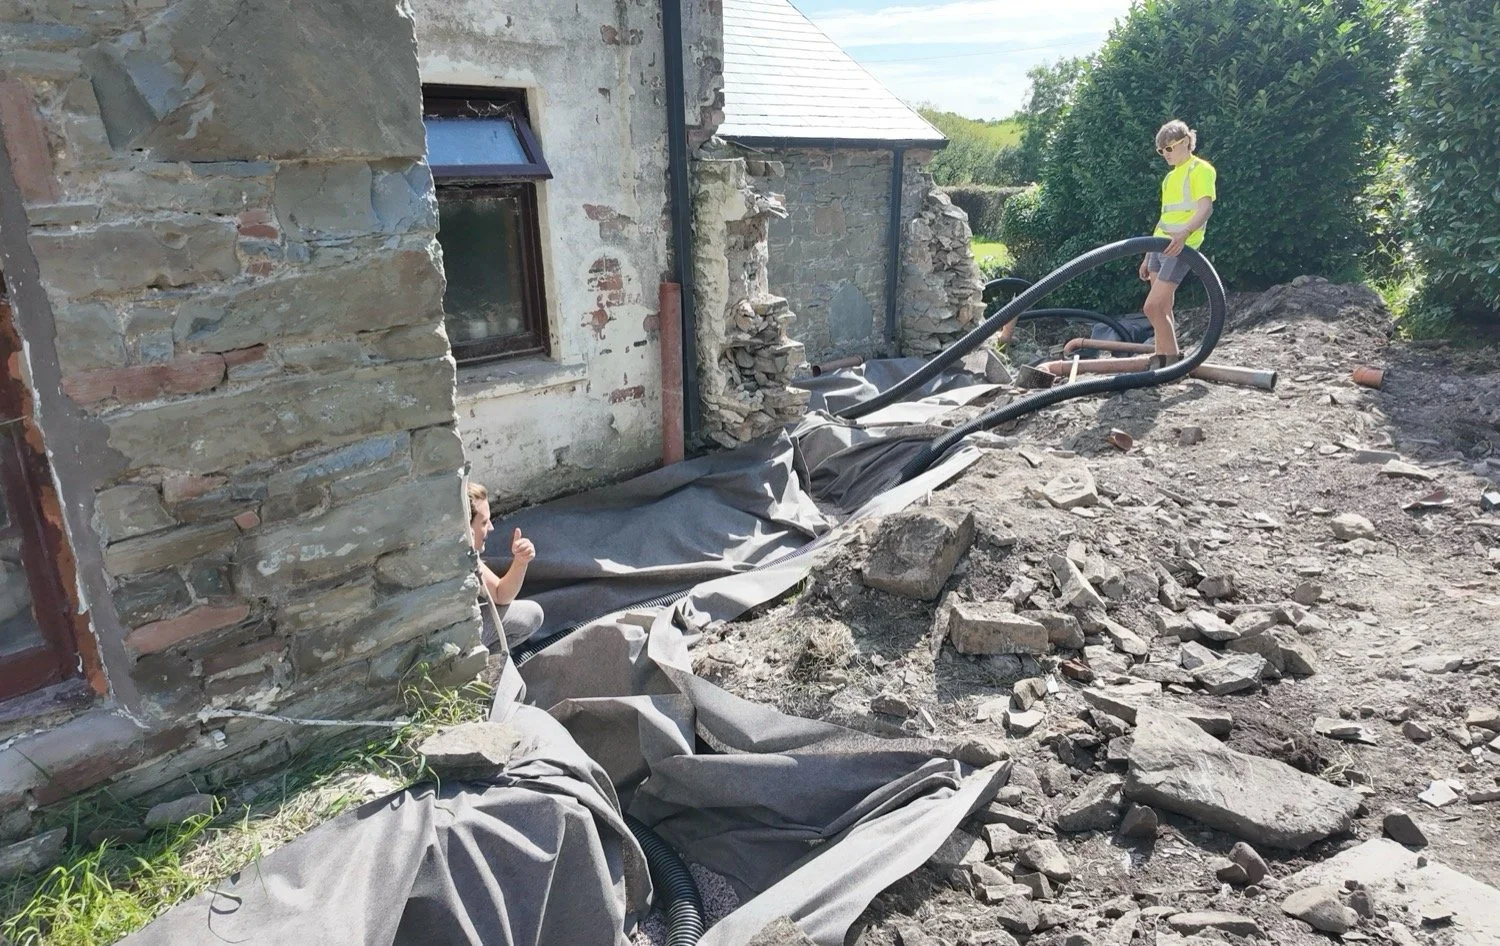
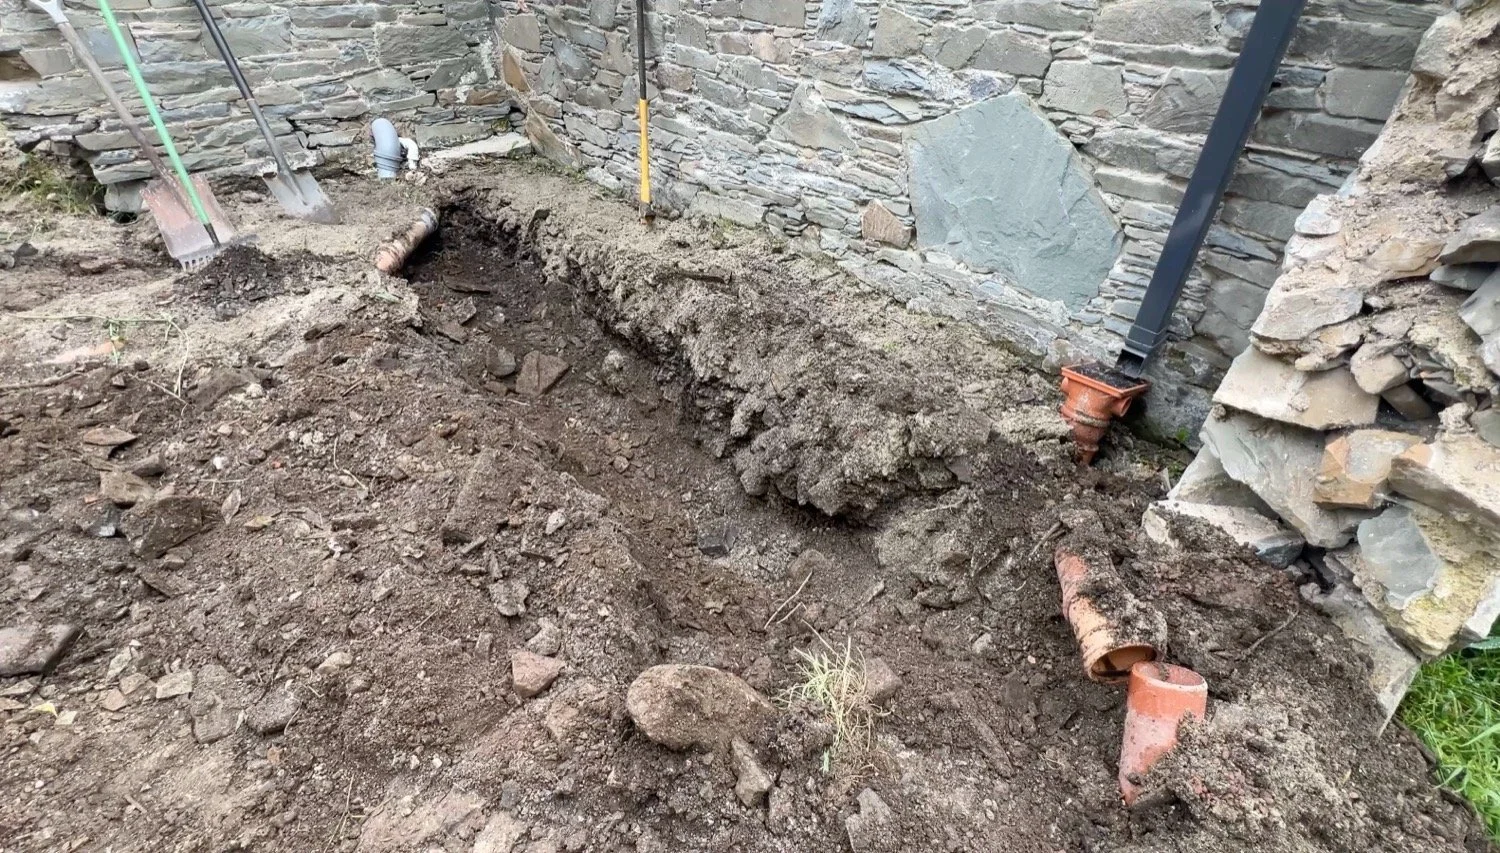
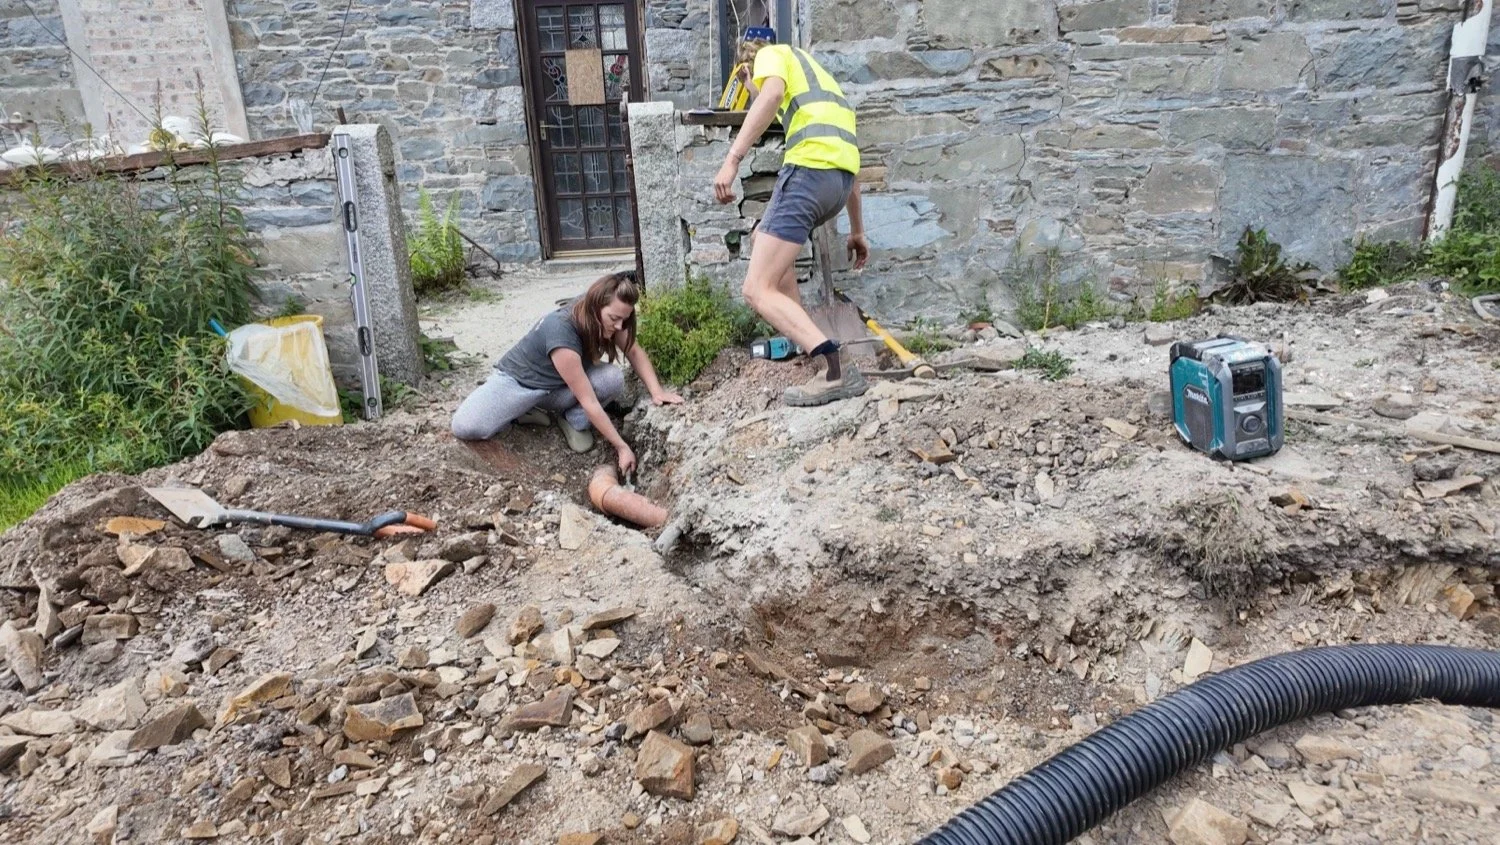
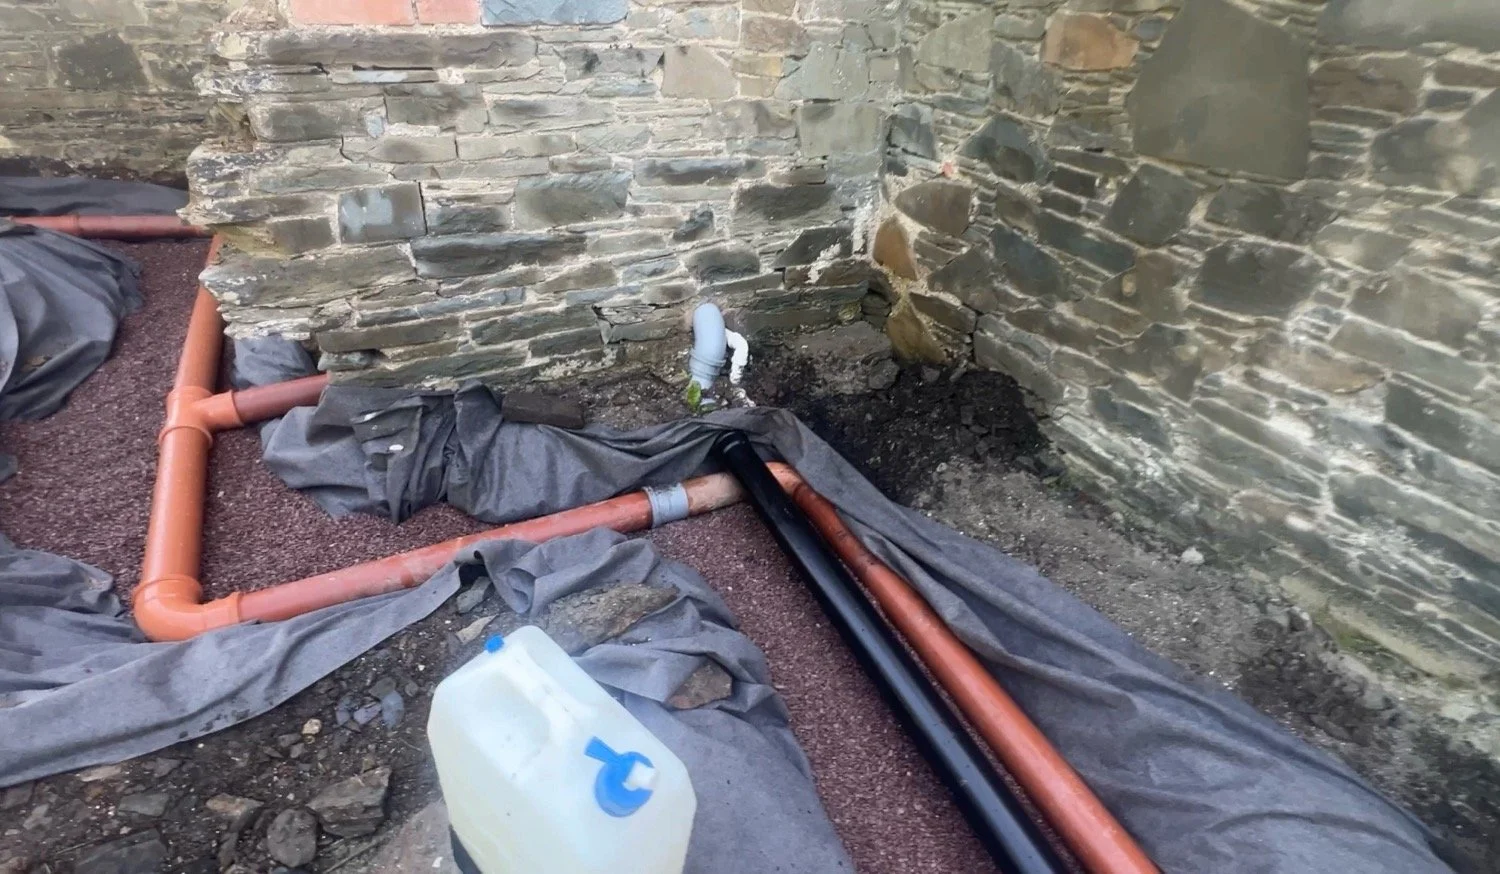
First, lets start with a visual of existing pipes. On the top left near the tools, you can see the poop chute exit the building and come into the ground before making an eventual 90 degree turn (two 45s) up hill. on the lower right, you can see the drainage from January, sat over a rocky ledge that we’d need to break through and under. Out of shot to the far right is the rest of the poop pipe when it swings back. Our new trench here will be the home to all pipes including the french drain right at the bottom.
The backfill up against the current kitchen gable in the house was mostly soil and loose rock. Well, it was soil for about 60cm, before the rock shelf rose up to about 2 inches below the surface. This was mostly blue rock, so we had to work around it rather than go through it. The end goal here will be to remove everything above internal floor level on the outside, but at the moment that would require a substantial retaining wall, so we’ll pick that up at a later date with more time.
Why more time? Because this is Tuesday. Next Monday scaffolding needs to be erected on this exact spot. Time is of the essence!
The entire trench needed a gradual fall, so working to the ground levels, rocky geography and existing pipes we needed to tap into wasn’t straightforward. Little Dan pecked through the worst of the areas in our path whilst giving the wall clearance where needed, and then re-dug the trench with the narrow bucket to leave us with a full trench.
Anything near pipes or very close to the building was dug by hand, by Big Dan mostly. The newly re-excavated January drain was shallower than we’d have liked, but with some careful pick axing, troweling, SDS drilling and shovelling, the rock was cleared and the path complete.
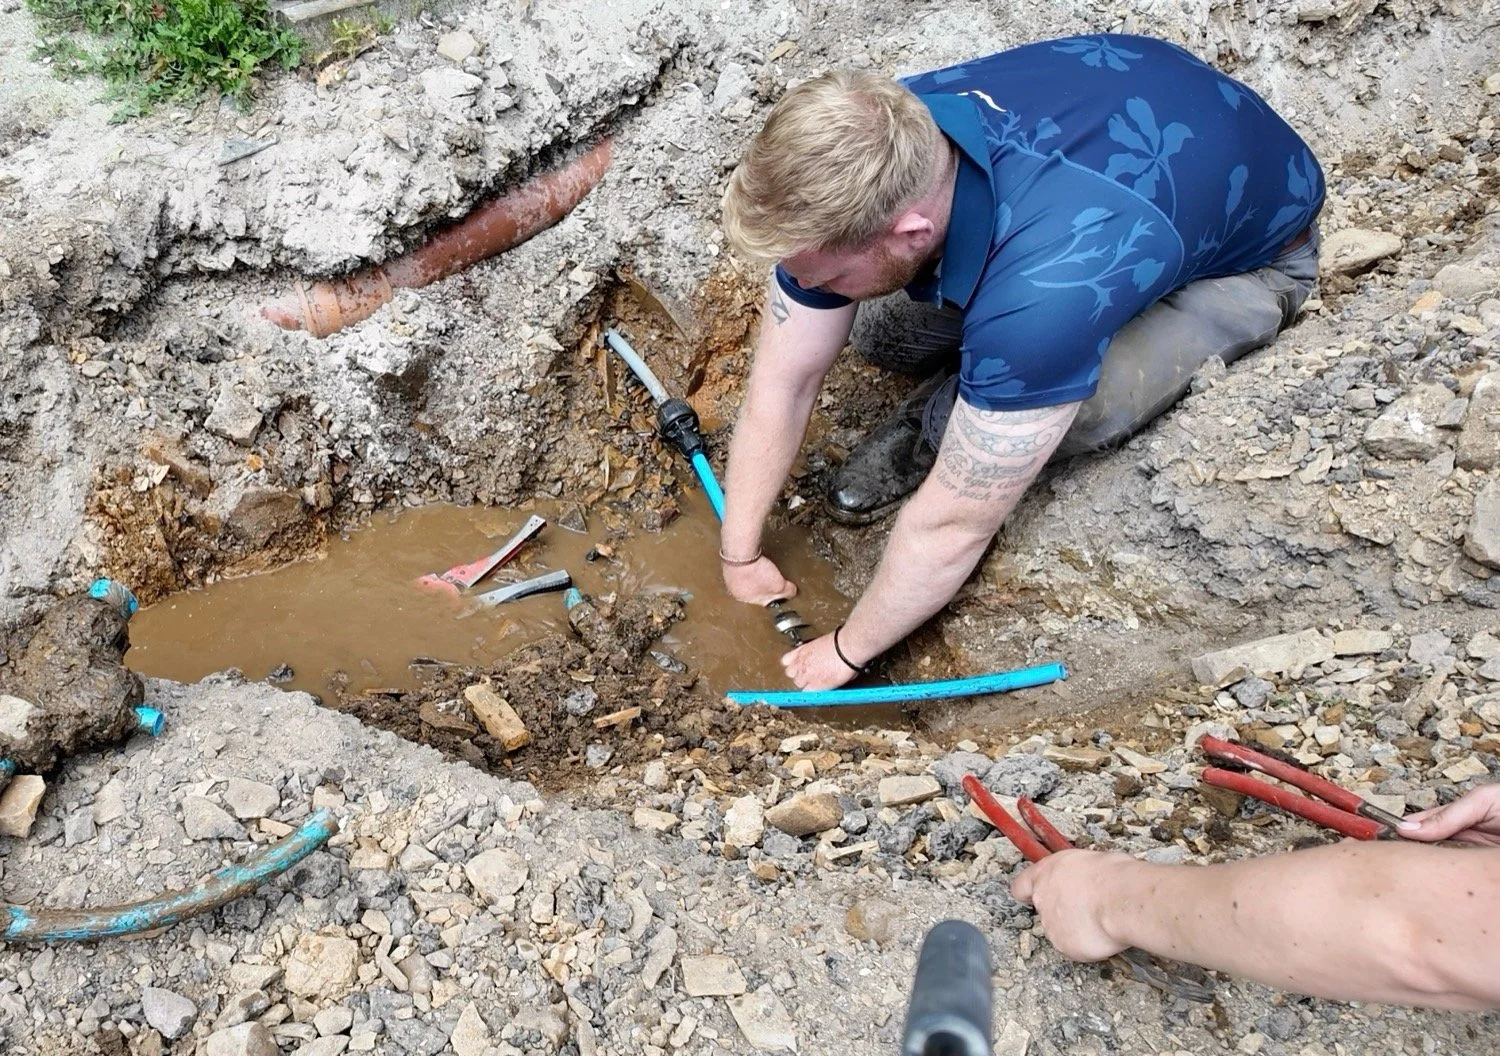
There were only two major set backs for this whole trenching mission. One was the the digger track pin thing snapped and the track fell off, which lost us half a day until both were replaced. The other was that the well water incoming pipe had a leak on a branch back to the field before a stop tap. That meant there was no way to stop the high pressure water coming half a kilometre downhill to do a pipe swap or change.
Enter neighbouring farmer Ben who knows our farm arguably better than we do. As the local water piping oracle, he was our first call for advice, partly to see if he know if there was a tap anywhere else and partly to see if he’d come and swap out the fixings because he’d keep a cool head in the water war. Although there was no other tap, Ben did offer to come switch the pipes, and that was amazing. Now that Big Dan has seen it in action, he might be more confident doing the switch himself in future!

That pipe, fully uncovered, shared a window to the past though, because it had an old cast iron connection down to the yard still in situ. This section of pipe is now repaired and simplified into one single straight. With that done, our drain work could continue:
First, the January Drains 45 to a Y, which Big Dan completed in fairly rapid time:
We did dry fit the pipe and check the fall, but I don’t have evidence of this moment sadly. Next was the membrane. From my research, advice and current level of experience, French drains (if they include a pipe), should be fully surrounded by a non-woven geotextile. This is to stop soil particles and manky bits blocking your stone gaps and bunging up the pipe holes too.
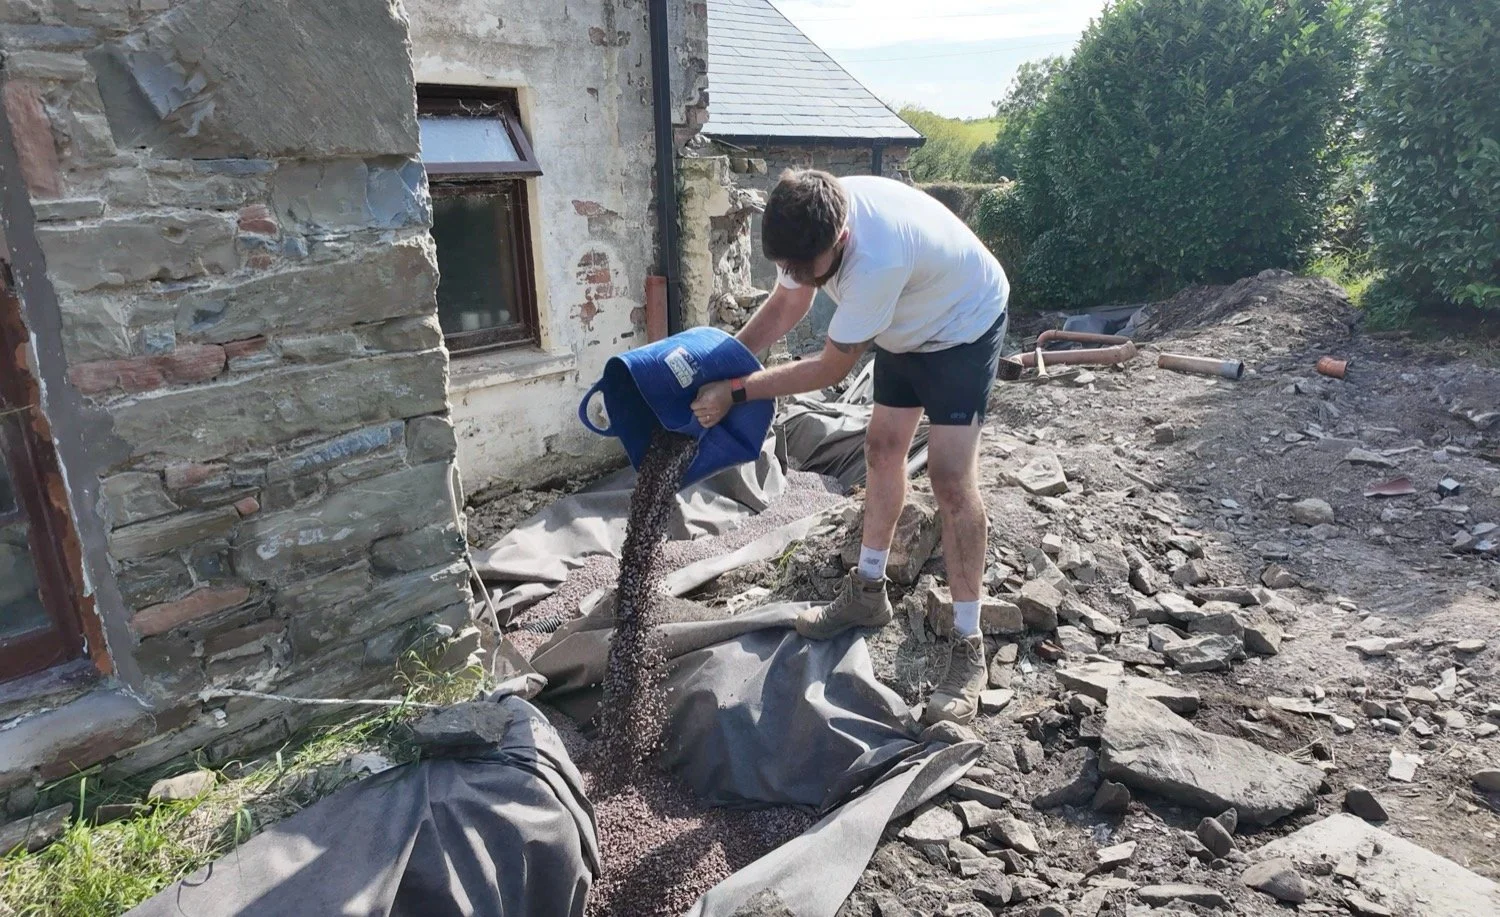
At the base of the trench, we then put a super thin layer of fine gravel (washed, always, and larger than your pipe holes of course!) to create a nice even and smooth bed for the pipe to sit on.
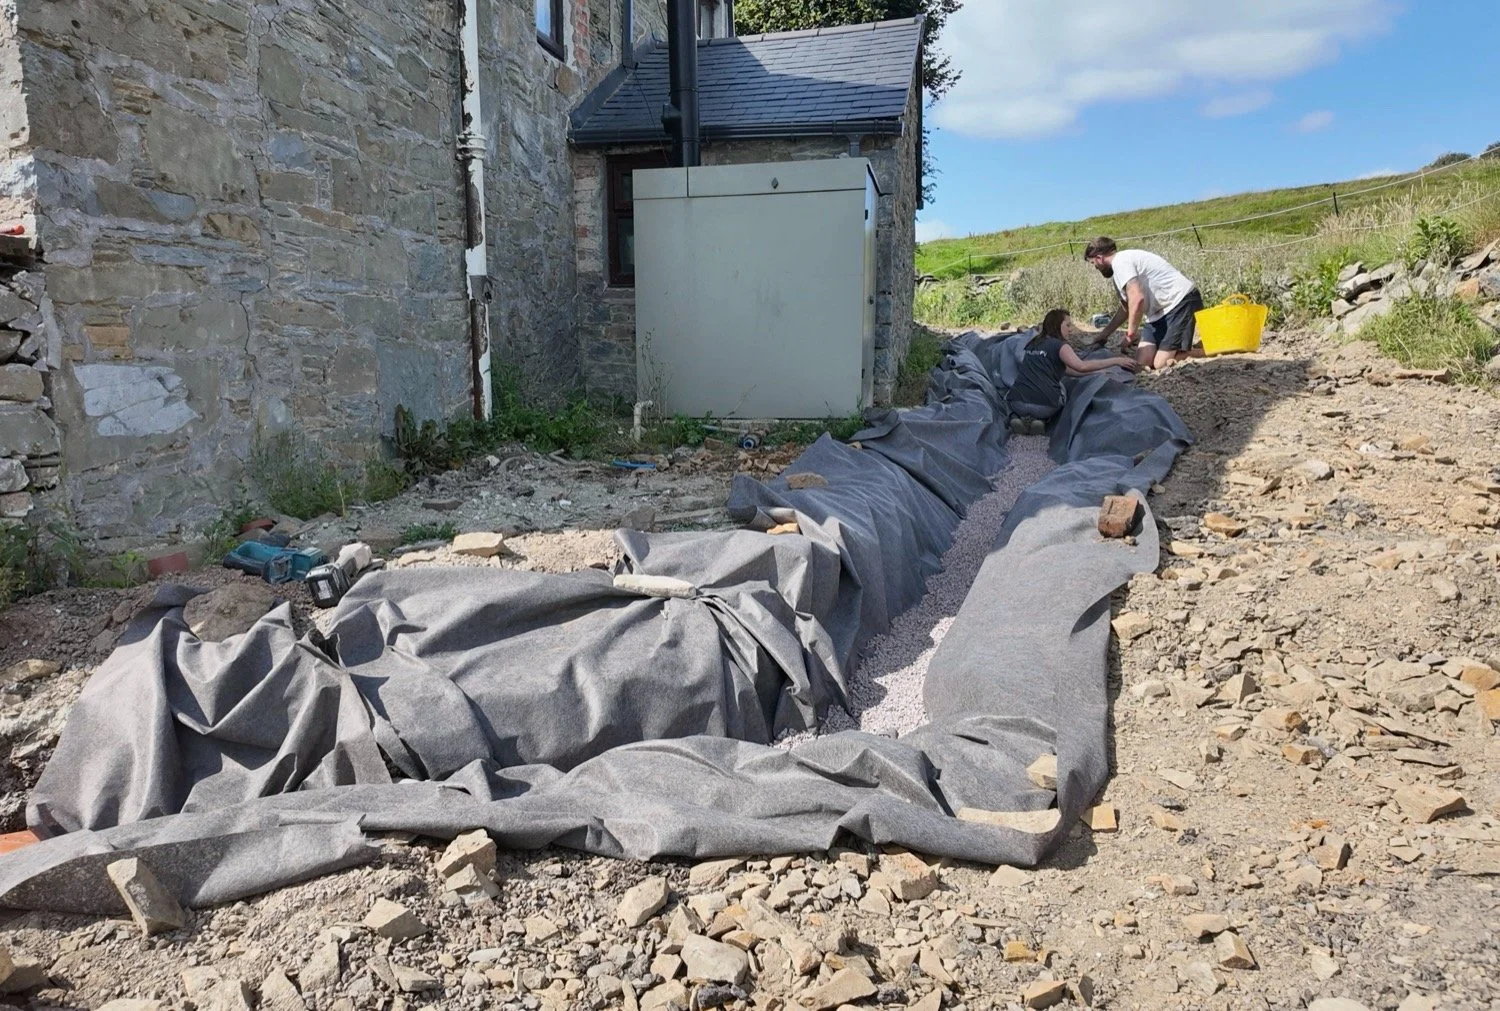
The geotextile and stone bed going in at the very shallowest end of the trench here ^^
Our stone ended up coming from a local quarry. I’d price checked with aggregate suppliers and found the quarry could deliver by truck load the next morning for about £500 less than the main stream building suppliers (like MKM, Travis Perkins etc). They helped finalise the stone selection and delivered a few tons of 10mm stone and a few more 20-40mm stone, all washed of course.
With the bed made all the way around, and levelled to create the necessary fall too, we then placed the pipe in. A bit tricky as it wanted to just bend up, so a few hard twists were needed before it sat quietly in the bottom of the trench.

Next, the pipe, now in its final resting place, was covered over with another thin layer of the fine gravel. That’s necessary for us here because some areas will get vehicle traffic, and smaller stone helps to protect the pipe a little more. I set the lads a 2cm/20mm depth for the topping for most areas, and a little more for the traffic lane.
Because of how tight the site is here, bucketing it in was the only option, so it took a little longer than we’d have liked, but eventually, she was covered.
That takes us to Saturday evening, where I stepped away and the boys continued. By the end of Saturday night, after dinner, the January Drainage was back connected in this far corner of the house. That was our first deadline met, because Saturday night/Sunday morning would see a fair volume of rain. Sunday morning rolled around and with about 2cm of rain, everything did it’s job perfectly.
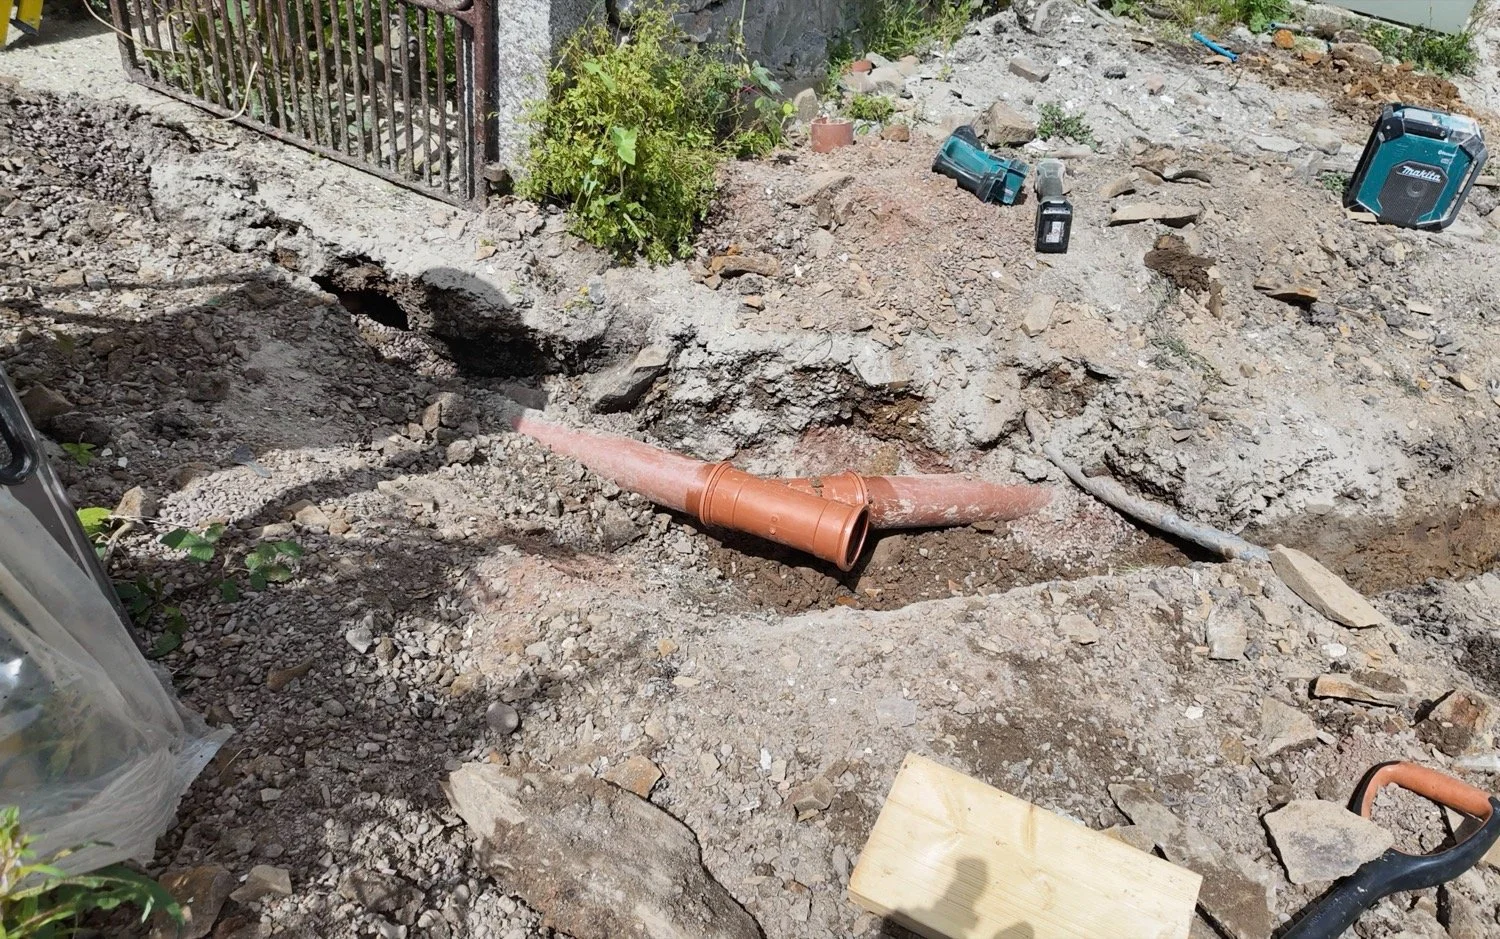
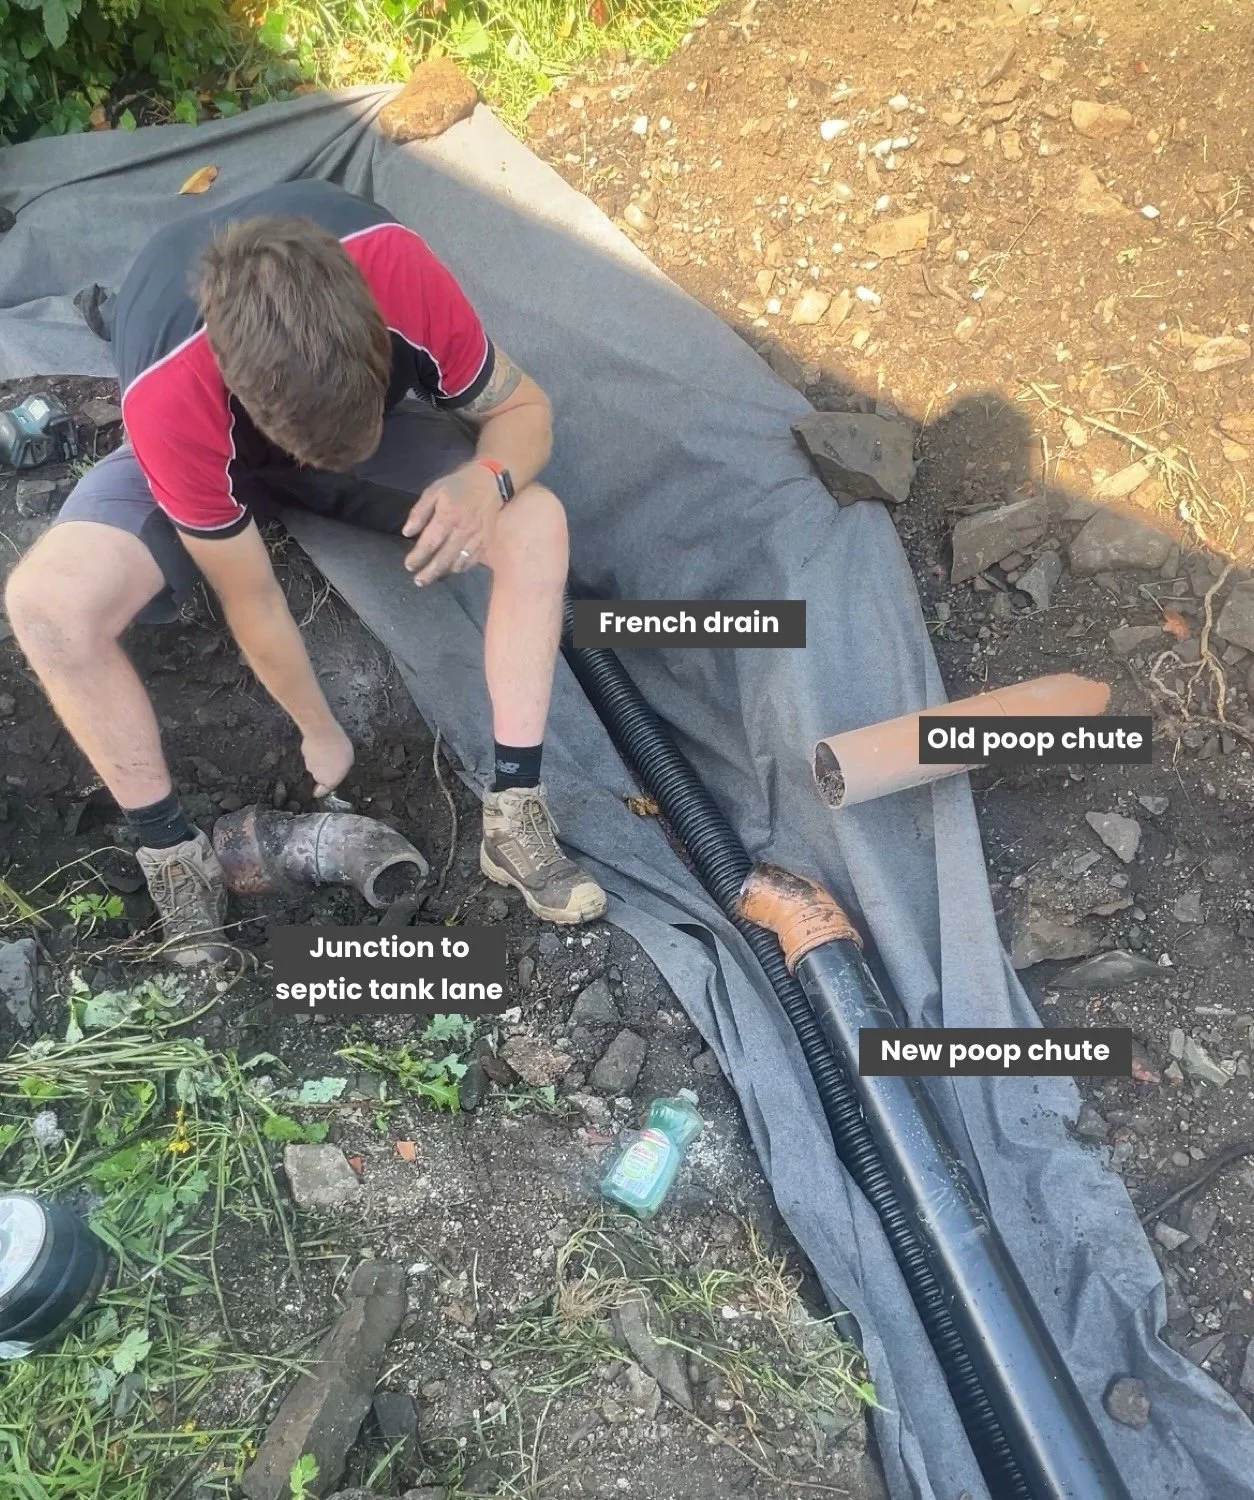
The final connection to do was the new poop pipe which will, shortly, have a connection coming into it from upstairs for maximum poop chute velocity. The first step was to take away that double 45 that led the poop uphill and instead connect straight run from the house exit downhill (that’s the black pipe above).
Here is the situation downstream, at the connection to the underground septic tank run:
Dan did some cutting and used a flexible collar to step up to the new pipe, making sure the base of the pipe didn’t have any bumps to block the flow:


Then we tested it (not with human excrement, but with copious water) to check for any issues or leaks, and it ran through perfectly. All pipework was now complete, and the backfilling commenced.
Slow progress on the back side of the site because there was no access for machinery and the gutter drainage couldn’t sit lower, otherwise it would not connect with a fall around the back of the building.
Therefore, carefully bucketing stone was the only way. Big Dan took this with Little Dan filling at the stone piles near the cow shed.
The next step was to fold over the membrane. Best practice here is to staple the sides together but we held off and went with an overlap. This wasn’t as perfect as I’d have liked, but as this was my part to do, I did my best. Sometimes asking Big Dan for more filling, other times removing some to create a little more space. In the end though, the membrane was fully folded from end to end.
On top of this, a layer of washed stone went into most places where the height would allow. Little Dan and I tackled the driveway and relaid the orange rock, using the dumper to bed in the stone when the pipe had a good 2.5ft of cover.
Little Dan then switched out to pulling some of the sand and soil away from the farmhouse’s northern-most gable back onto the pipe bed, before jumping in the digger there to commence levelling out the path. That did involve sorting slabs, large stones and soil, so careful work for a while.
Big Dan jumped in the skid steer to scrape the driveway of all loose material. This area needs to settle but won’t be dressed for a fair while yet, so it doesn’t need to look good, just provide access and not weaken the porch wall. Ignore the weeds, it’s summer in South West Scotland so you’ll never be able to control them fully, and they are not a priority for us and that wall and rubble section won’t exist in the end anyway!
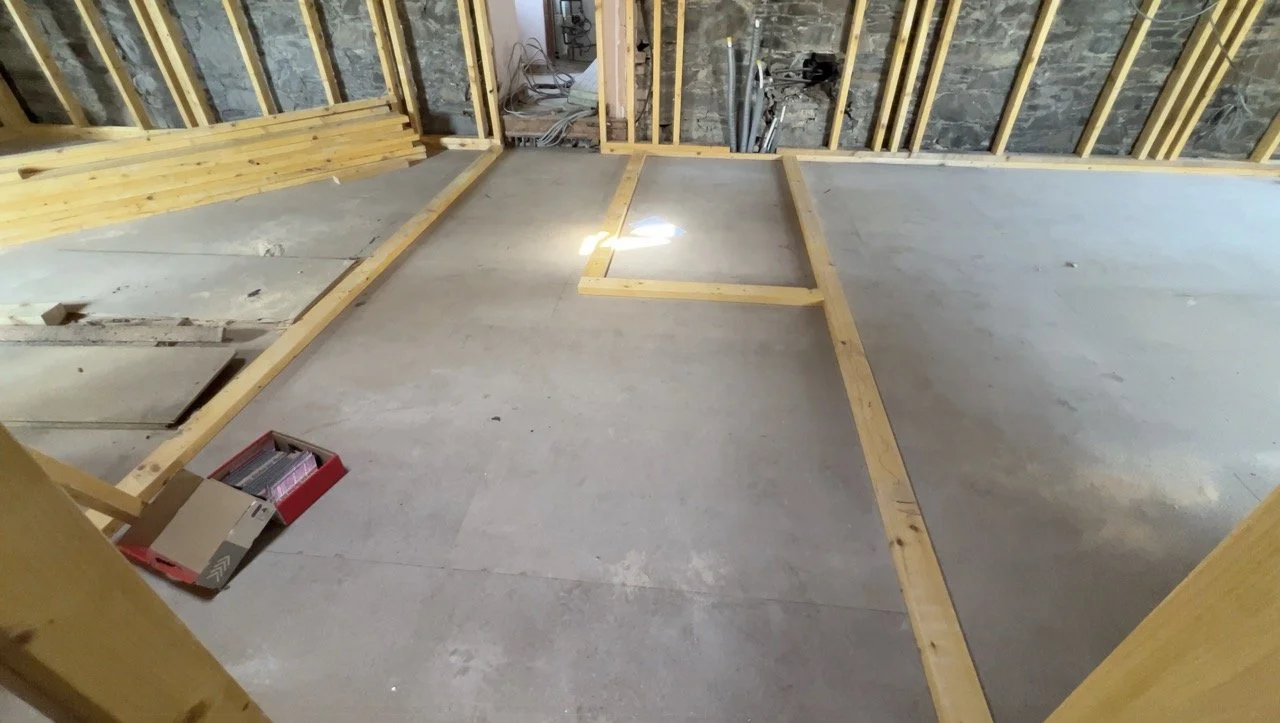
Unbeknownst to us, still working into the evening, the camera stopped capturing its timelapse. That means that there are some chunky gaps in progress on the gable end and around the side. I have some short clips but really, this photo sums it up at 7:30pm when we downed tools and went to the pub:
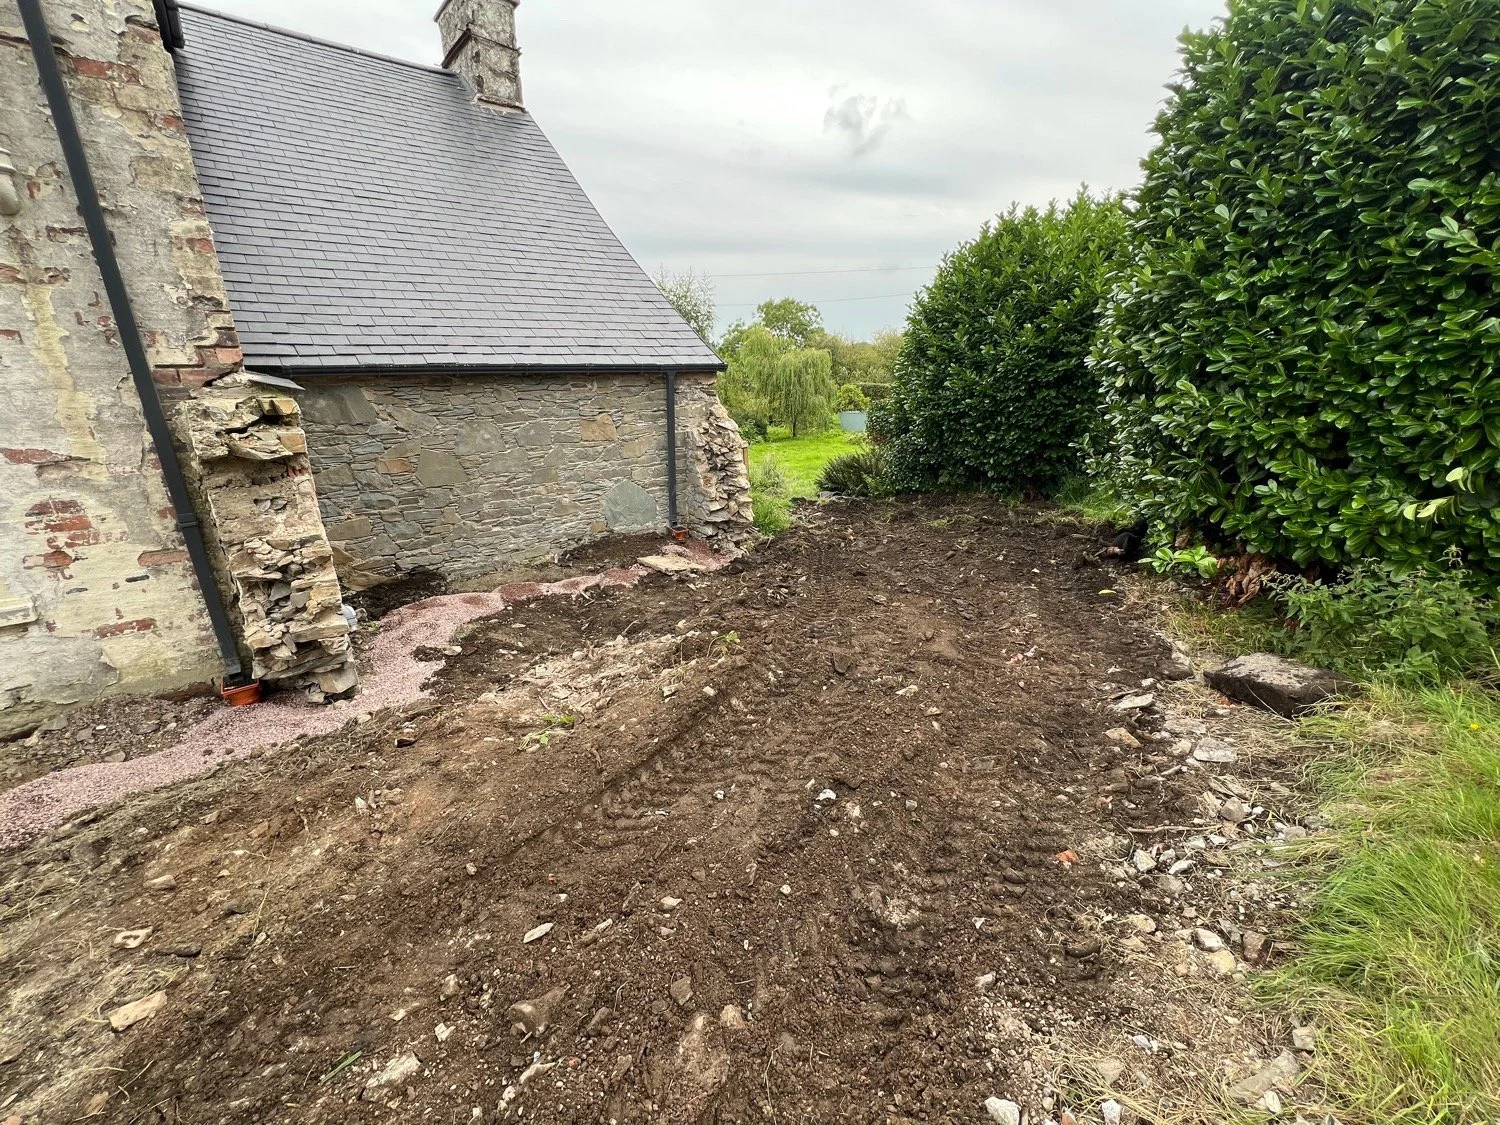
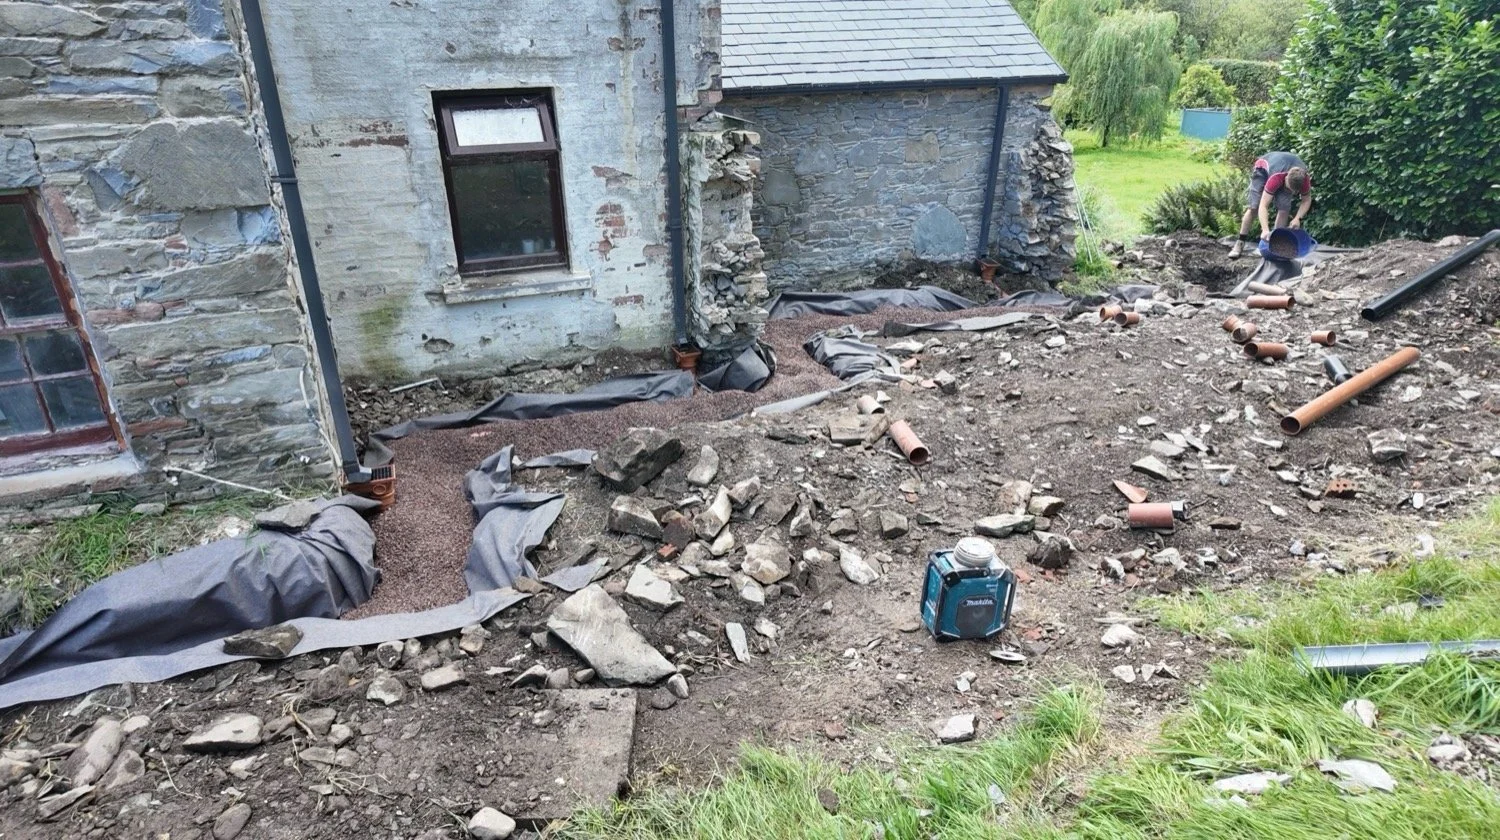
Here you can see where the giant rubble pile was at the beginning of the week. All pipework is buried and bedded. The gravel to the back can be overfilled, but we’re waiting for the broken wall heads to be removed and the render to be set first. Although it looks like a total mess, this area is actually perfect.
It has two levels, the higher level forming a smooth and gentle track that bends round to the back garden, perfect for actually getting a mower down there! The lower section is a wide step, not a steep slope to the walls, and has the lowest point at the edge of the drainage trench, hopefully managing water flowing down in the future.
And then it rained. Week 1 of August, complete.
August Week 2:
The decision here is whether to discuss things in chronological order, day by day, or discuss things in specific project groupings. Everything was being worked on at the same time, by multiple different teams, and it all kicked off on Monday of Week 2 in August. Let’s go with projects, because in written form, there is much clearer progress through the sections photos!
Week 2 was all about different trades doing different things at warp speed:
Builders:
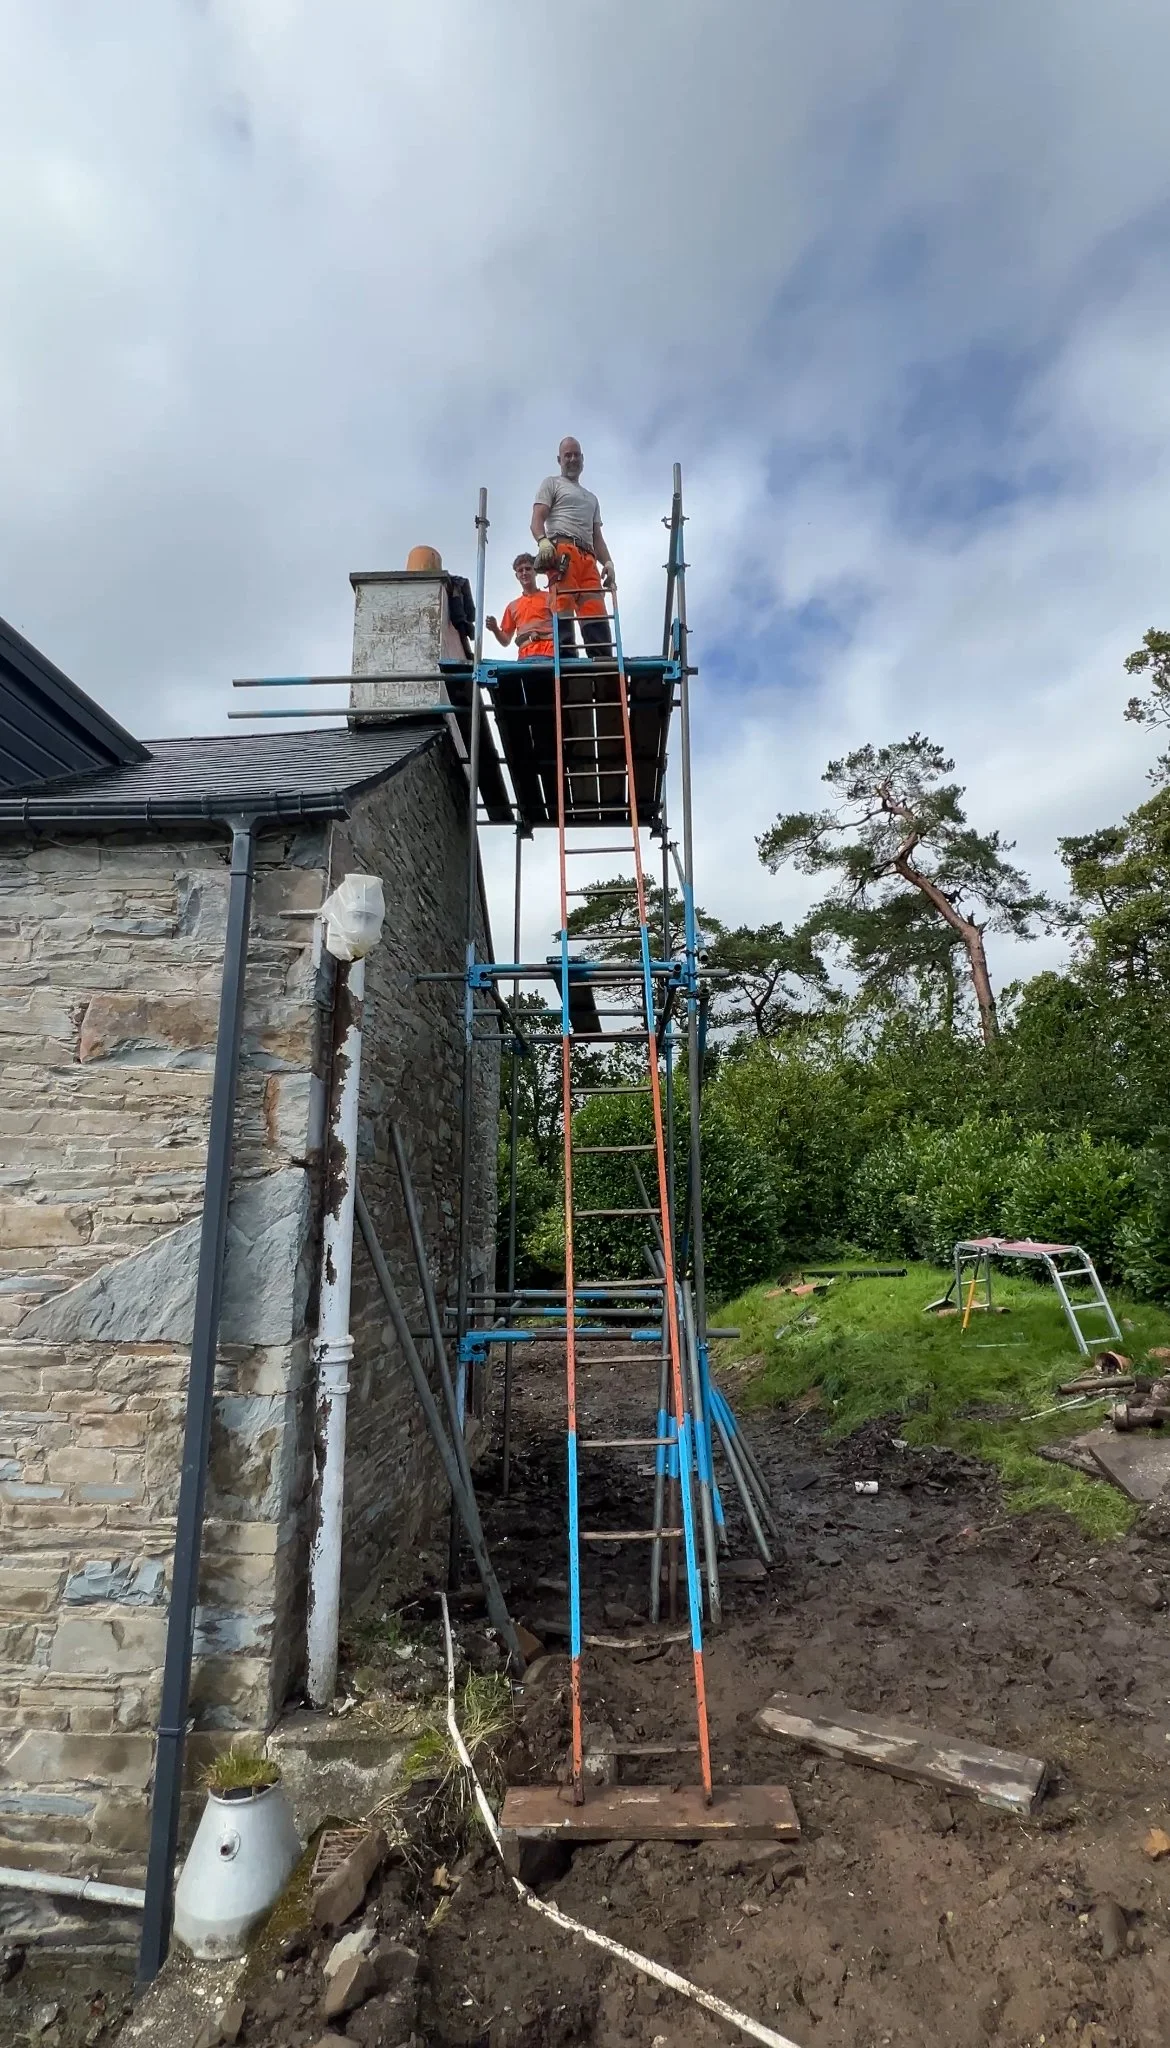
Scaffolding erected for chimney and render works
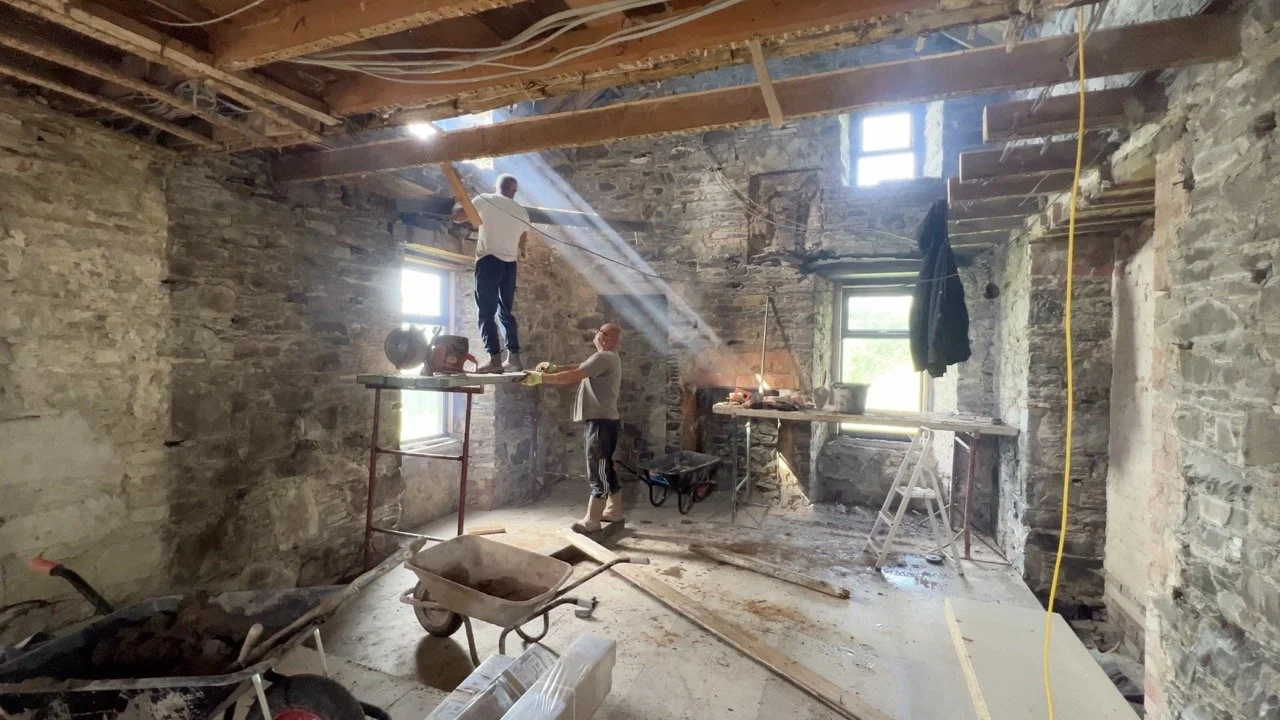
Structurally securing and cleaning up the Inglenook found in June/July
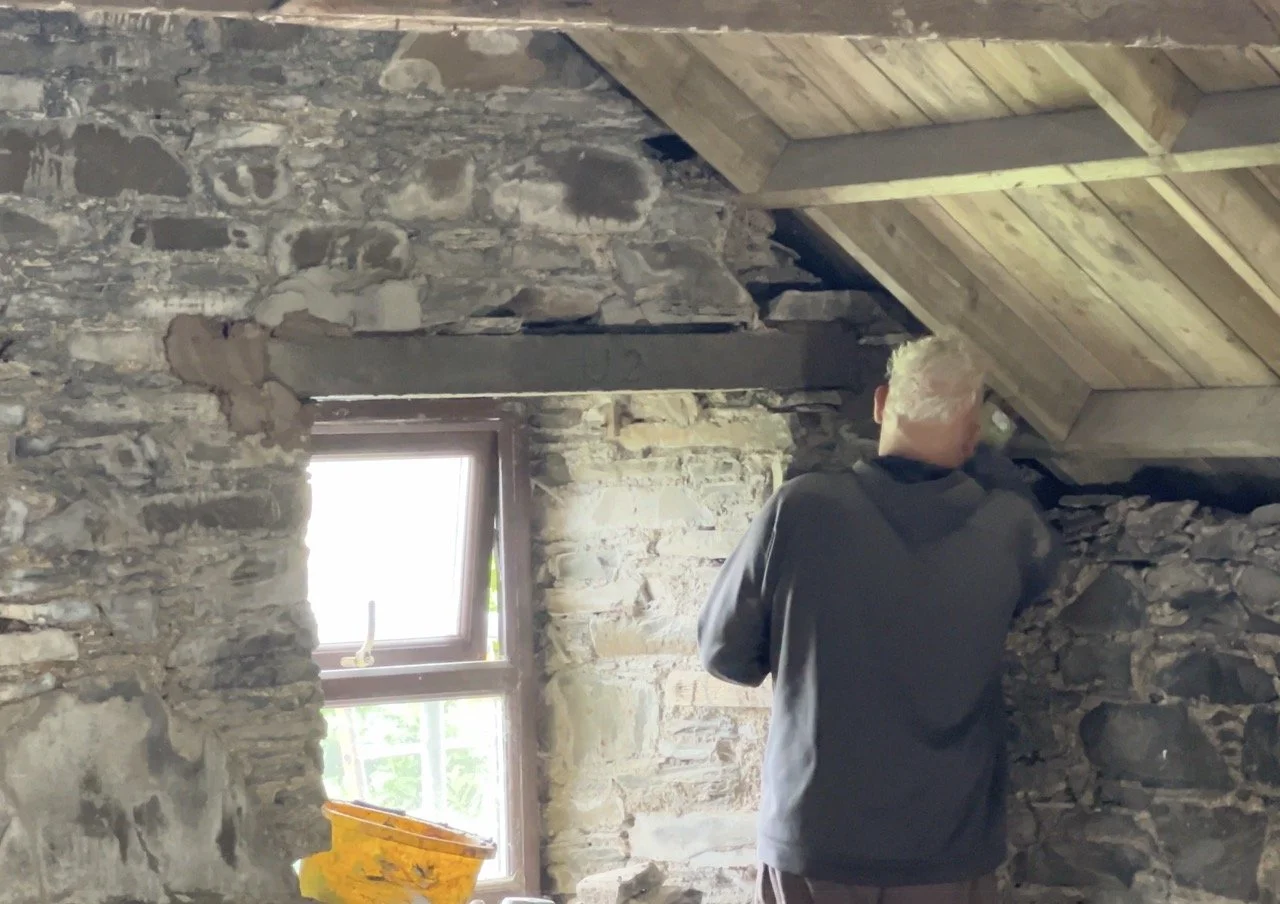
Replace all wooden lintels across the central section
Preparing the hearth for the log burner
Repairing and upgrading the chimney stacks to include a lead layer in the flaunching, removing surplus pots and repointing
Squaring up the walls left after removing the potting shed/coal store
Remove and replace brick in the north gable end with stone
Repoint the walls
Joiners:
Remove the bridge
Replace all first floor joists
Lay first floor boarding (Weyroc)
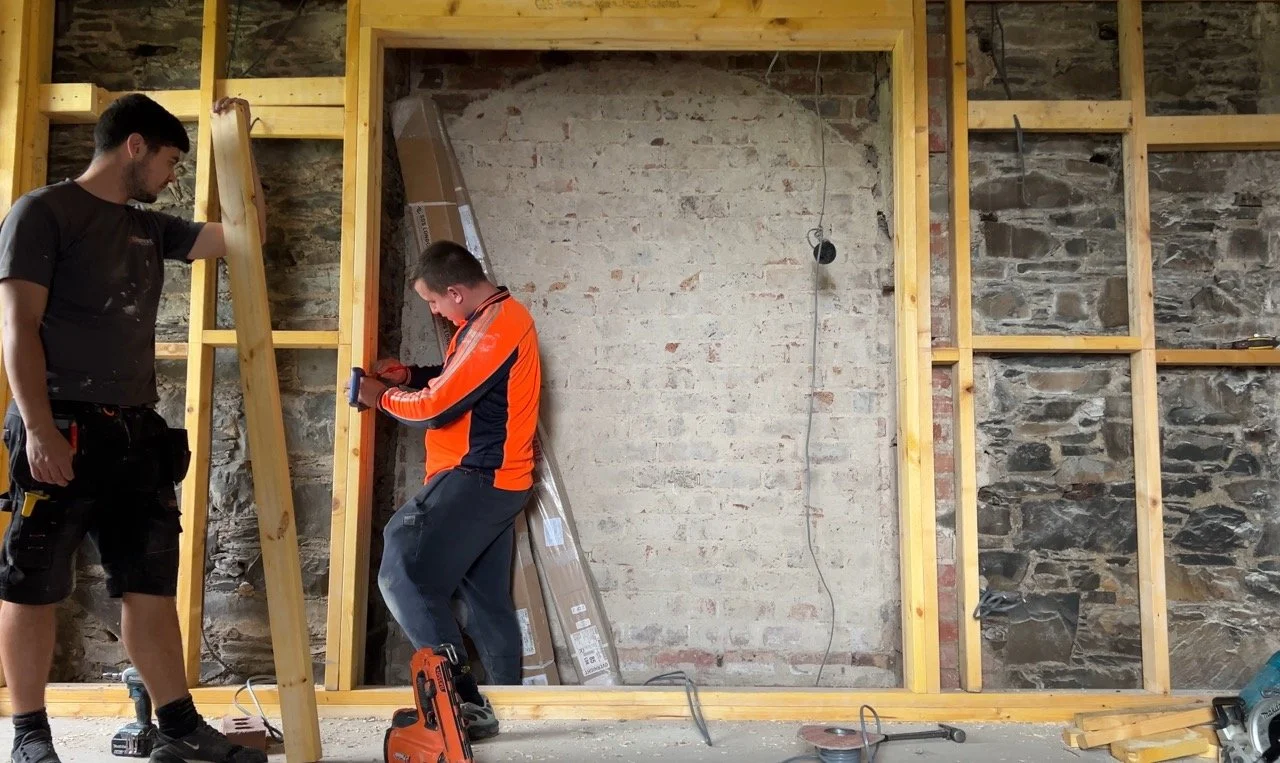
Add external wall framing in preparation for first fix and insulation
Prepare pocket door ahead of the reinstated archway <- Partial completion, pushed to Week 2
Prepare media wall for TV fixings (different to stud frame) <- Partial completion, pushed to Week 2
Prepare stone alcoves for cupboards
Add internal dividing walls <- pushed to Week 2
Fire People (log burner installation team):
Confer with builder for fireplace preparation
Remove Agatha the Aga from the current kitchen
Assess fireplace for burner installation within current chimney
Jess
Hundreds of decisions in milliseconds for re-hashing plans to end up with something that works. It’s been a LOT of chopping and changing this week!
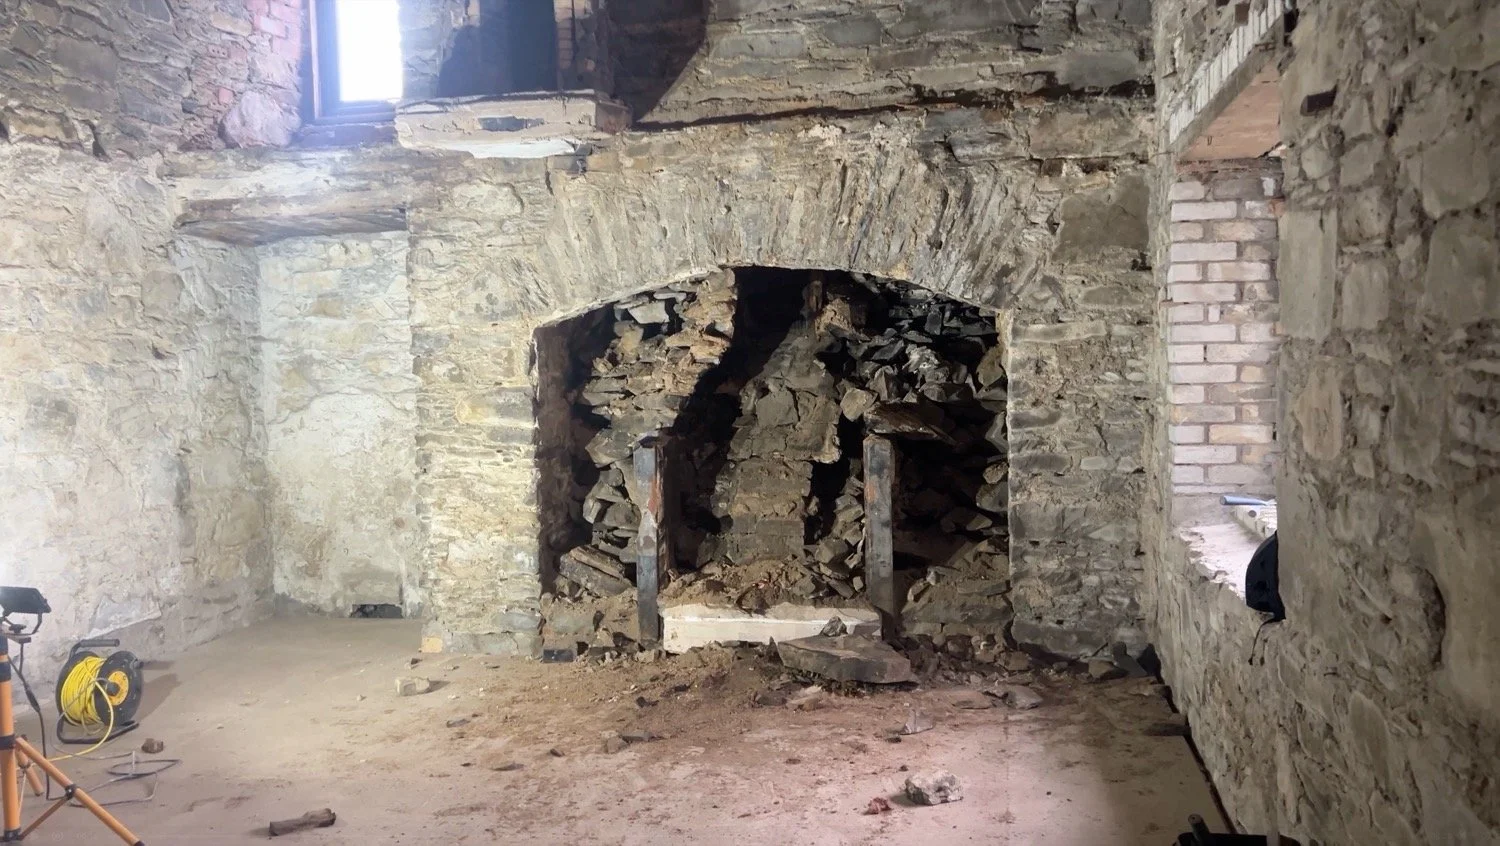
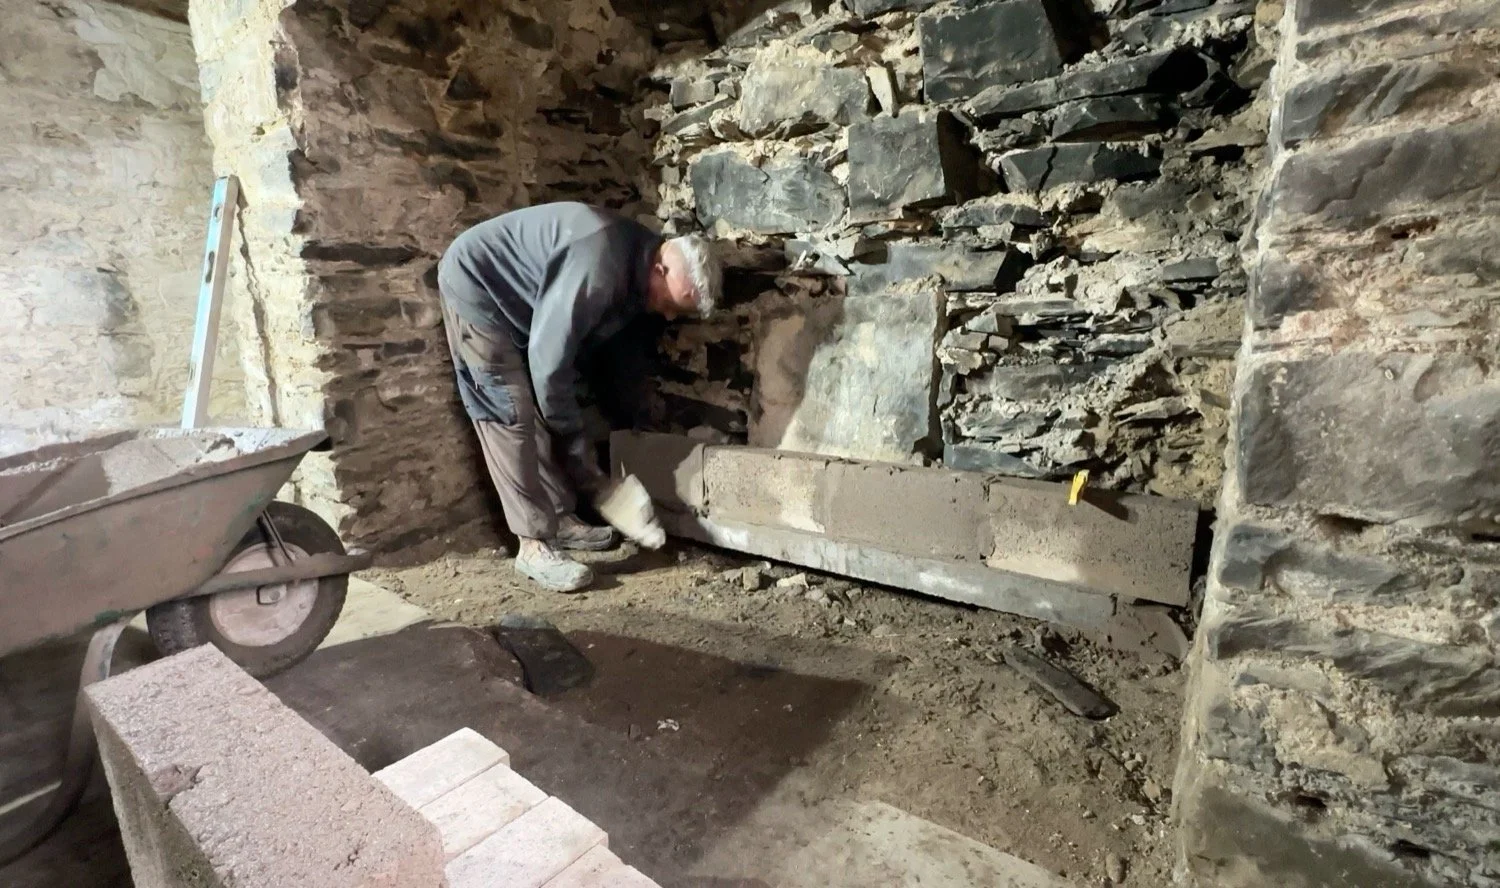
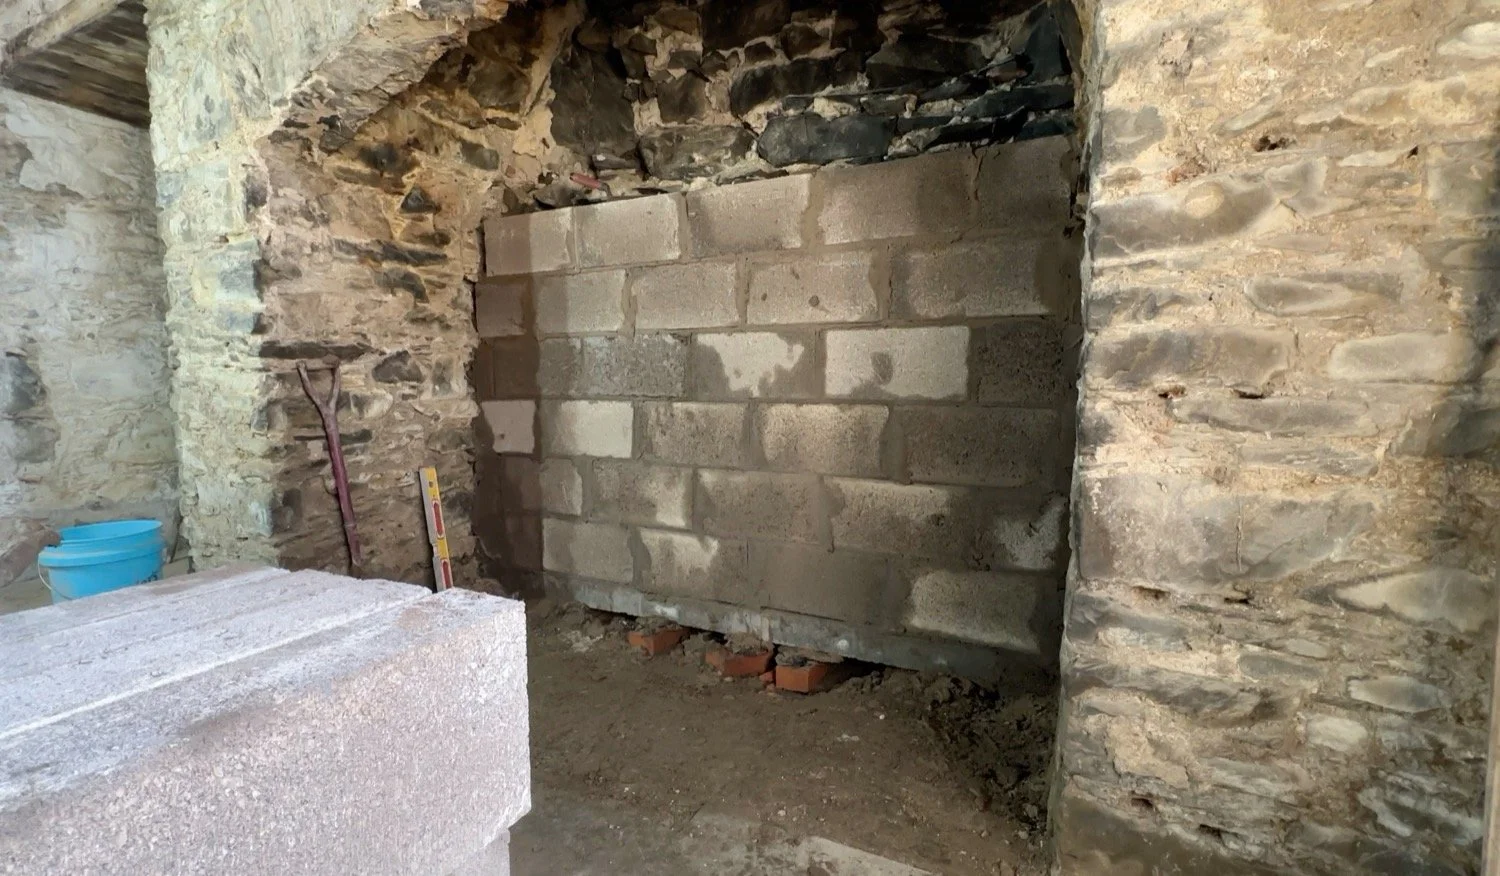
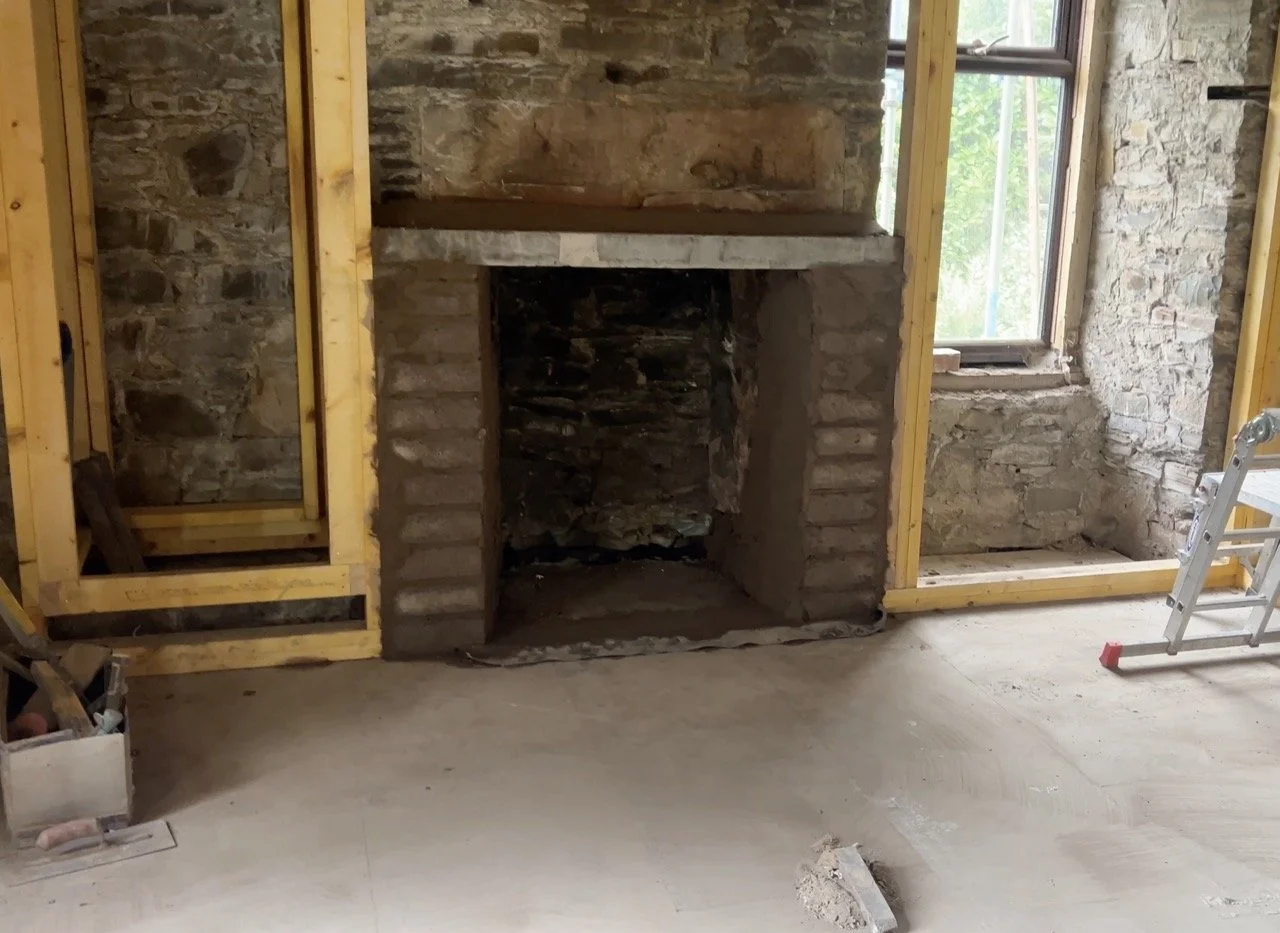
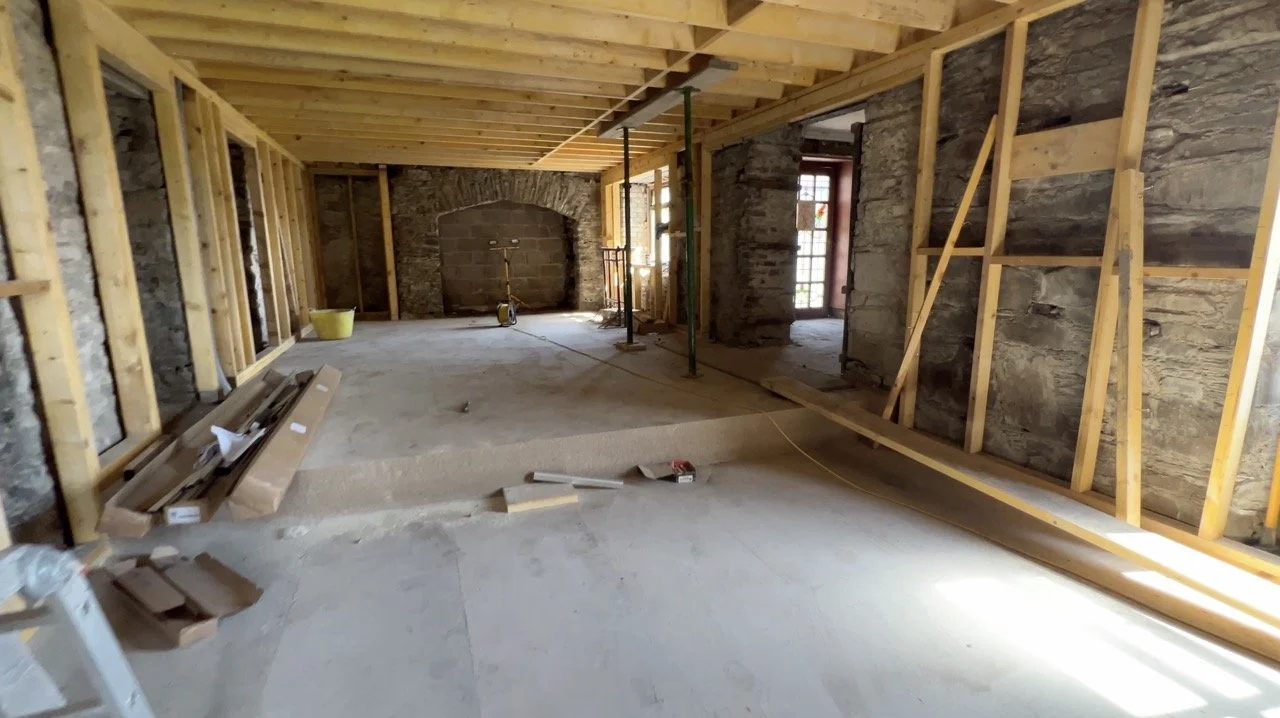
Securing and Prepping the Inglenook:
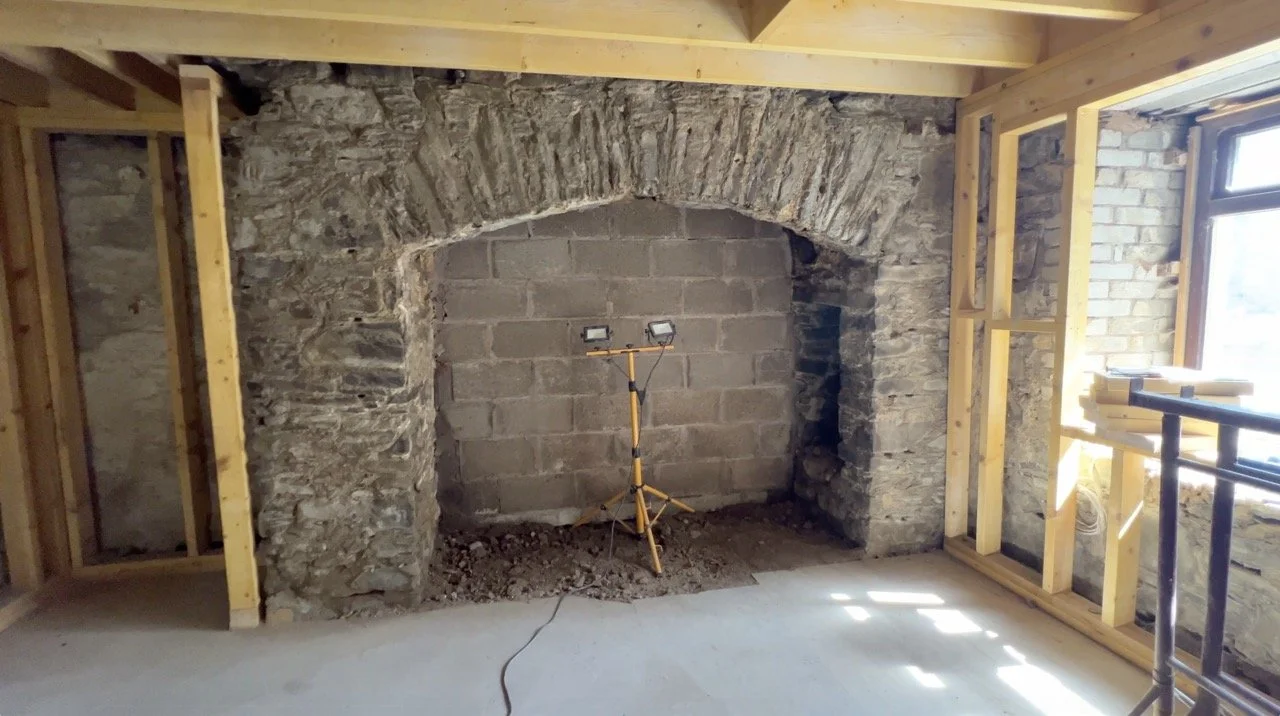
This took a fair chunk of the week for one of the builders as it was a stop and start sort of project. First, all the lads jumped on to get the stone out. The external wall was, thankfully, in tact and the bits coming out were just enormous volumes of infill. The stone created two gigantic piles outside that Dan moved on Friday, but looking at the second to last image below, you can sort of see where it all was from - Dan is 6’5’’ stood fully upright inside the fireplace with his arms stretched upwards, showing where the ceiling of this opening will be!
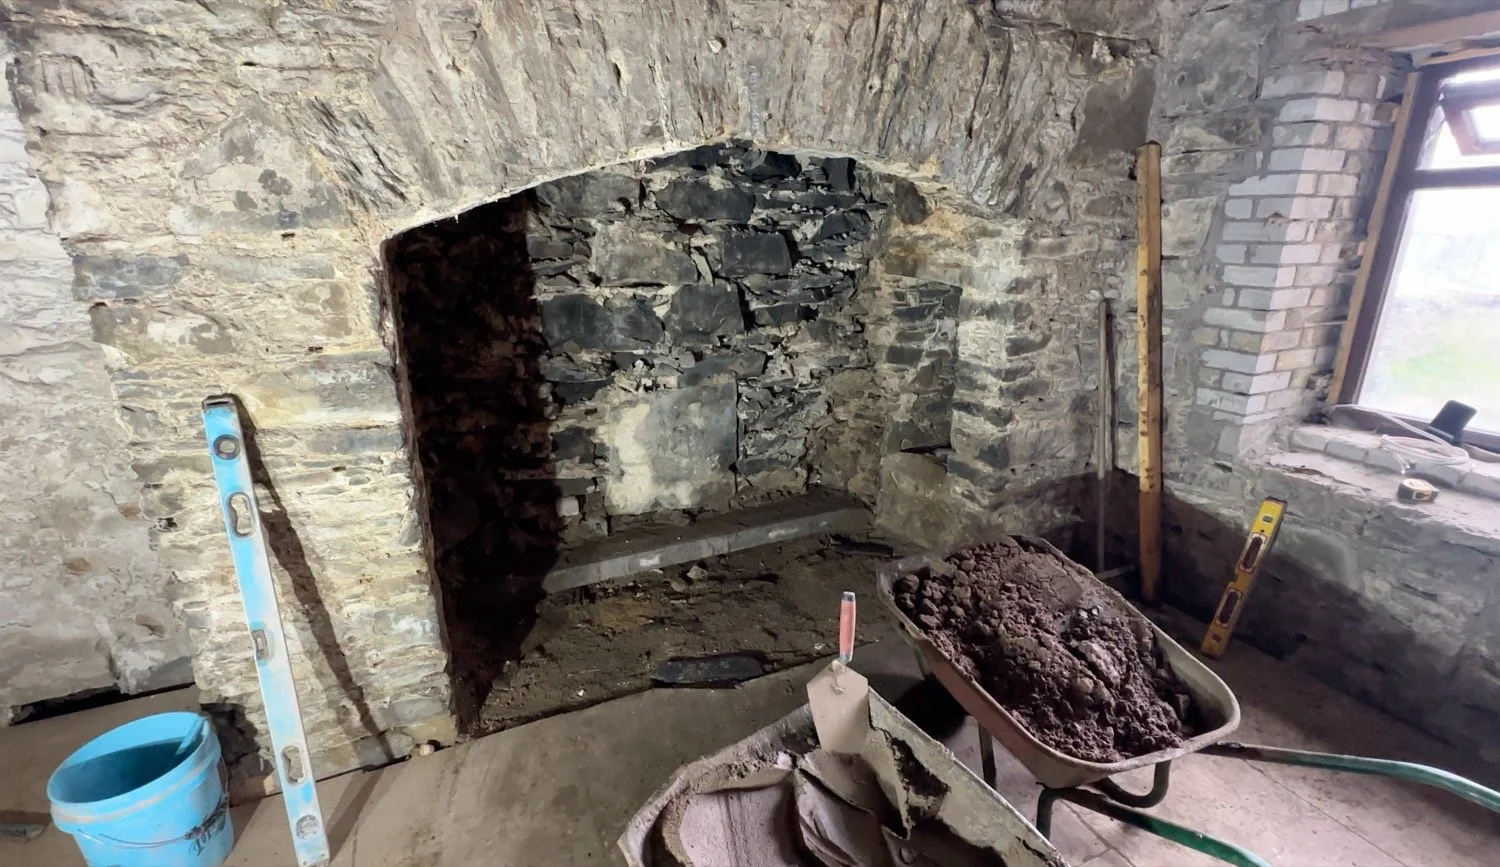
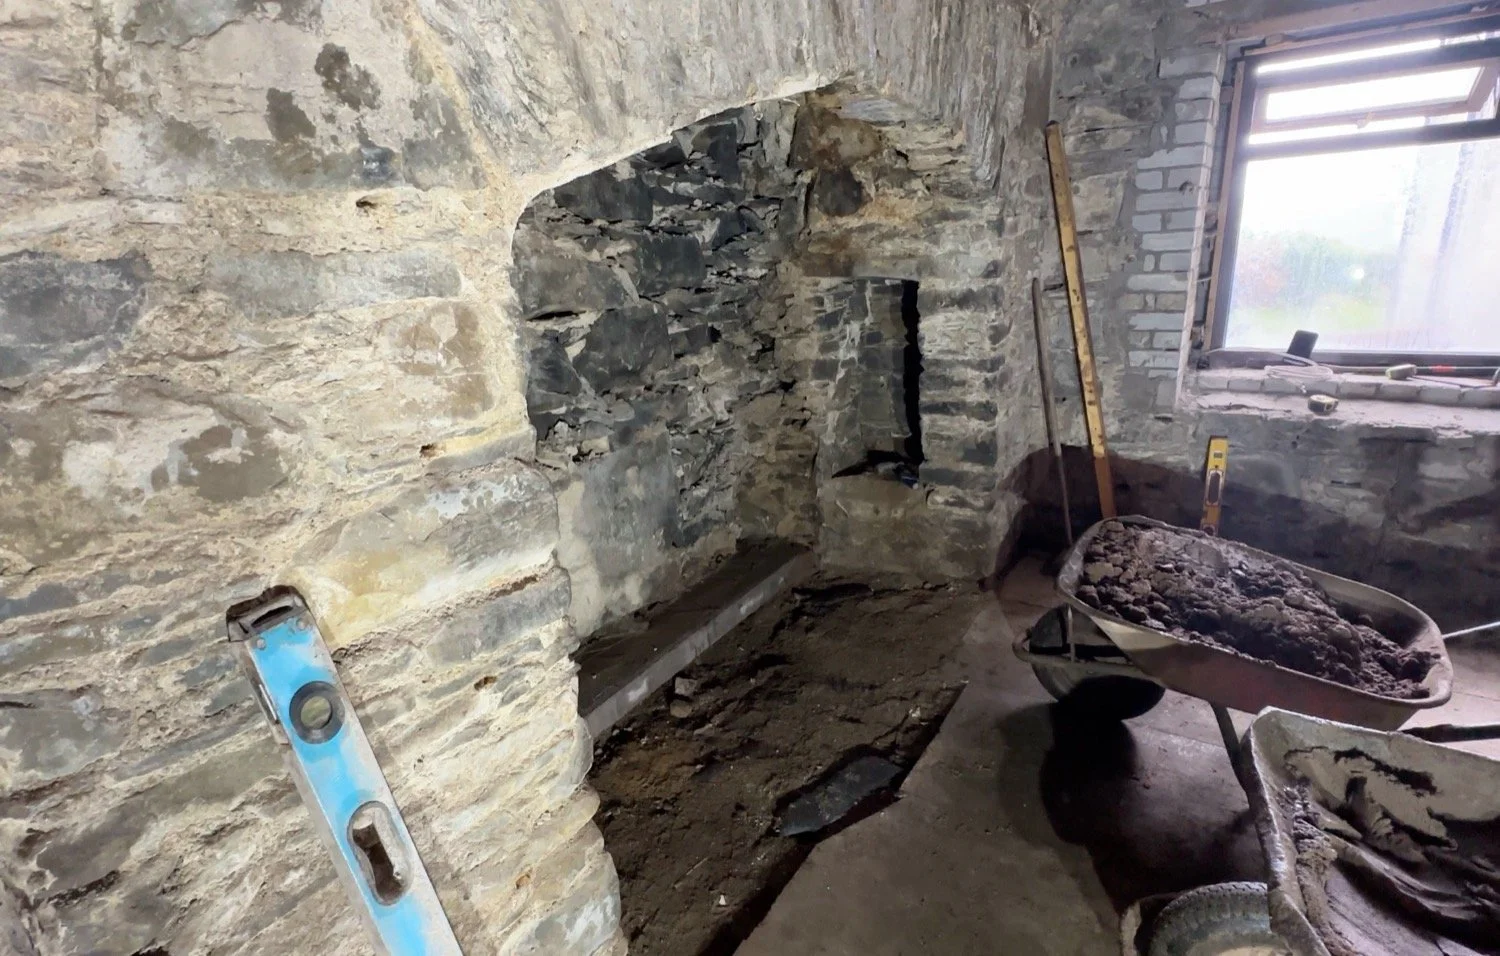
With the infill out, block work began, which needed to set off and then cement was actually poured behind for stability. This was repeated to include brick and smaller blocks up the opening all the way to the solid walls on either side. Cement, solid stone and moisture aren’t friends, but we have a plan and we’ll pick that up next week!

Replace all wooden lintels across the central section
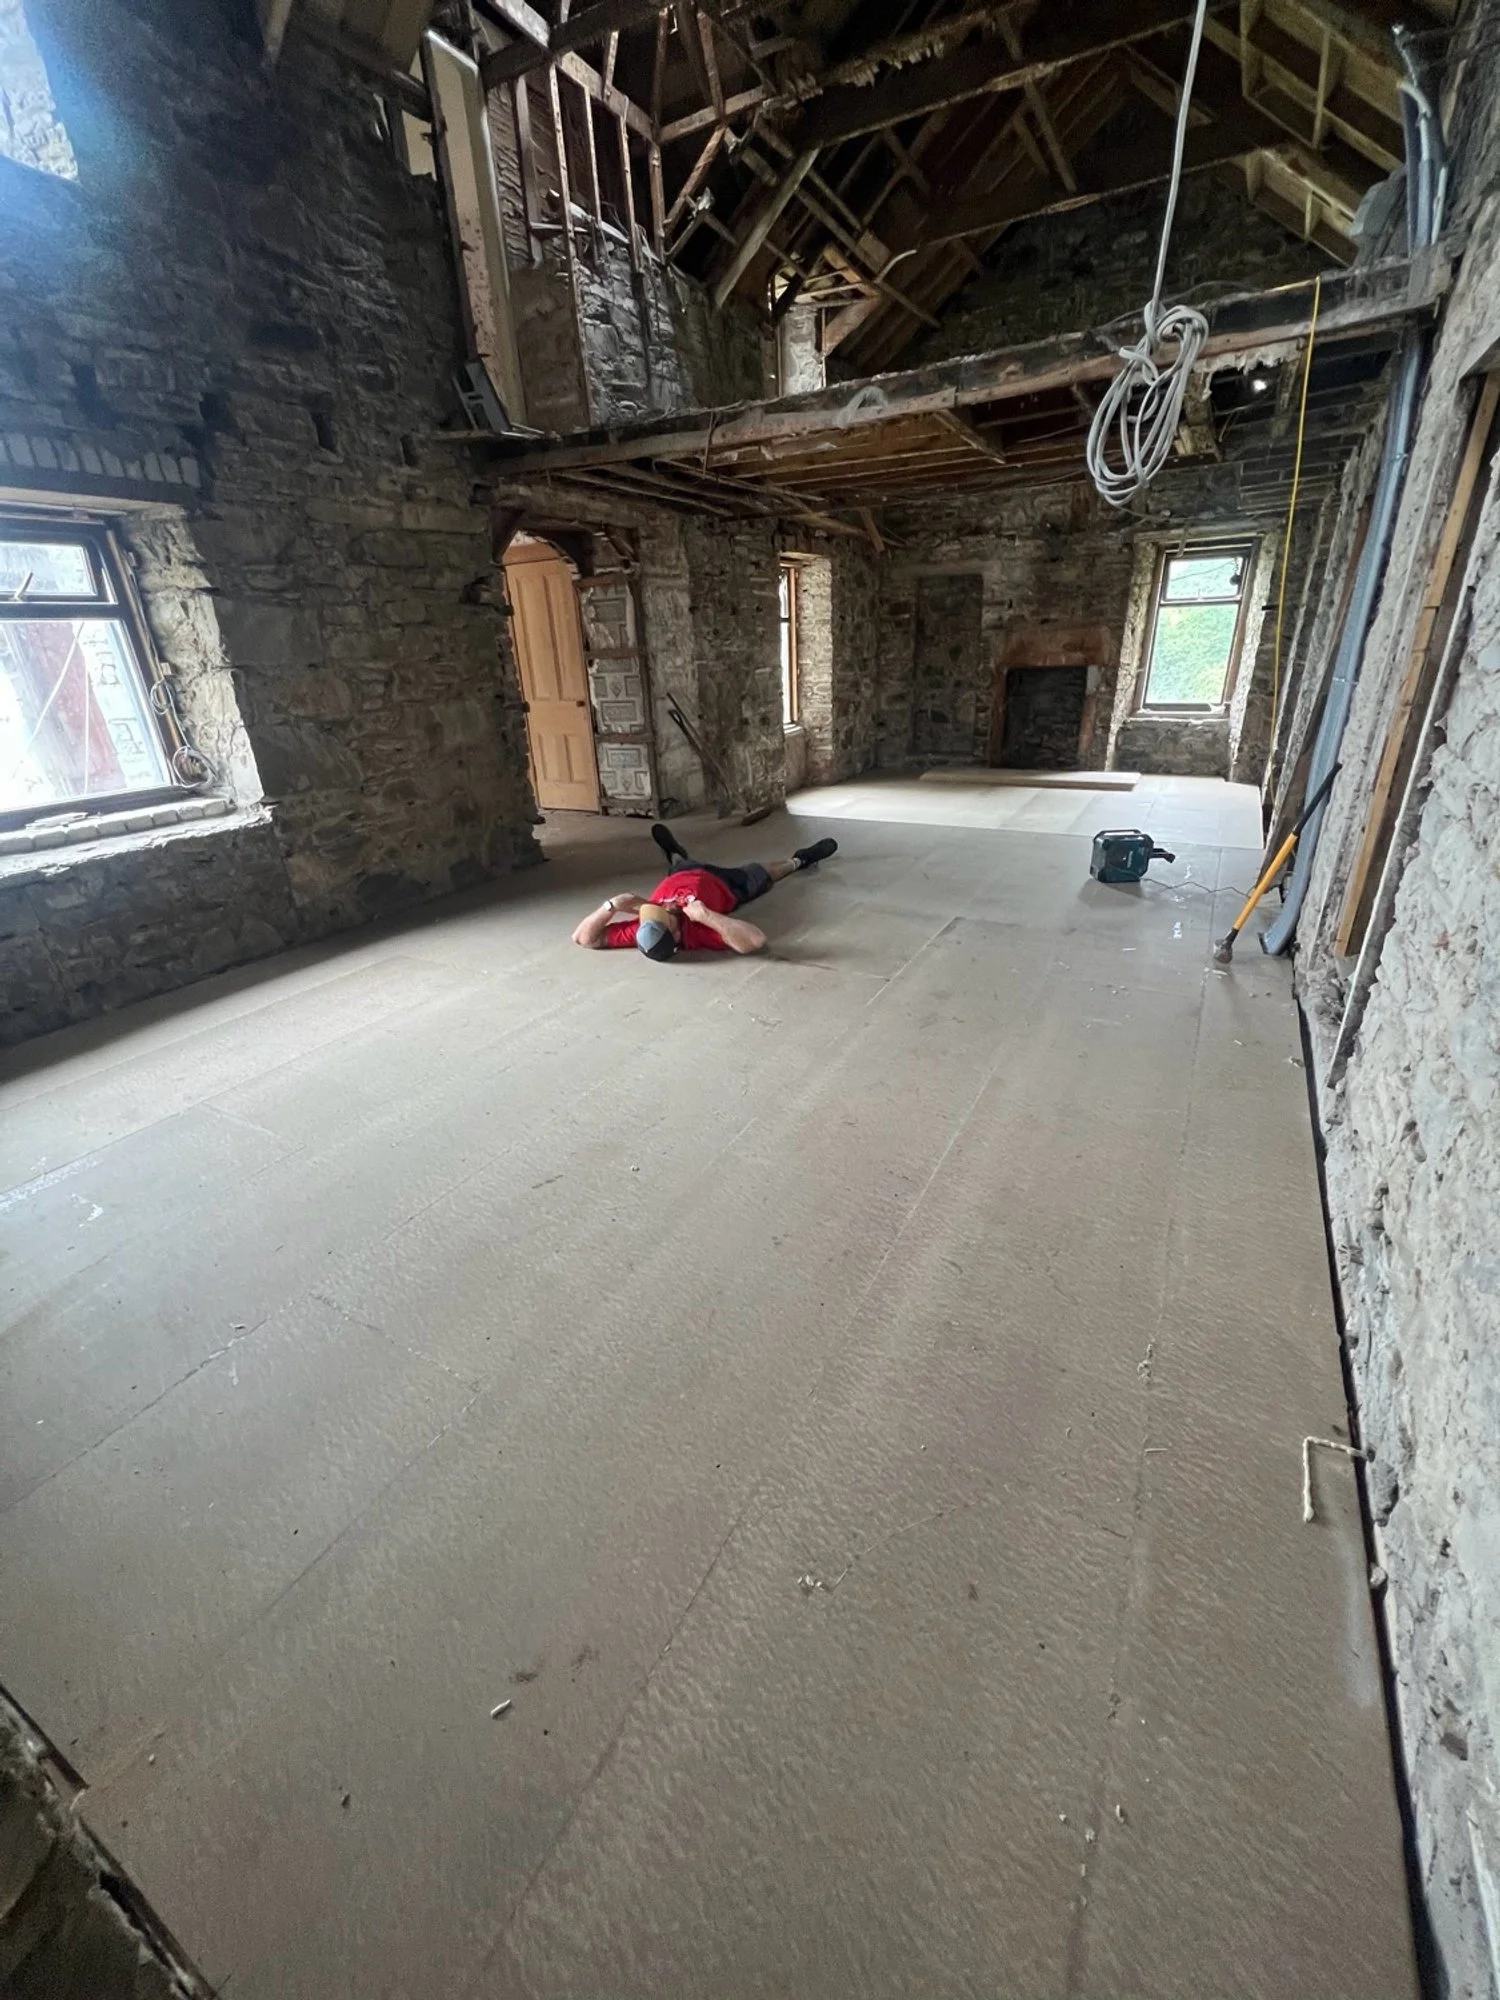
Another project that ran on for the week, some were fairly straightforward after removing some pesky floorboards that had hung on (floorboard removal shown below). Some of the lintels were not wide enough, these took longer to replace in full. However, by Thursday, all of the 11 spans were replaced with non-perishable materials, adding longevity to the renovation. Much of the timber removed had woodworm or rot, so it was good to replace them here.
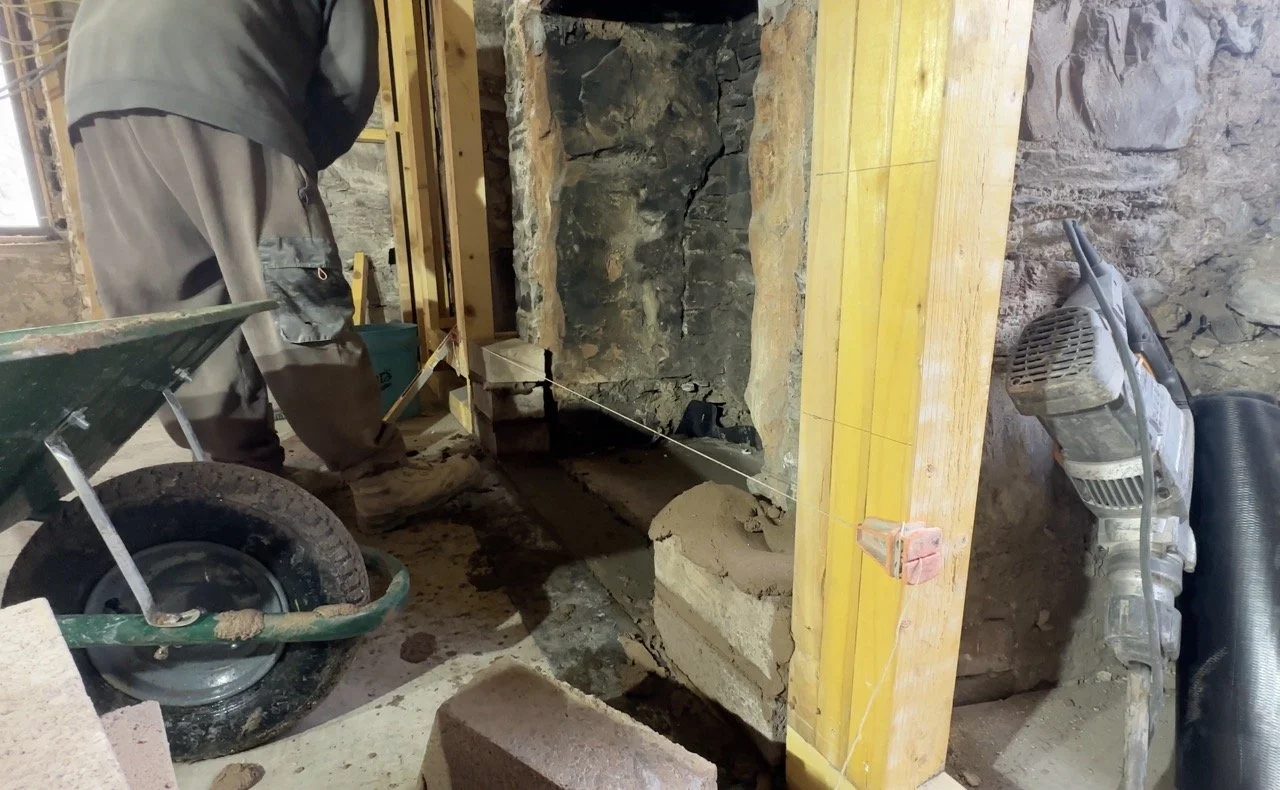
Preparing the hearth for the log burner
This project picked up on Thursday and Friday, so the visuals have clues for what the joiners were doing inbetween, but I’ll still include them here. The size of the burner vs the opening for the fireplace here, plus a hefty insulation chunk out of the room, meant that the hearth needed to come into the room, but it could not be built from combustable materials. The builder team jumped on to build a block surround and add a lintel to allow the joiners to work up to it later.
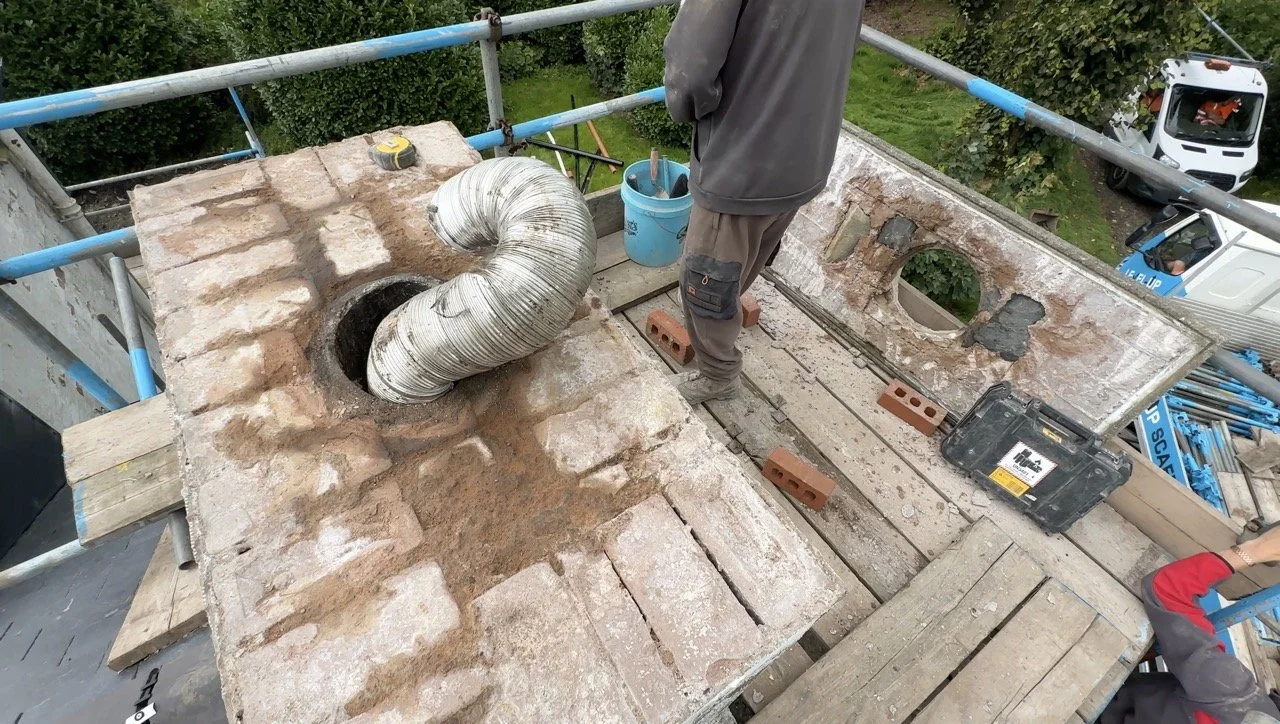
Repairing and upgrading the chimney stacks
With the scaffolding up in the storm on Monday, the chimney work commenced. All three chimney stacks leak badly. Some of this is from pointing degradation, but a fair bit of it is penetrating the top of the stack on the flaunching. Therefore, all flaunching was stripped and the stacks repaired, with pots that were no longer required fully removed, and a lead liner placed all the way across to ensure no water can enter the stone work or flues.
Here’s the kitchen chimney stack and Aga flue liner, with the removed flaunching on the right hand side, showing clear evidence of water ingress in the dampness near the opening on both parts.
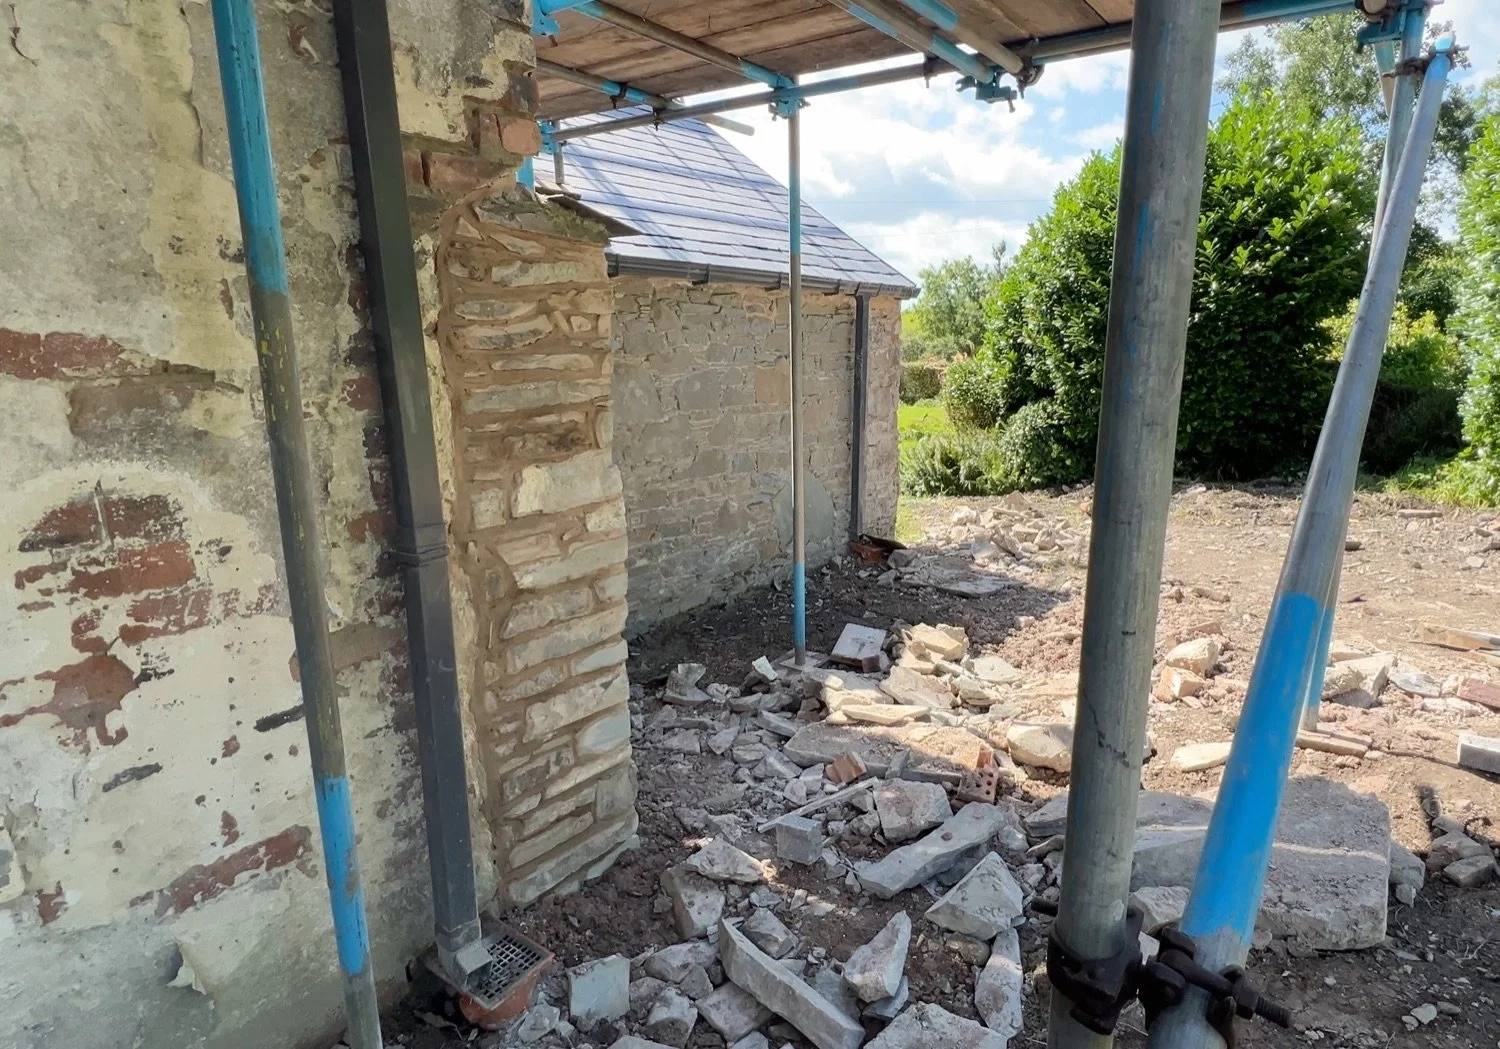
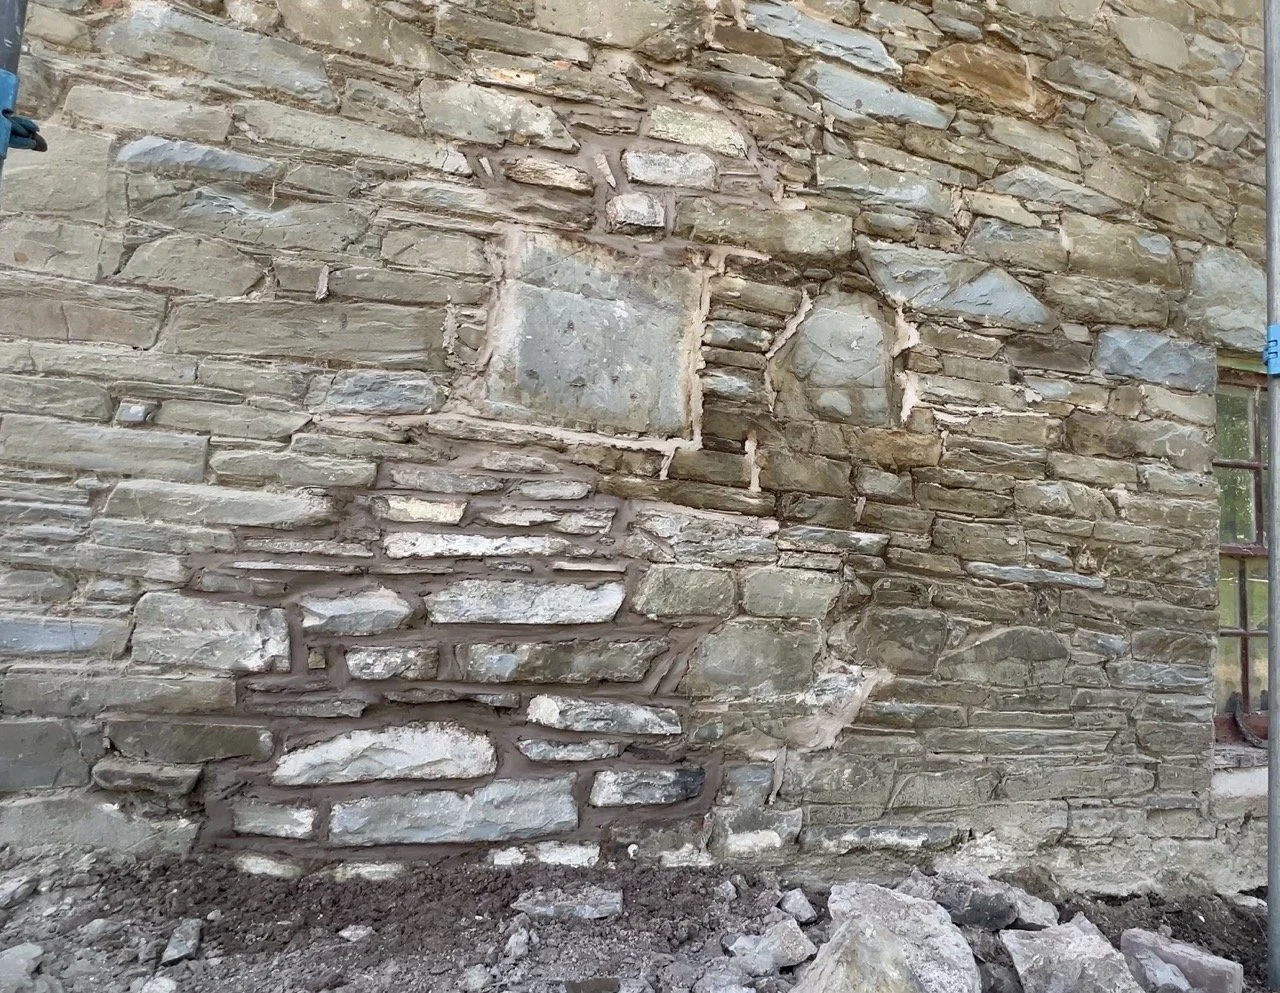
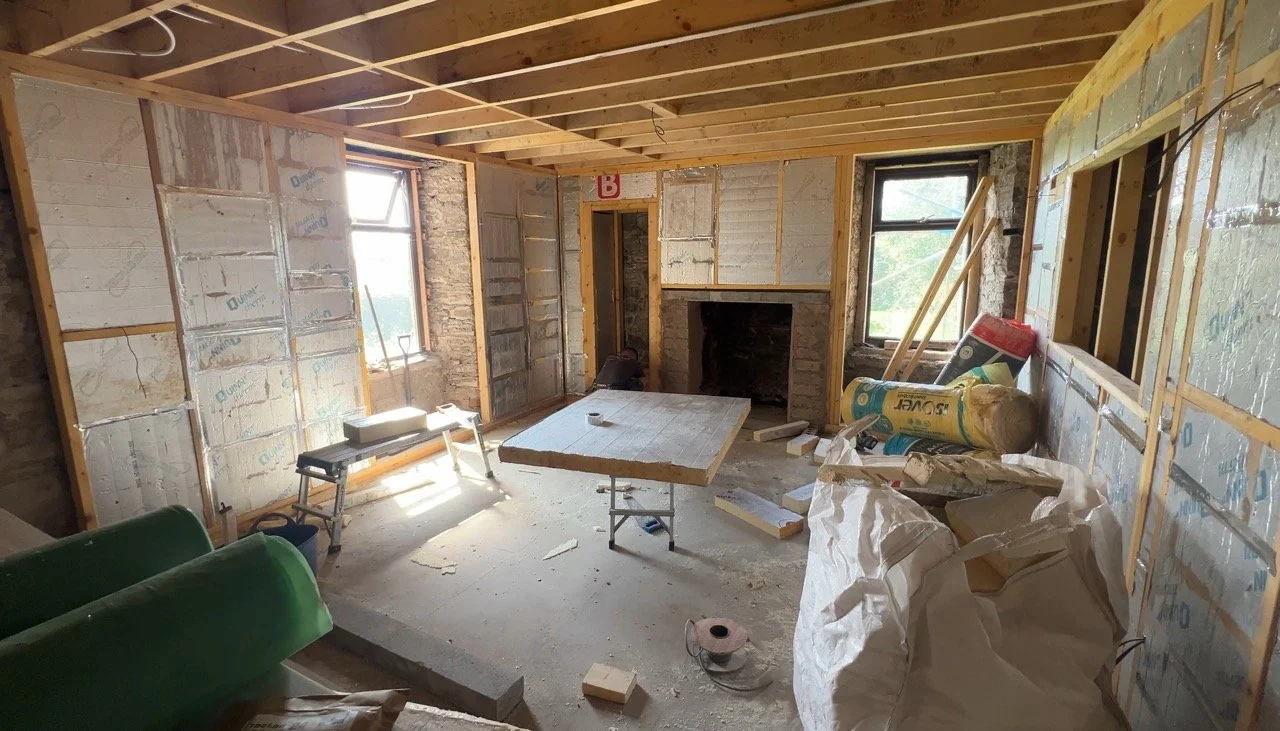
Squaring up the external walls
If you remember from the end of Week 1, the side of the house looked like the first photo below, with broken ends of walls that no longer existed from the potting shed still sitting there. You might have been thinking, “Jess what are you thinking leaving them like this?!”, and if you thought that, you should know me a little better by now 😅
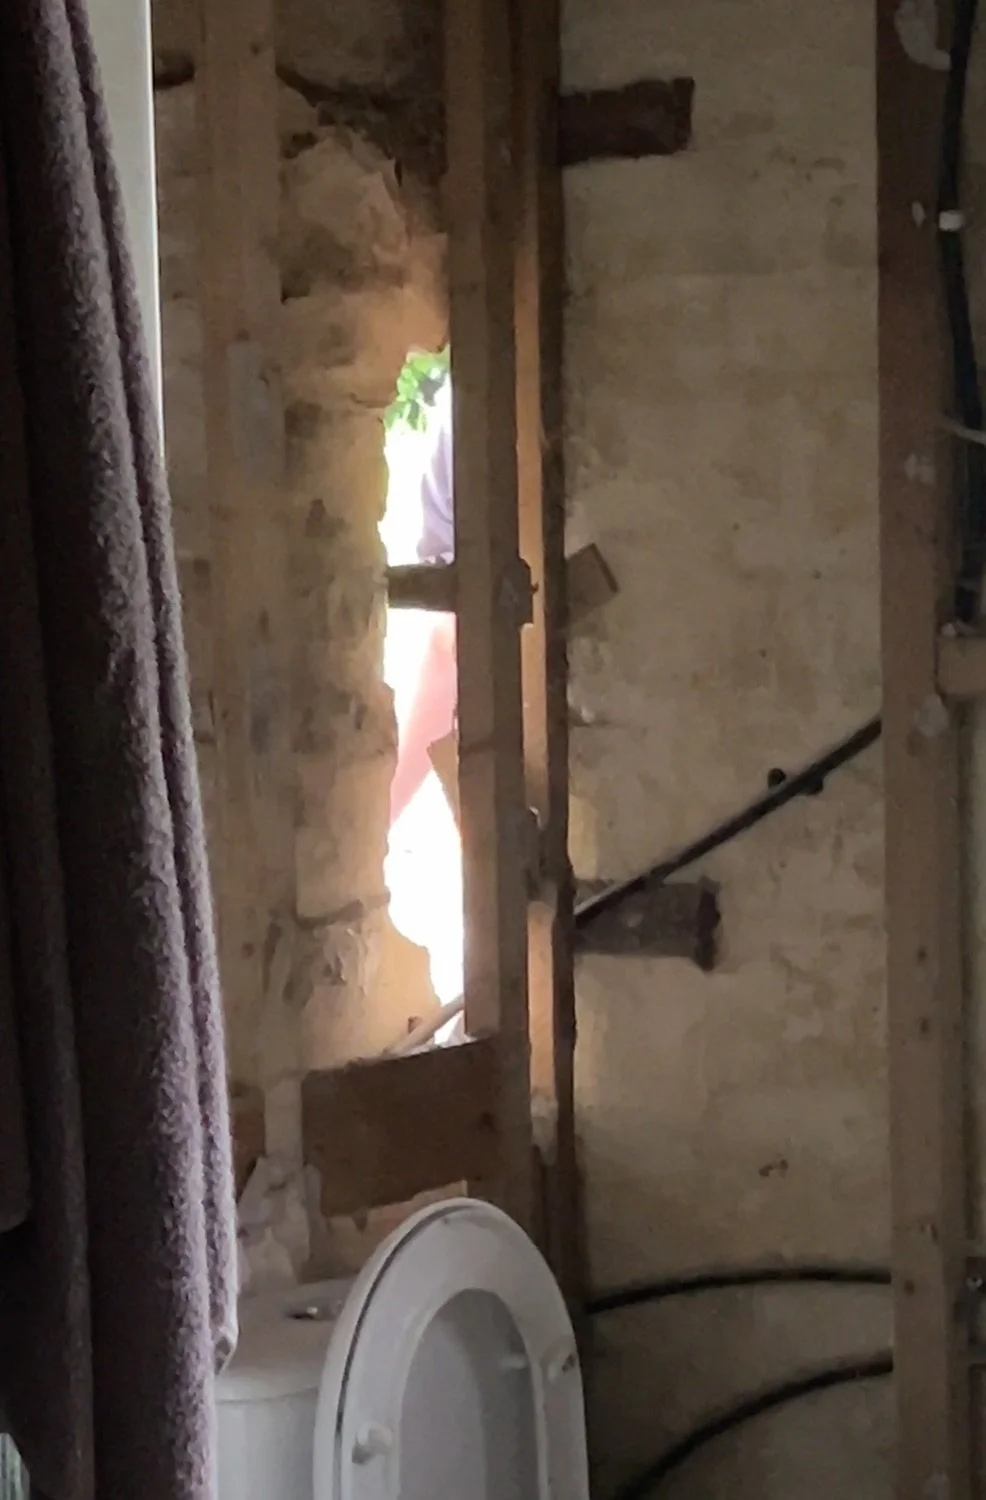
The far edge of the house had a bit of wall remaining that was rendered on the outside, but we didn’t want to knock it off in case it was tied into the actual external wall. We could see it wasn’t tied in on the inner leaf without render, but you just never know. Therefore, we left that one, and the more complex brick and stone corner, to the pros.
The latter involved some reworking of the stone, which also involved a temporary window to the outside from the downstairs loo, but by the end of the week, the corners were corners once more, with fully repaired stonework using lime and stone on site to get a lovely finish.

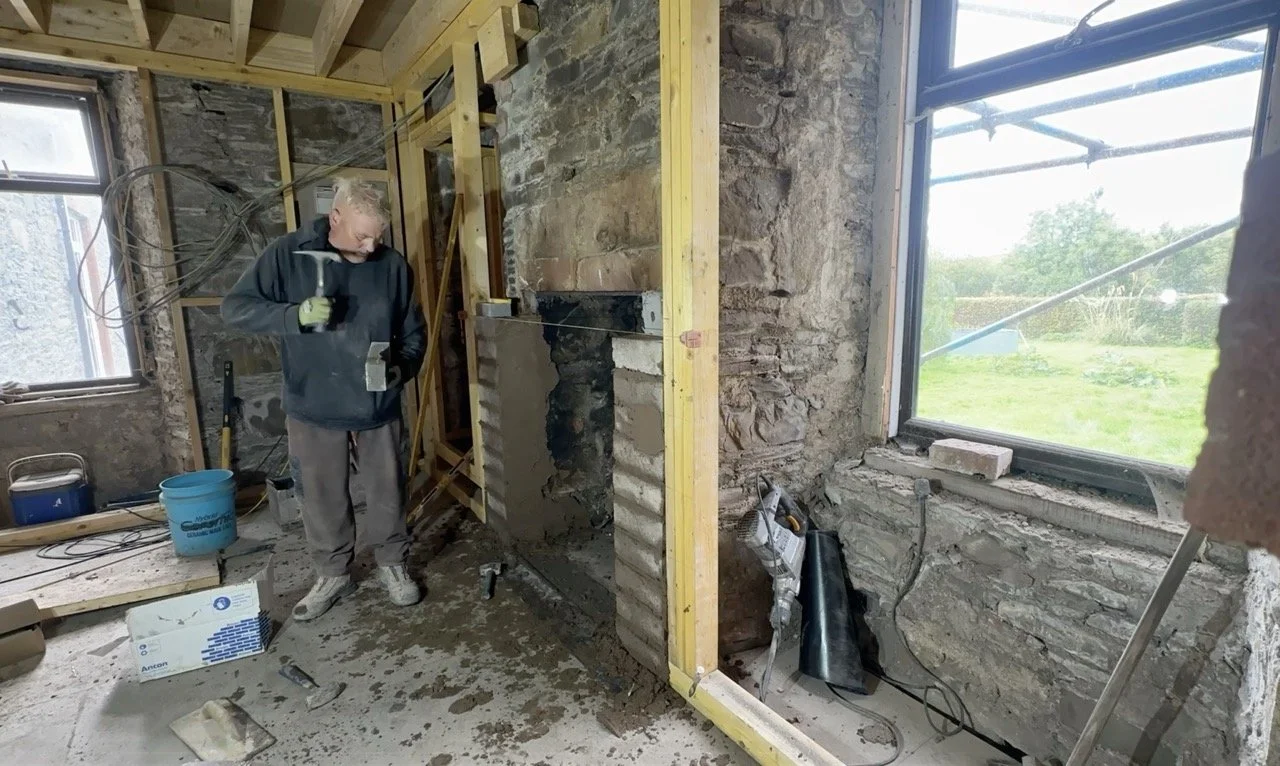
Remove Brick and Repoint
The remove brick is specific to the north gable, we won’t be doing it everywhere, and it specifically covers some brick repairs that probably have something to do with the Aga. Alas, they were all pointed and bedded in cement, so with Dan already on his cement removing mission, the builders worked to rip out these brick bits (with the fireplace people, to be honest), and sure up that wall so it can stand for another hundred years.
Repointing of the entire north section is underway, but as always with pointing on stone/rubble walls, it takes an AGE, so it’ll be a while till it’s complete, and a while more til it is fully set too.
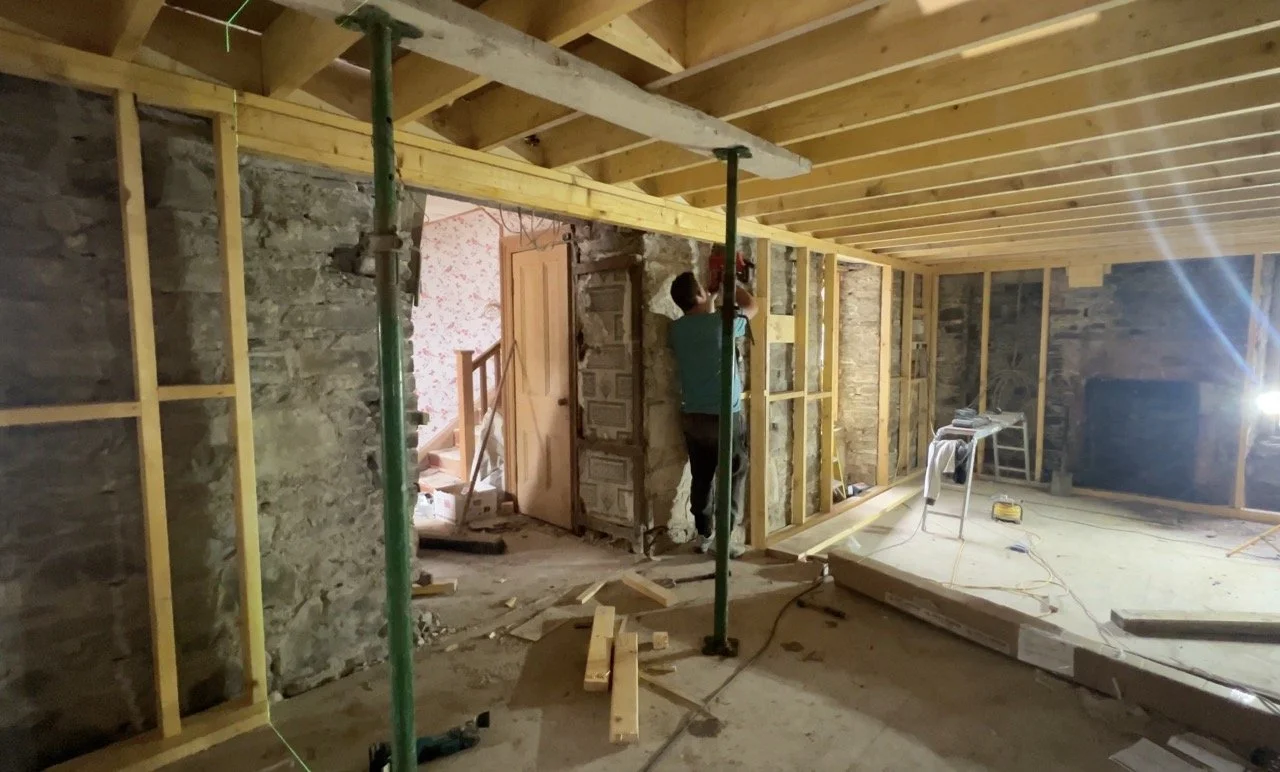
Joinery in Week 2
Over to the joiners now, it’s time to get deep into the internals of this space. We dropped little Dan back home on Tuesday and also stayed in Yorkshire for a couple of days to pick up some bits of work, so we missed some major moments! When we returned, things were already moving at speed, with the bridge gone and the core ground floor framing up and some joists already in:
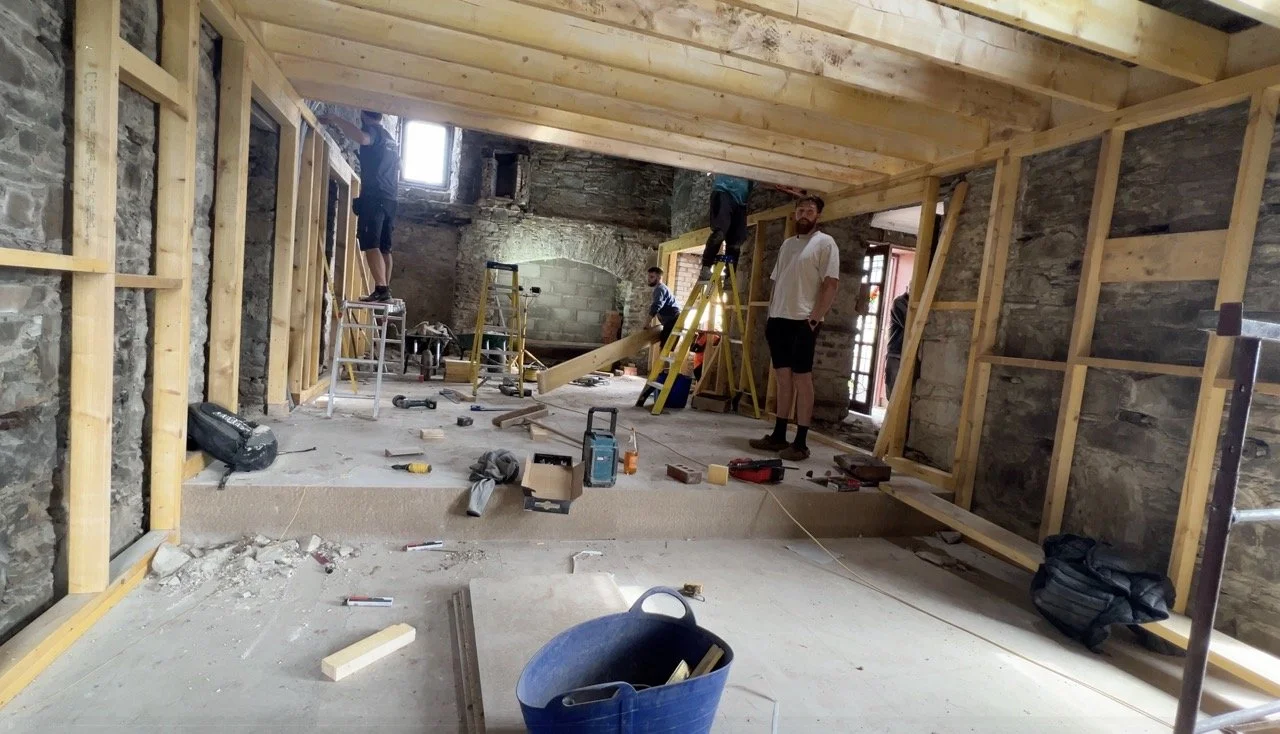
The millisecond that those joists were in, there was already someone upstairs putting the flooring boards down. With the boarding in upstairs, the downstairs team could amend the base frame to have all the correct openings and alcoves added. That included preparing the framing for the pocket door which will open within the original archway (will be rebuilt) and the bookcase next to the fireplace in the lounge.
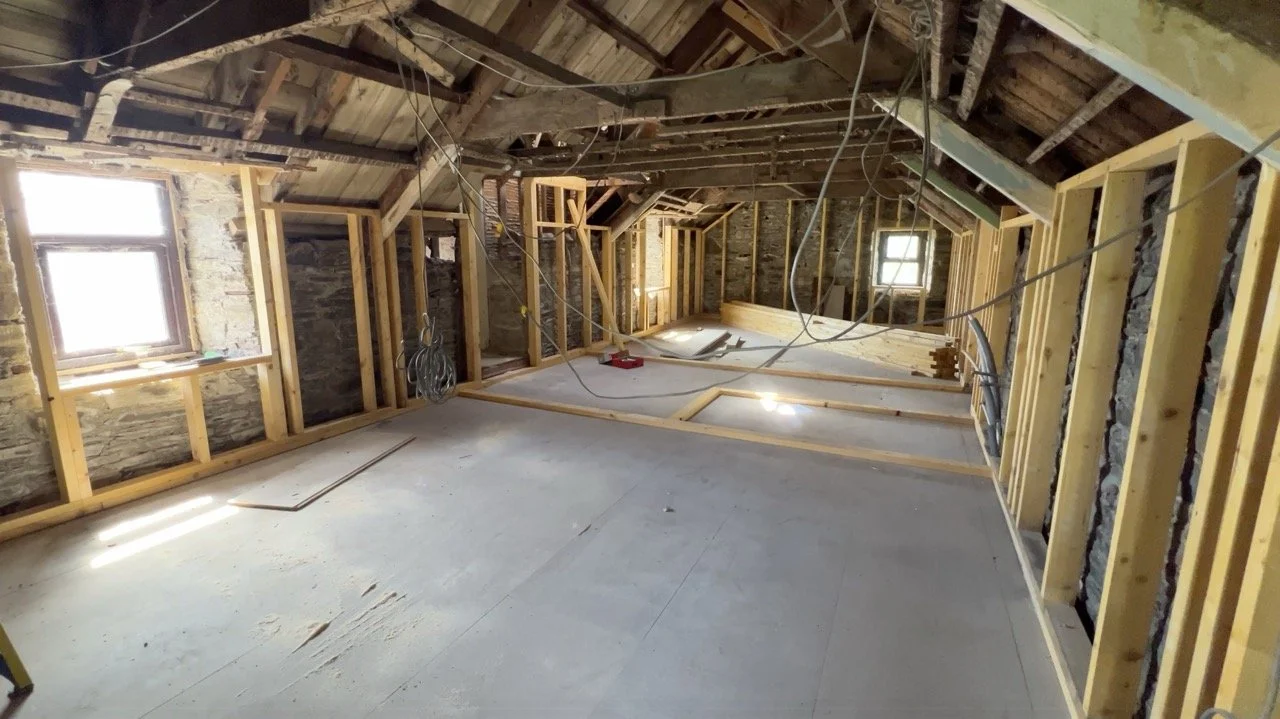
Upstairs, the framing is a bit more complex, because of the pitch of the roof. We’ll be vaulting these ceilings too, whilst retaining the beams in the room itself, so it’ll look fairly epic in each of these bedrooms. The landing area needs to house a lot of important things, an immersion heater/tank, manifold, consumer unit/fuse board and more. By the end of the week, we’d marked out the rooms, doors and radiators up here ready for first fixing next week:

Removal of the Aga
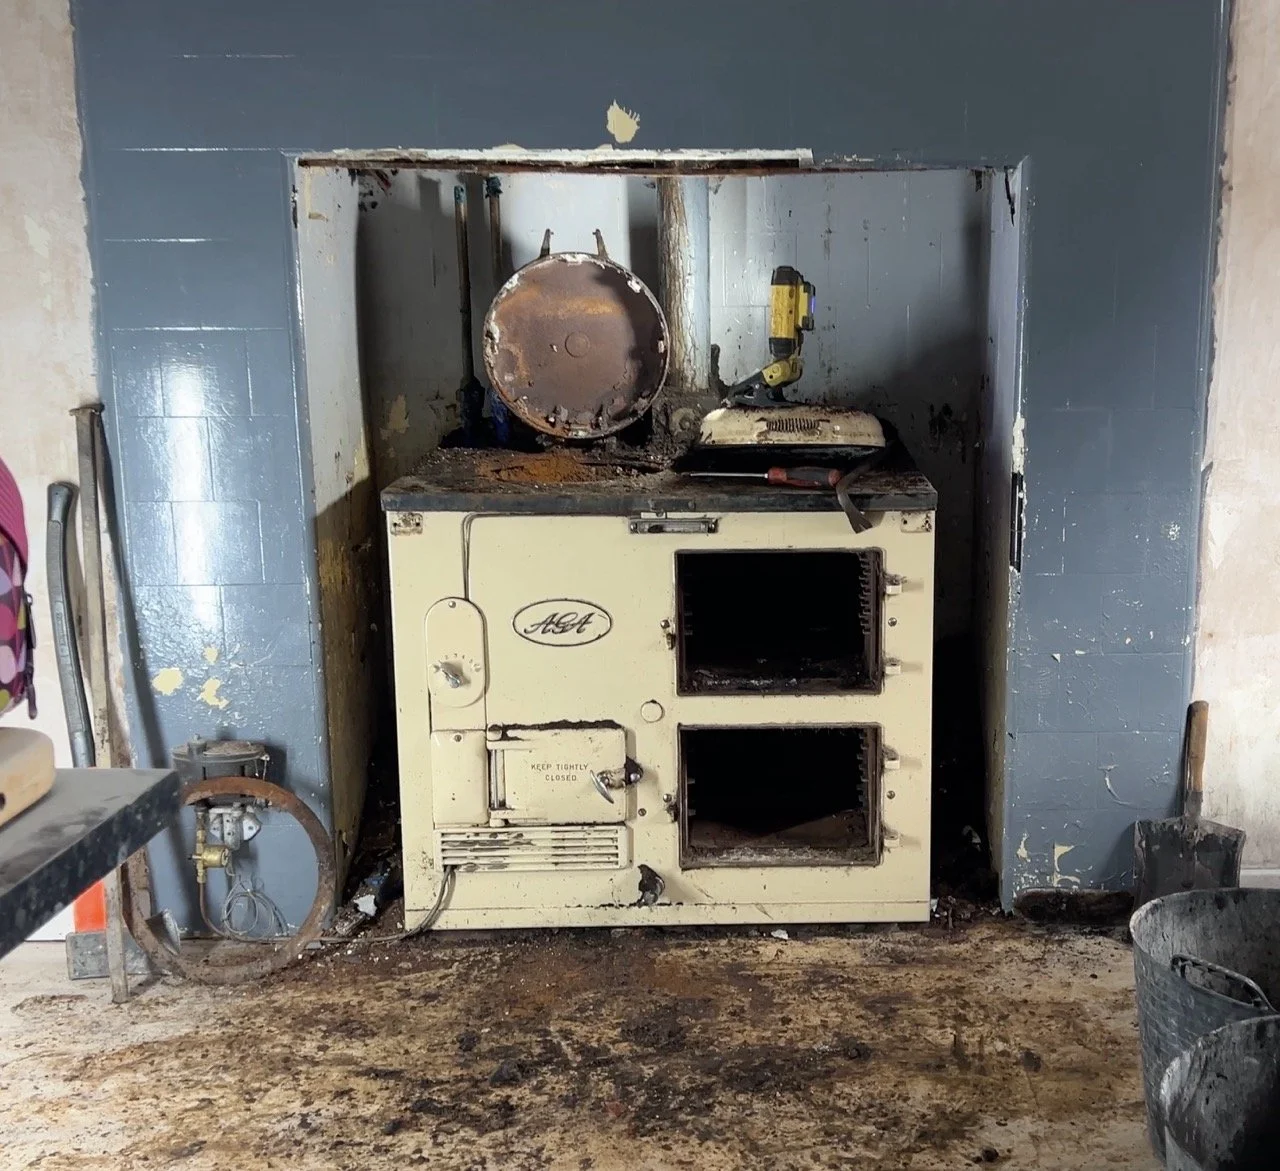
Everyone was oddly attached to Agatha. I’m not sure if that’s because she’s like a little time capsule of nostalgia, or if they like the idea of an Aga that is a coke convert running on blindingly expensive heating oil requiring £2k of refurbishment to run and then about a million pounts a year to actually use? Who knows!
The thing is, Agatha was DOA. Dead on arrival.
She was in such a bad way that it took the roofers 3 months to open the doors on the front. We knew she’d be bad inside as well, and genuinely I’m so glad that we didn’t try to fix her.
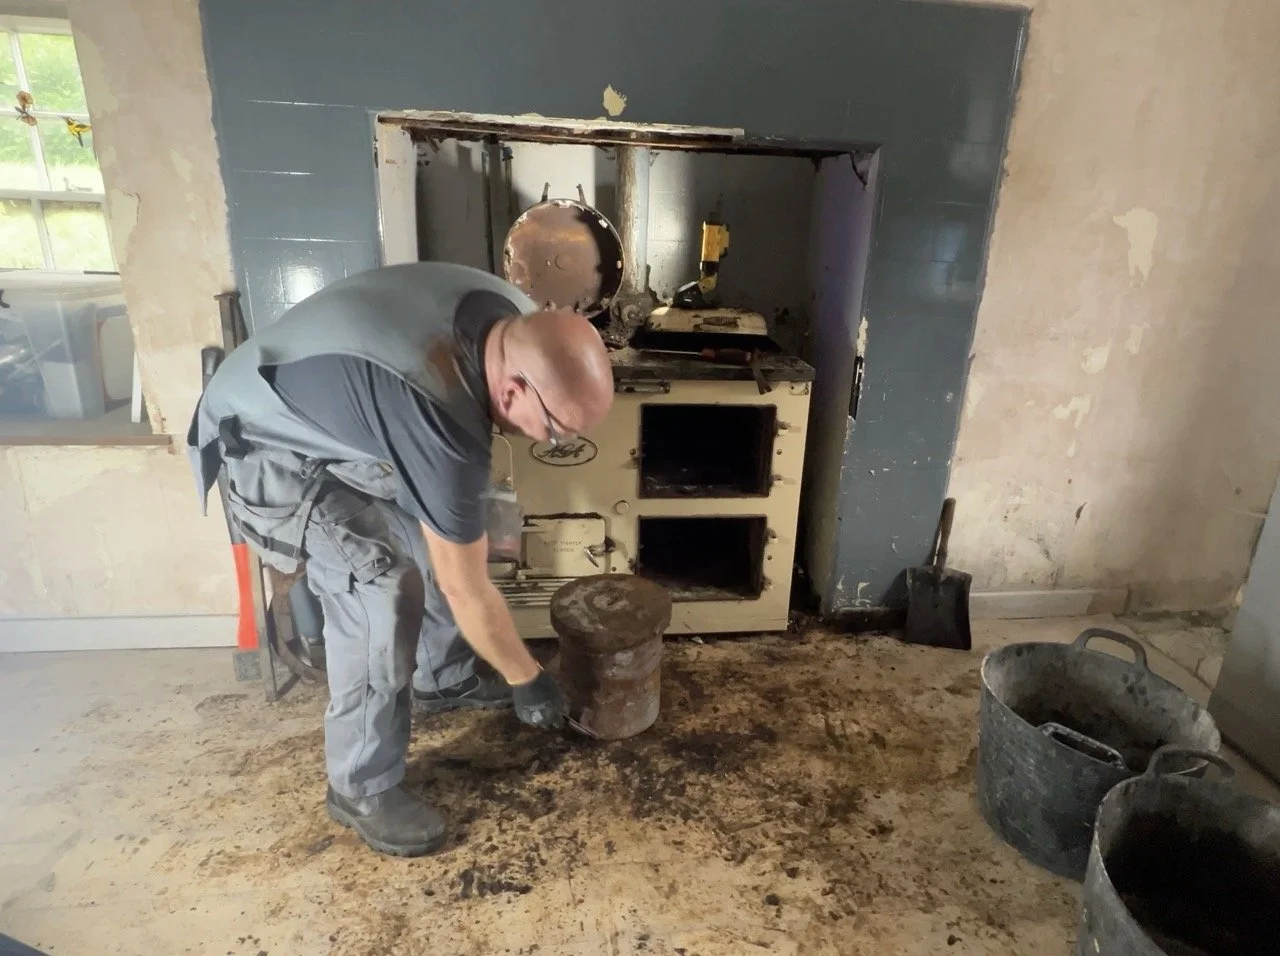
August week 2 was Agatha’s funeral. To remove the body from the building, we’d need to break her on site, and so that’s what the fireplace lads helped with on Thursday. Already well disconnected, in places for many years, she’d be pulled out into the kitchen area and dismantled. Each part of her was going to a different final resting place, so with care, she was stripped and then left the building.
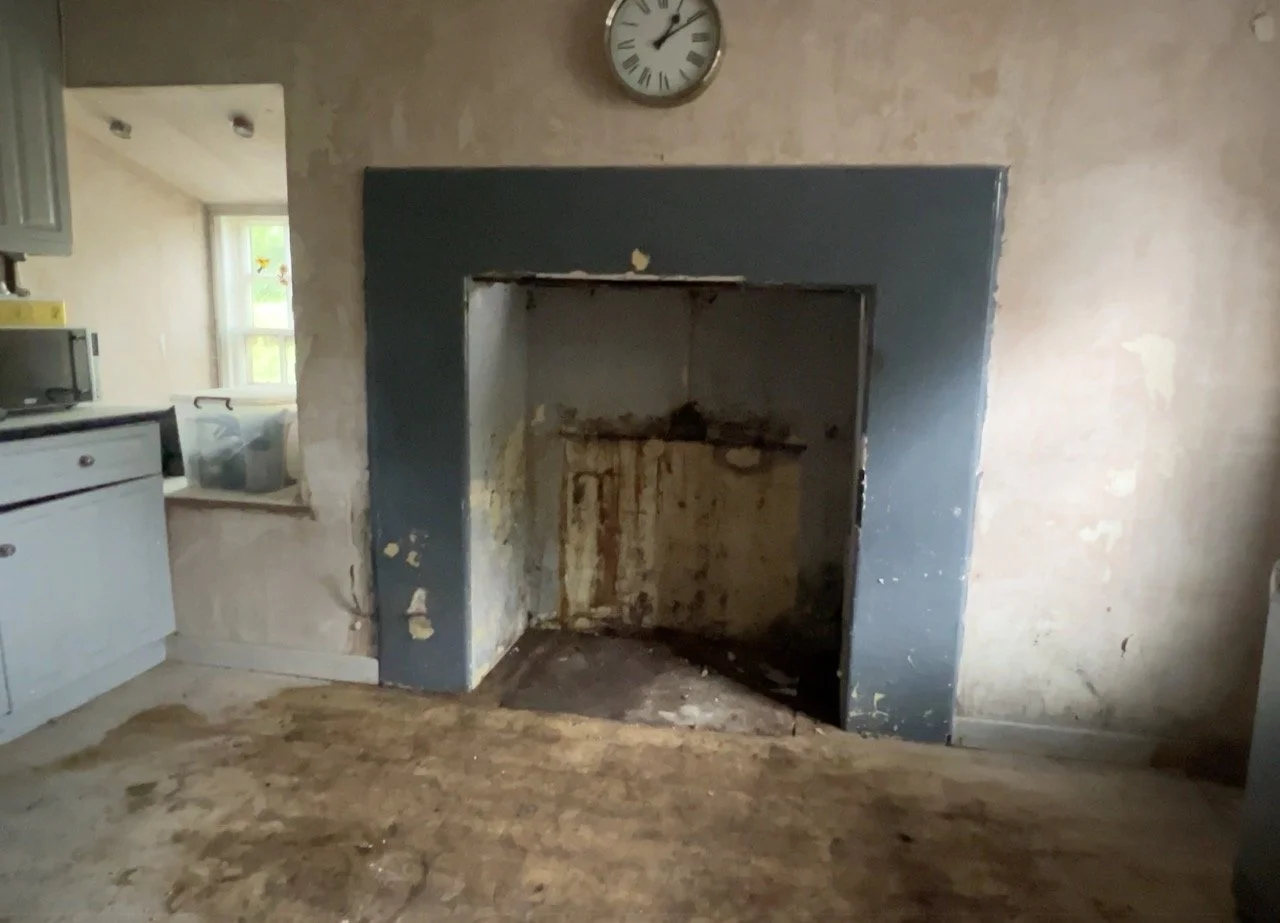
What’s going where Agatha was? A log burner!
“In a KITCHEN?!” I hear you cry… well, kind of. It’s a kitchen for now but in a few years this room, the darkest, coldest, dampest pocket of the north side of the house, will be a gigantic utility, boot, coat, dog and farm-y type space. Because Agatha needed to be out for some chimney work, and because she continued to stink of damp, mould and oil despite being cut off a while back, it was time for her to go now.
A nice neat little burner, which will be drowned by the opening there, will be popped in to heat the north chimney stack and gable wall in winter, whilst supplementing the internal heat in this uninsulated section for the forseeable future. It’s not for everyone, but it works for us!
My bits:
Nobody really needs to know this, but this week I’ve reworked the plans to on-the-fly decisions a number of times. Dan’s been in and decided where he wants a door to go, missing the fact that that move means the radiator won’t fit, or the socket will have to move. A decision to widen the upstairs hallway meant the radiator on the end of the cupboard there no longer fit, and so on. Thankfully, we’ve not purchased any of those bits yet, and aside from vetoing my upstairs lightswitch plan on the landing, Dan and I are mostly in agreement on all things.
Joiners, builders, plumbers and electricians all have different plans for their bits and not a single one has conventional notes on it. I have confirmation from all that it at least makes sense to the trades using it and that’s good enough for me!
Downstairs electrical plan shown here:
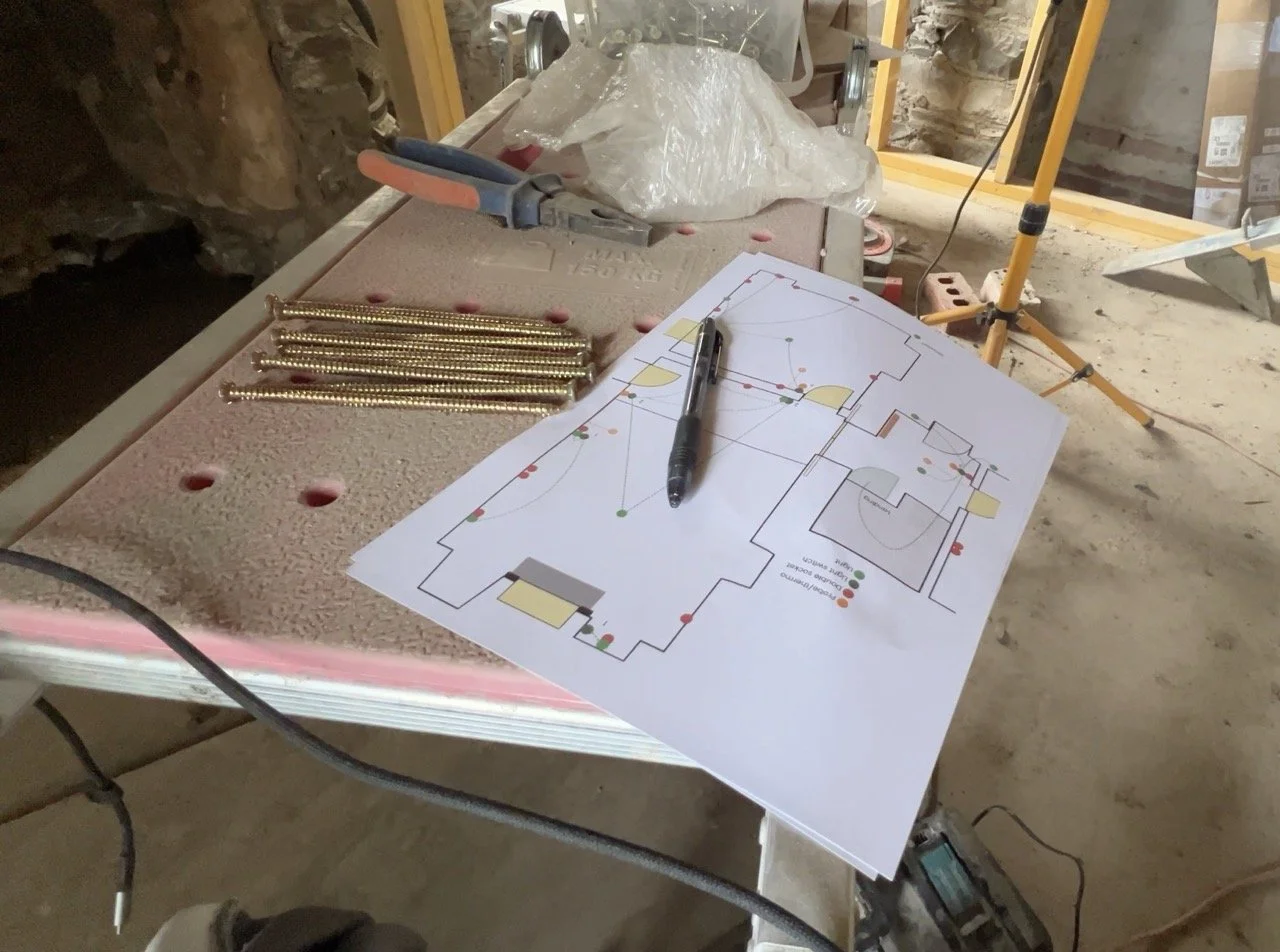
That’s it for Week 2!
August Week 3:
Again, there’s a lot to get through here! We’ll start on Sunday.
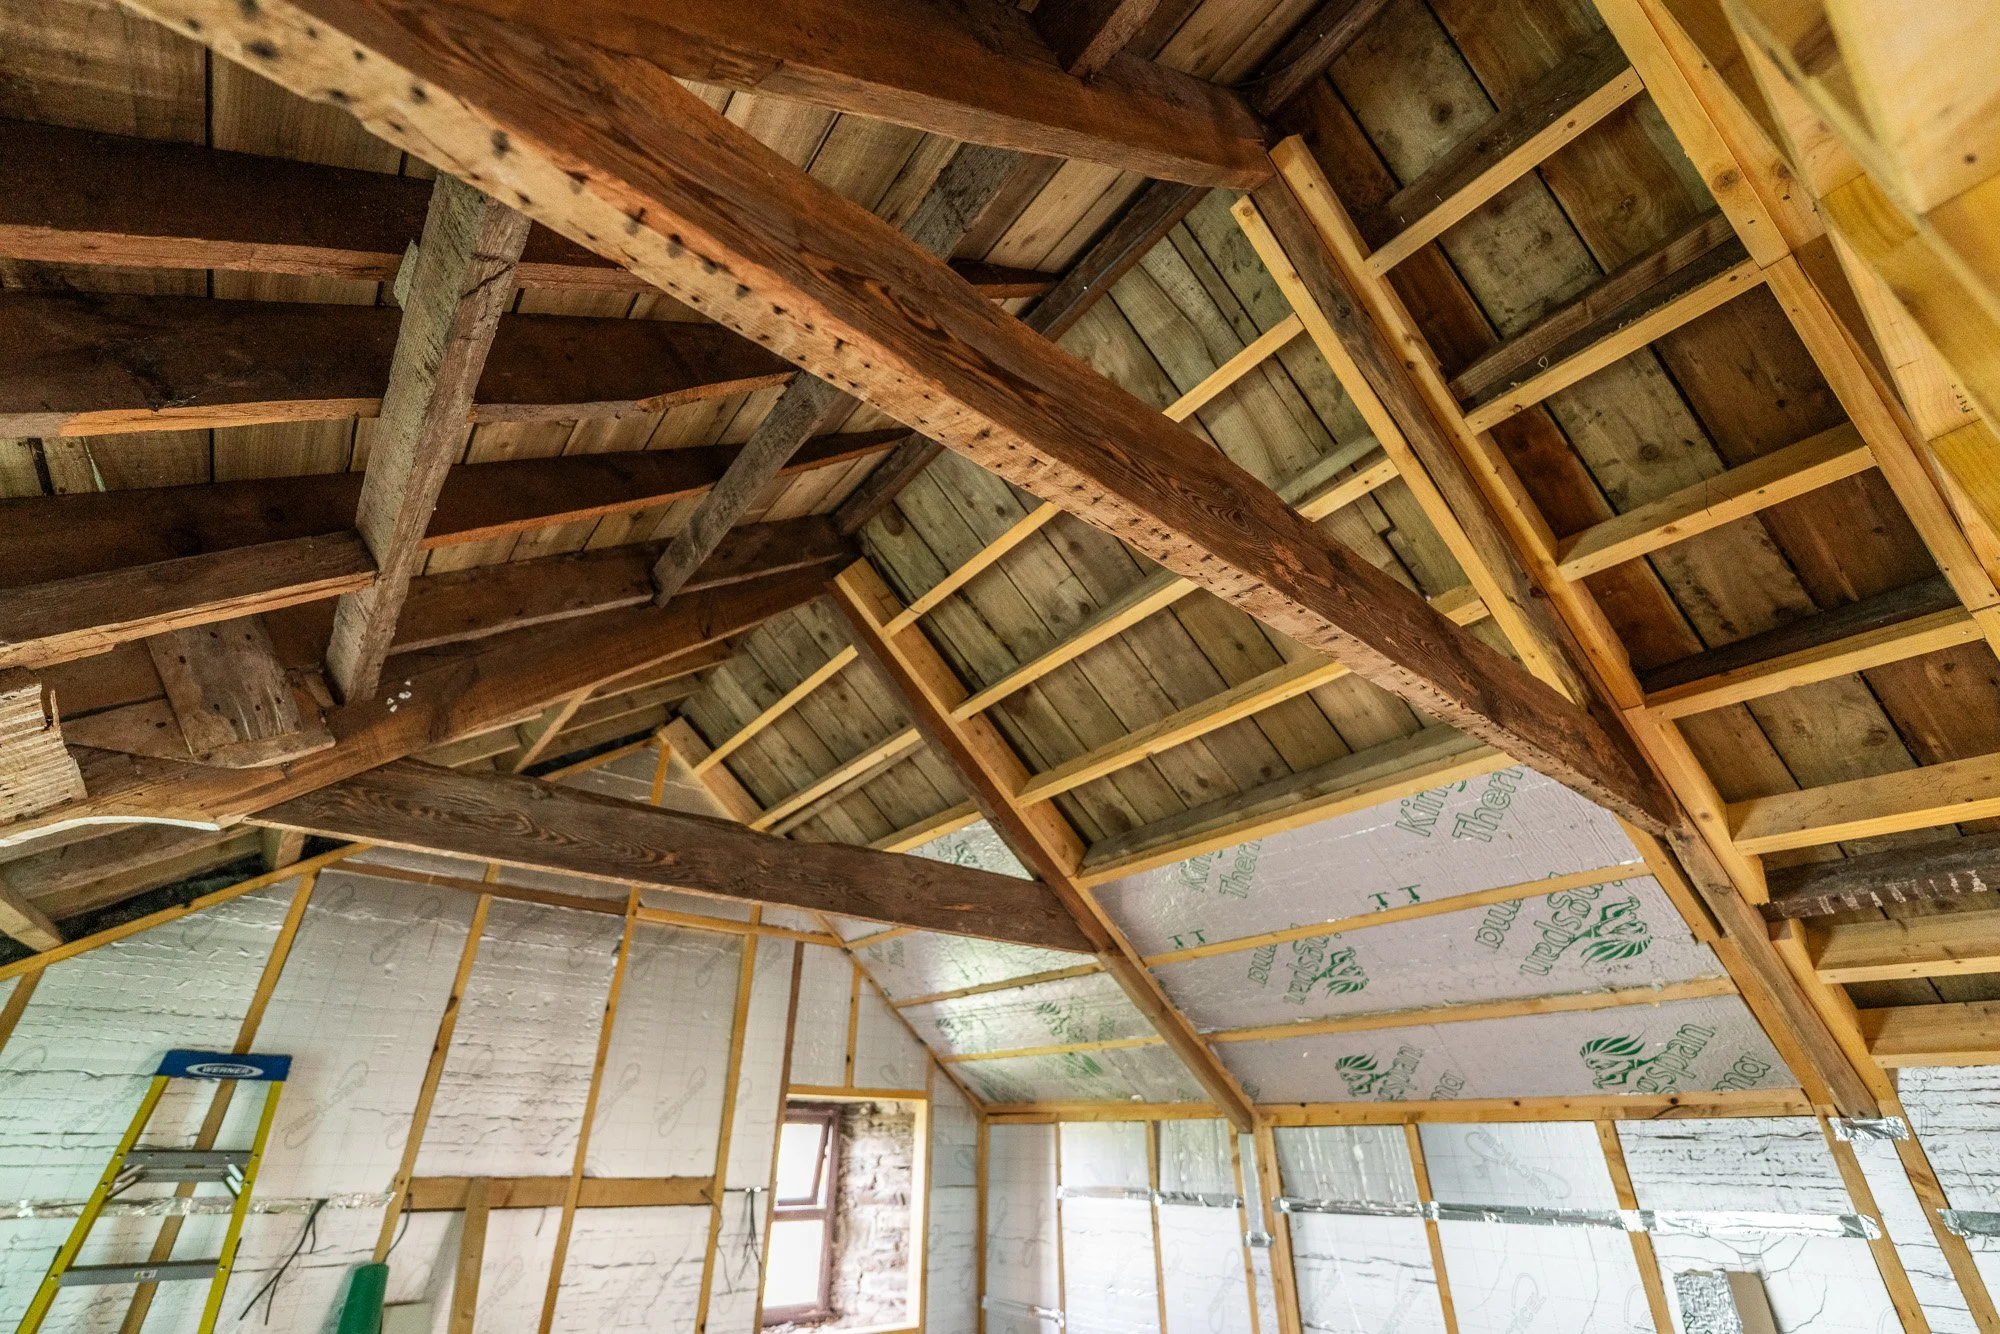
After I wrote the Week 2 update above, Dan headed out to do his pet project: sanding the beams. The trusses are going to stay visible in the final rooms upstairs with vaulted ceilings. However, the trusses were not visible previously and therefore, they were pretty rough. Dan wanted to get them sanded before the vault was insulated and boarded, and that’s exactly what he did.
He started by removing all the nails from the wood before sanding with large grit sandpaper, then followed on with finer grit paper too. The trusses are transformed, and they look amazing. Below are a couple of photos, the first shows a sanded beam (front) and the others as they were (minus nails). We’re keeping the holes and saw marks, and the roman numerals on every single one that are like a window to the 1800’s version of Ikea flat pack furniture.


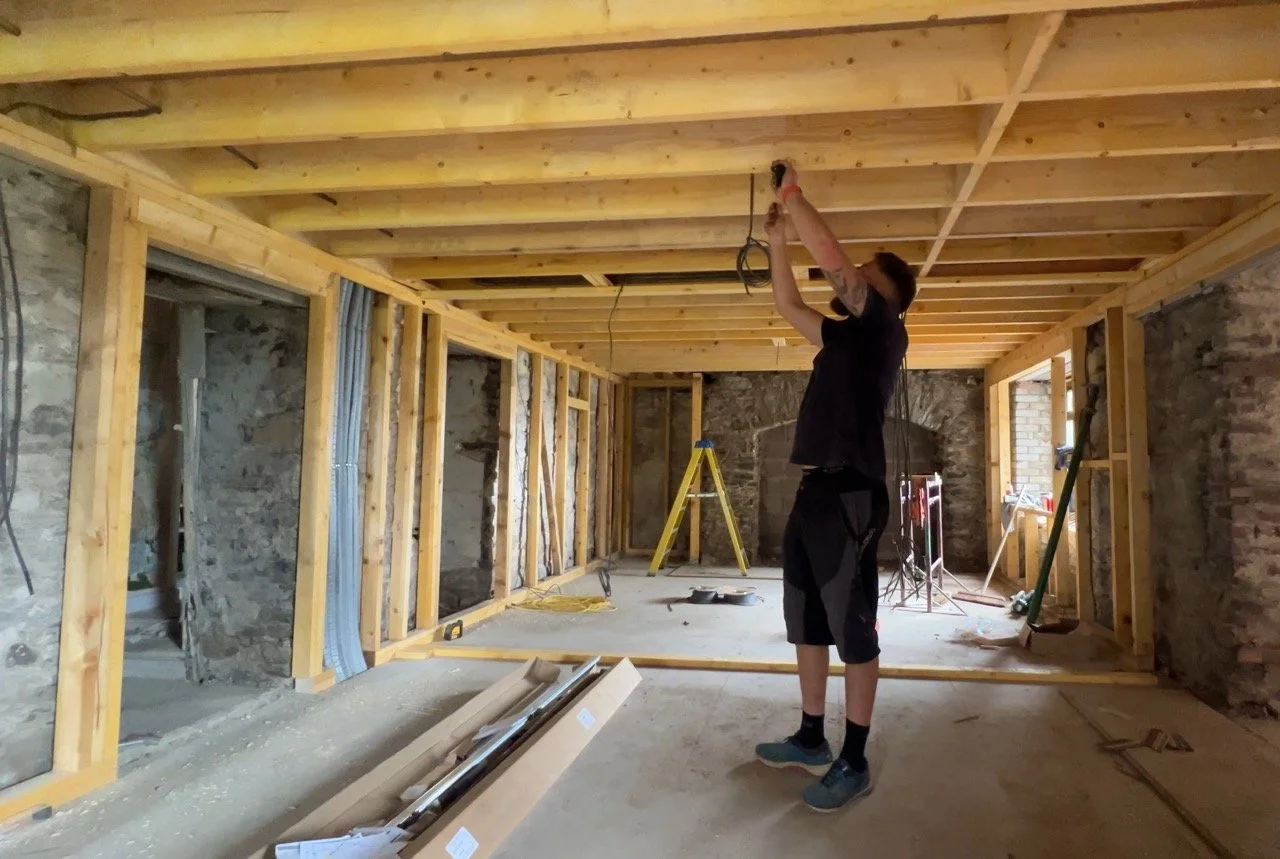
Monday was another framing day, along with the start of the electrical mission on the inside of the central section. The framing was primarily centred on upstairs, but downstairs had some mini moments around what the joiners are now calling our “media wall”.
Dan decided he wanted to be Kenny’s (the electricians) apprentice and so, with zero prior knowledge or skills, he was given tasks to help Kenny out. In all fairness, I’m not certain if Kenny actually wanted or needed the support, but he humoured Dan and Dan said he enjoyed it, so at least there’s that!
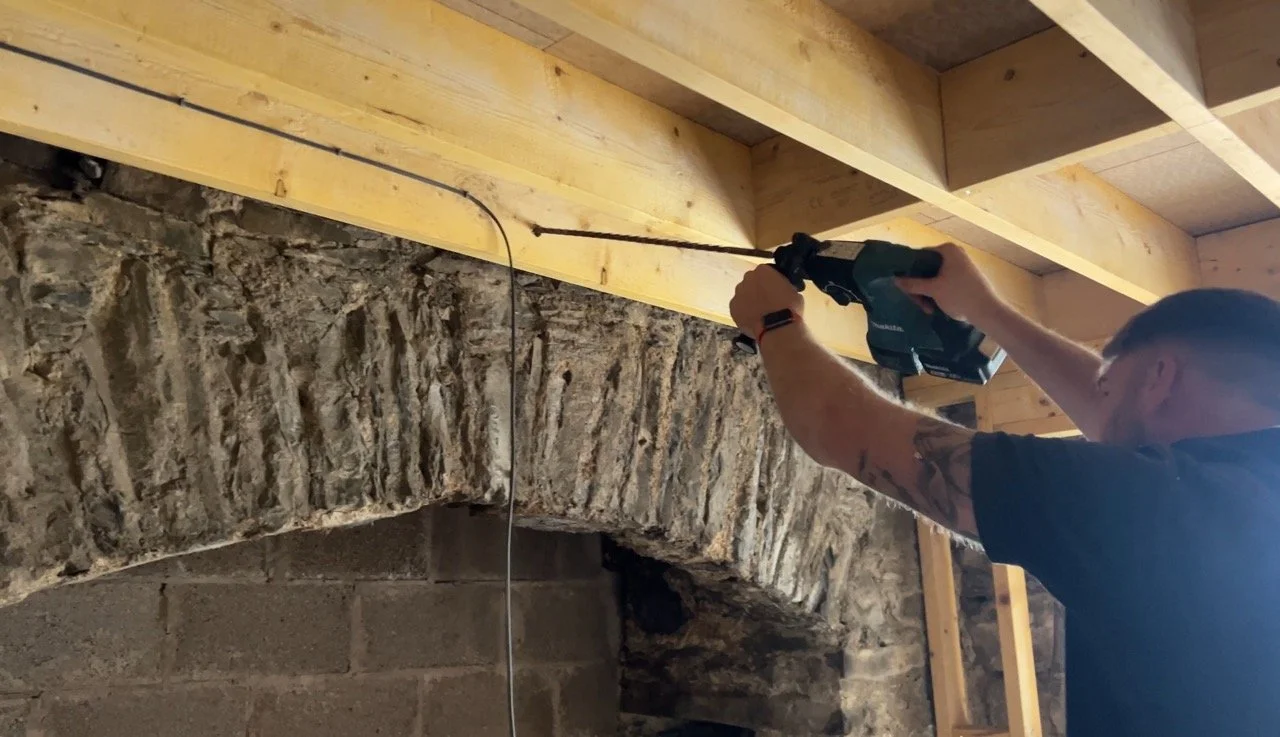
Because of Dan’s height, he was given the ceiling light positioning, along with marking all sockets and switches, plus drilling through stone. One of the main stone drilling missions, aside from external light positions, was the last-minute decision to put a light fixture inside the inglenook, so that it is illuminated from the inside out. The drill bit in use was enormous, and the angle achieved means the wiring will sit behind the internal inglenook ceiling/baffle:
Tuesday was plumbing day and electrical day 2.
Pipes wise, the plumbers focus was on:
Running new heating pipes to upstairs radiators
Running a new out and return to an additional manifold in the utilities cupboard for UFH in the master bathroom
Reconnecting the old existing pipework in the north and south blocks to their middle section join
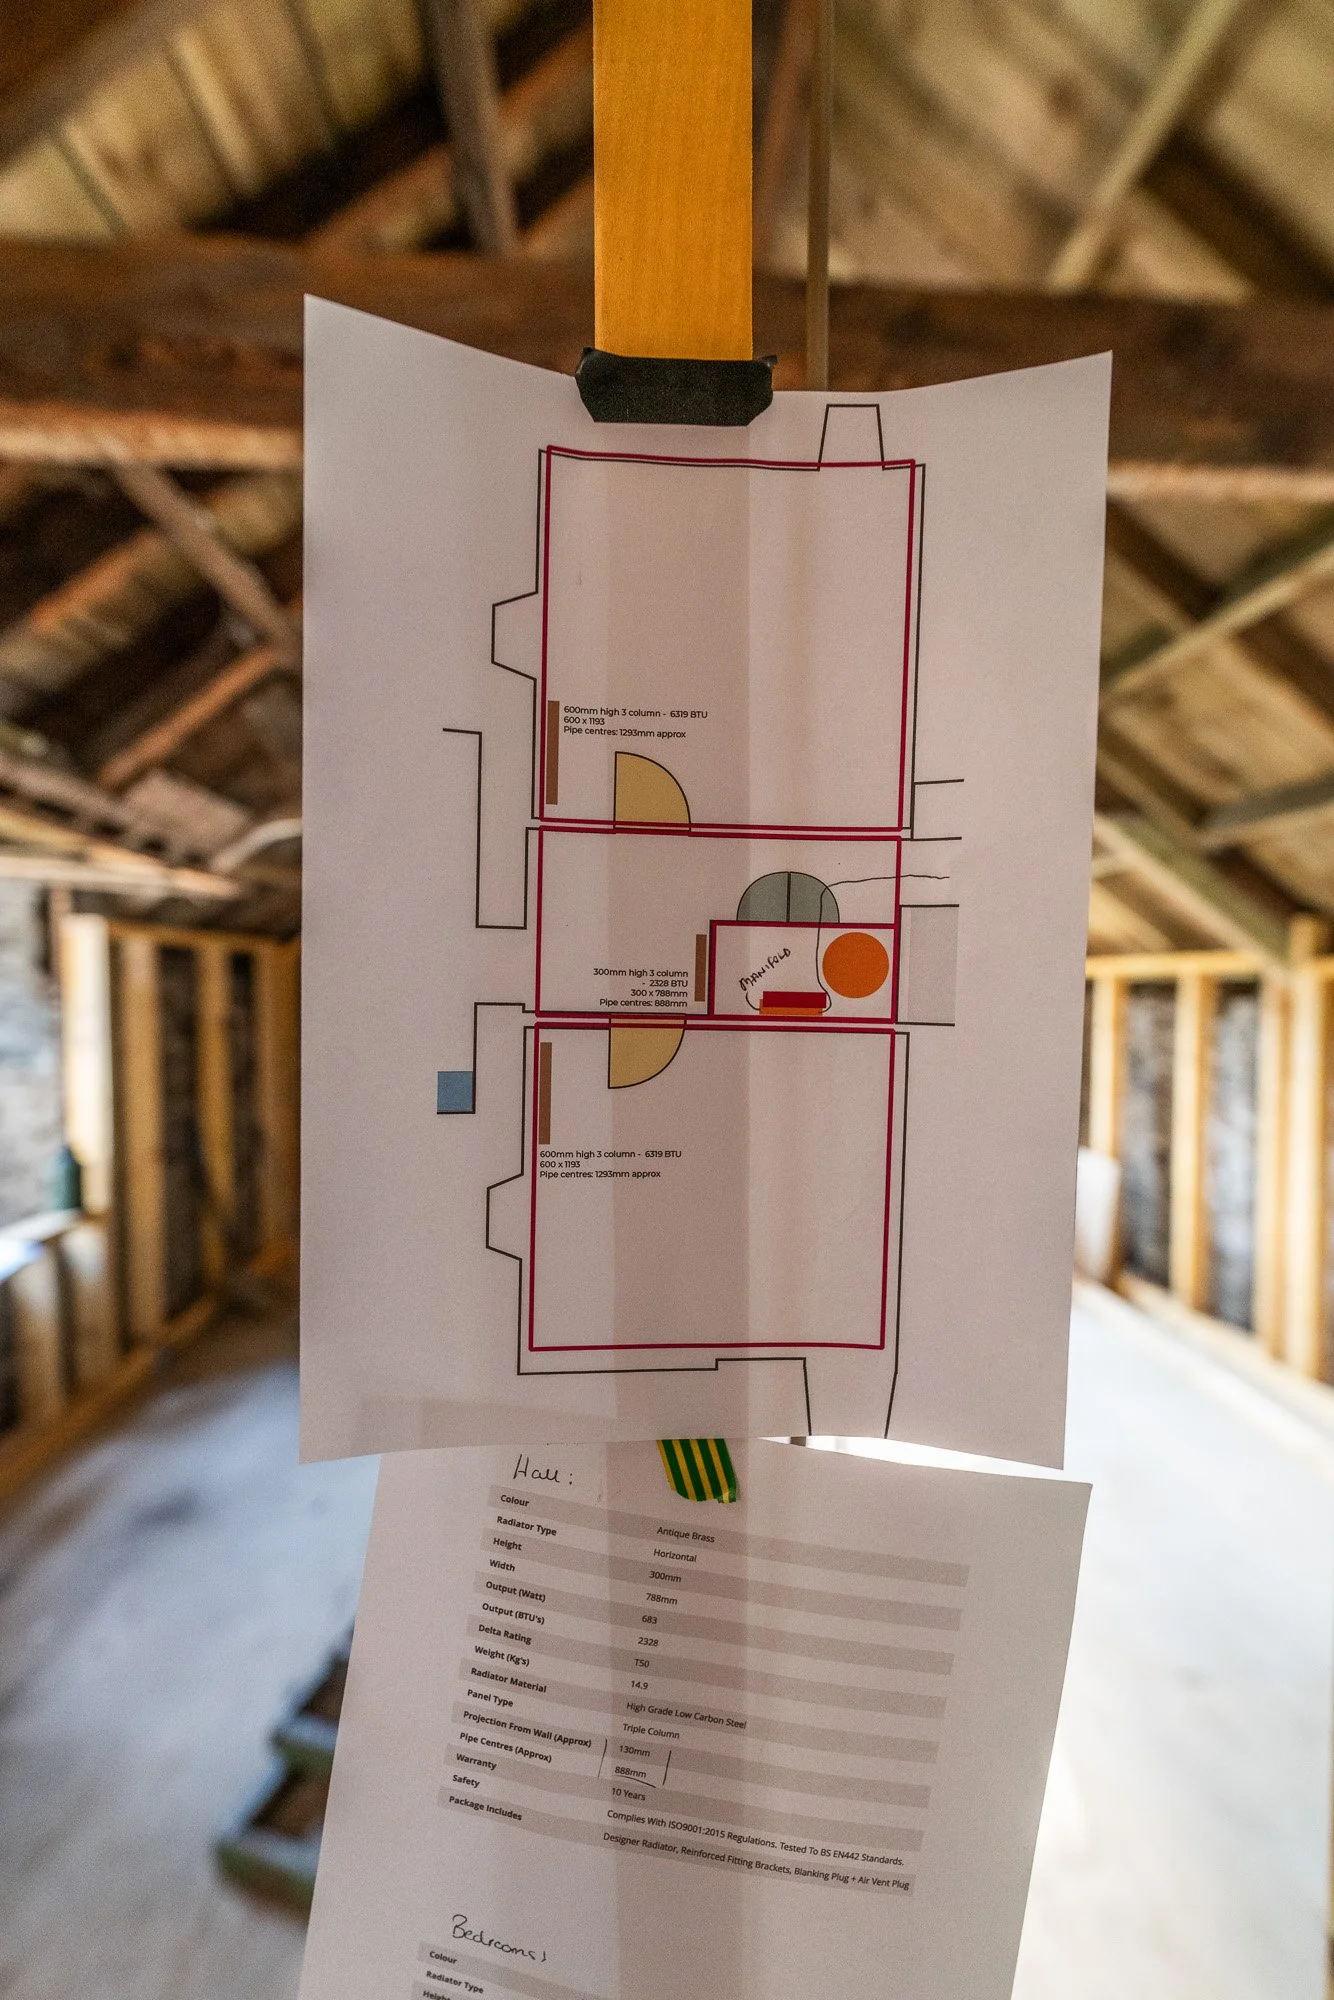
Of course, the plumbers had their own plan/map, with annotations for radiators, complete with specs, distances from walls and pipe centres. Before purchasing the rads, I really wanted to check the plan, sizes and valves just to make sure I wasn’t making a major mistake.
The jury is still out on whether I’ll absolutely hate the placement. Decisions were made over useful vs useless wall space, window dressings and their normal usage, and, to a certain extent, distance from the main heating hub in the utilities cupboard. Shorter is faster and cheaper.
The plumbers cracked on and got it all wrapped up in a single day - she’s ready to go!


Thankfully, the go ahead for procurement of radiator bits was achieved from all parties, including Dan – who oddly said to go and get the pricey valves when I had balked at the bill… I think he’s sick 🧐
Wednesday rolled around and it was genuine go-time now for the final push to be boarded up and ready for plaster.
I feel like this is maybe an important time to cover exactly what the insulation plan is in the middle section. It’s kind of our “test block” to see if this system works.
Insulating a Solid Wall Building
(I’ll do a whole post about this separately at some point, but for now, I’ll summarise)
The situation:
We’ve already gone against conventional building advice by:
NOT using external insulation on the building, which frankly seems ridiculous considering this is not a brick solid wall building, and therefore you’ve got 2-3 feet of absolutely solid stone before you even hit outside and any insulation there, and,
NOT putting a concrete/screed subfloor in downstairs, instead retaining (replacing) the suspended timber floor to allow the air bricks to do their job and handle ground level moisture, with insulation above that, below the floor boards.
However, we’re also going against conservationist advice too.
Oddly enough, our test block of the middle section will be “the other” insulation option; a “house within a house”.
This is the same internal method as was used in our previous home, which was solid wall brick from the 1850’s. Although it’s fairly controversial – because of the amount of house that gets removed – we also know that it does work.
To a point.
The point it fails is inside the internal skin, on any areas that are not given the same treatment, hence the worry over the inglenook because she’s not going to be insulated, rendered, painted or anything. She’s going to be a moisture hot spot, and the single largest point of failure with our entire plan. But that’s a me problem, so we’ll leave it there for now.
So, the third option, aside from externally insulating with modern materials, or using heritage and traditional breathable materials to naturally handle moisture, is to insulate a stud frame built entirely inside the house. The subfloor, ground floor rooms, first floor joists and first floor do not, at any point, make contact with the external walls of the central block.
If it doesn’t work well, or well enough, we’ll go with traditional methods in the other two wings and chalk it up to experience.
Again, we’ve lived in a house within an house, and it was fine. So we’ll see!
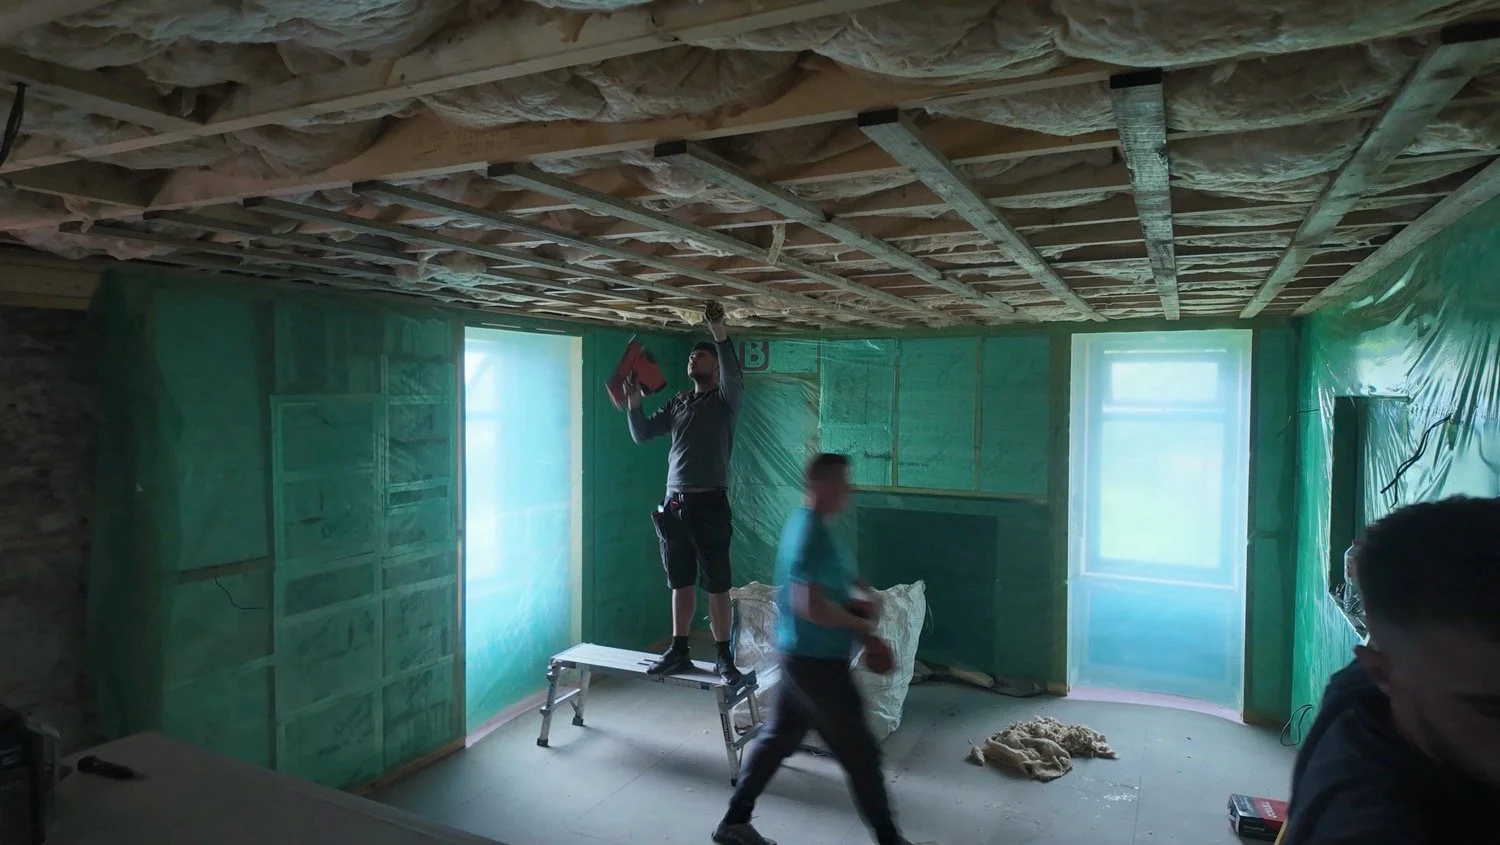
The steps:
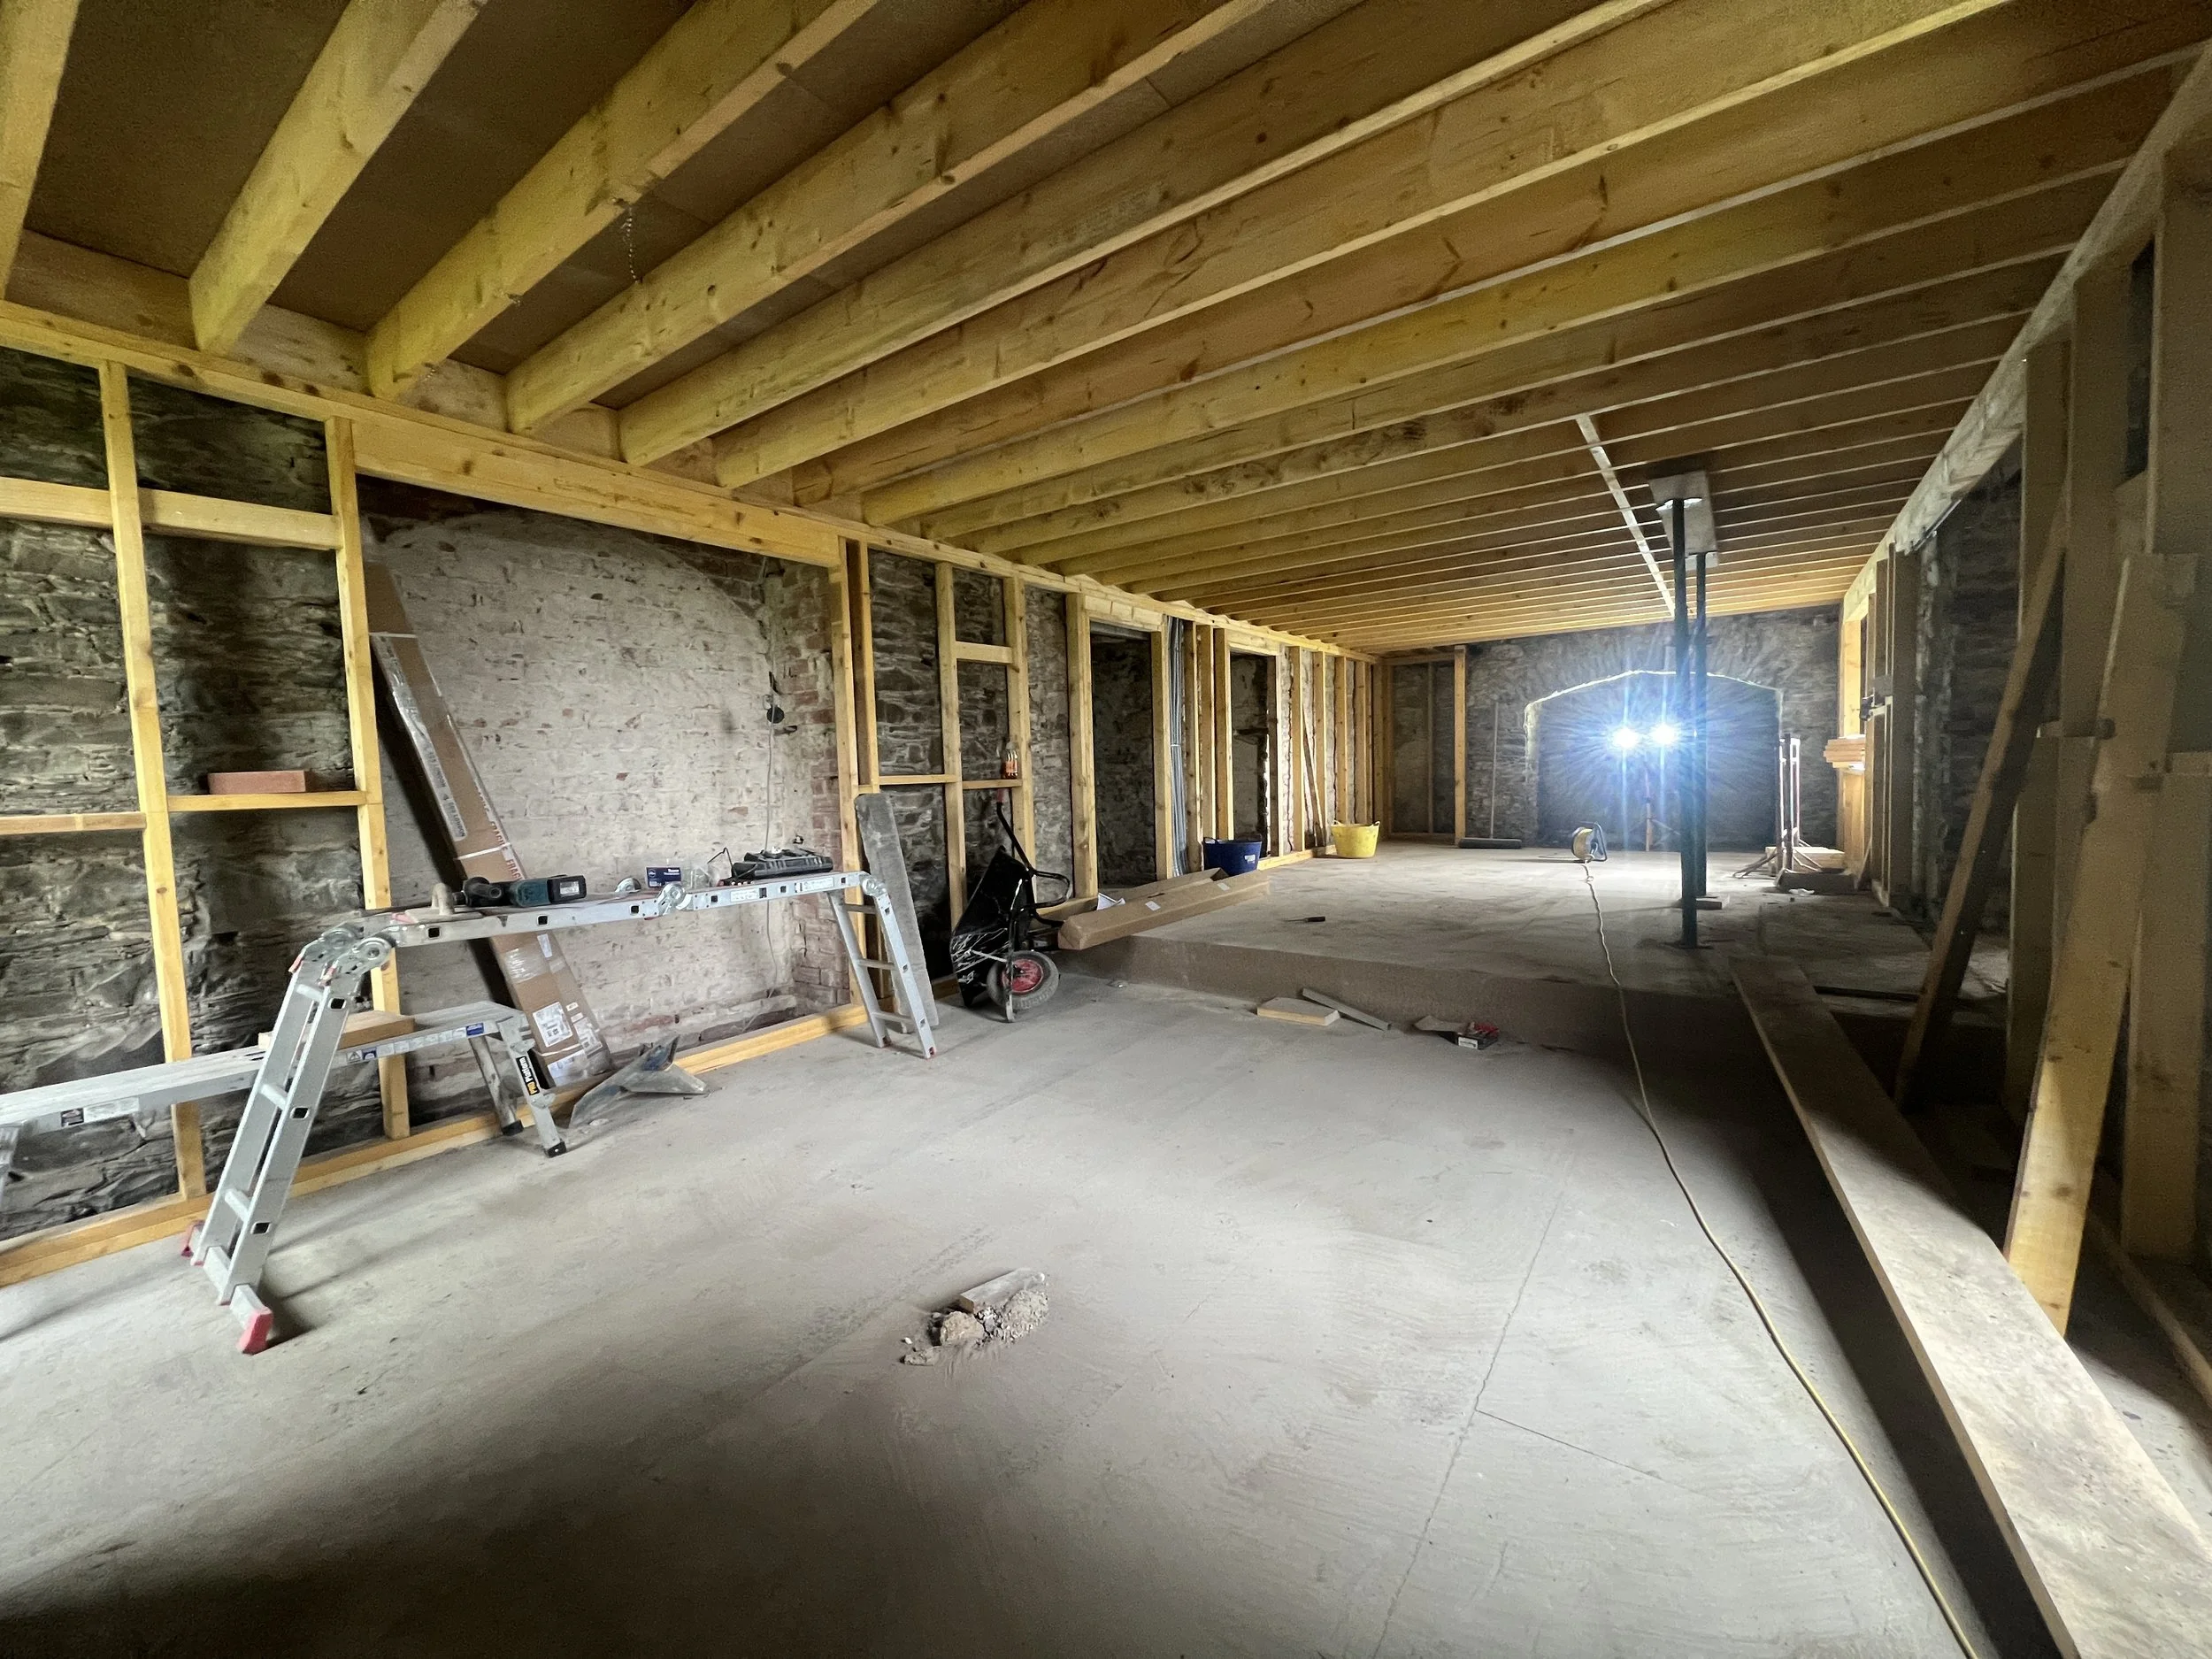
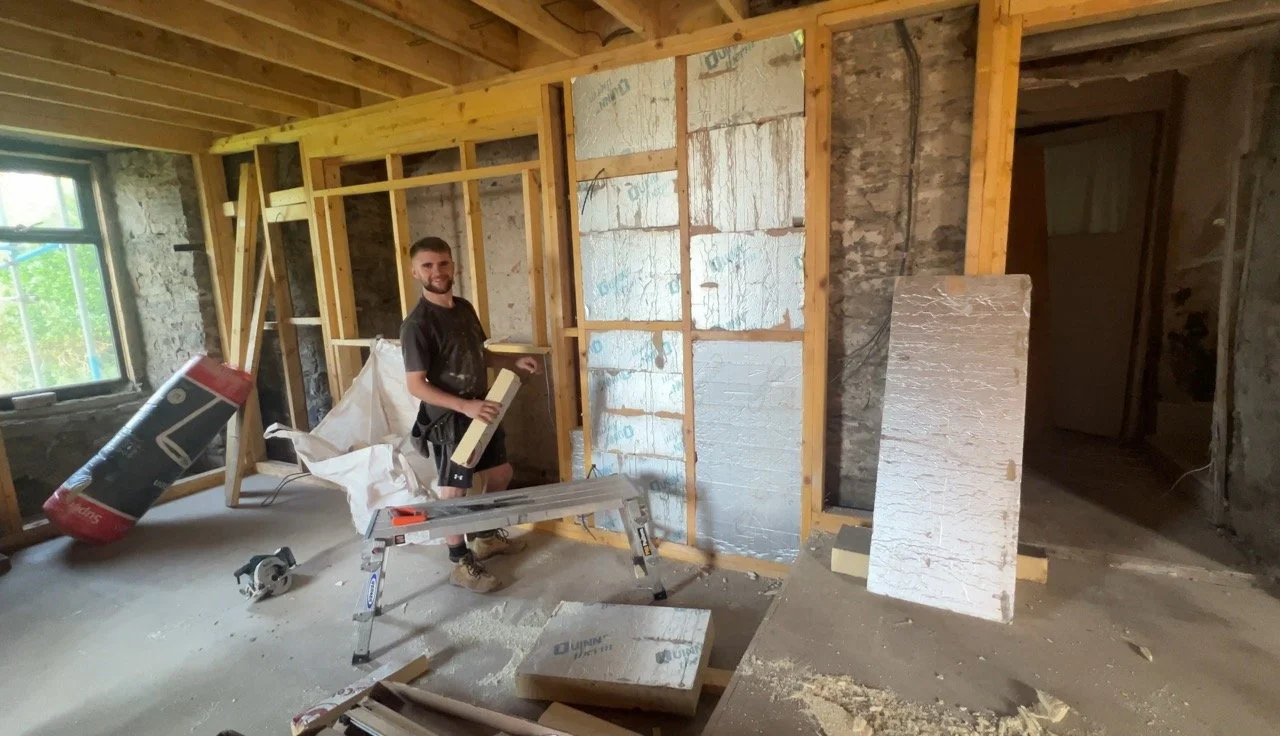
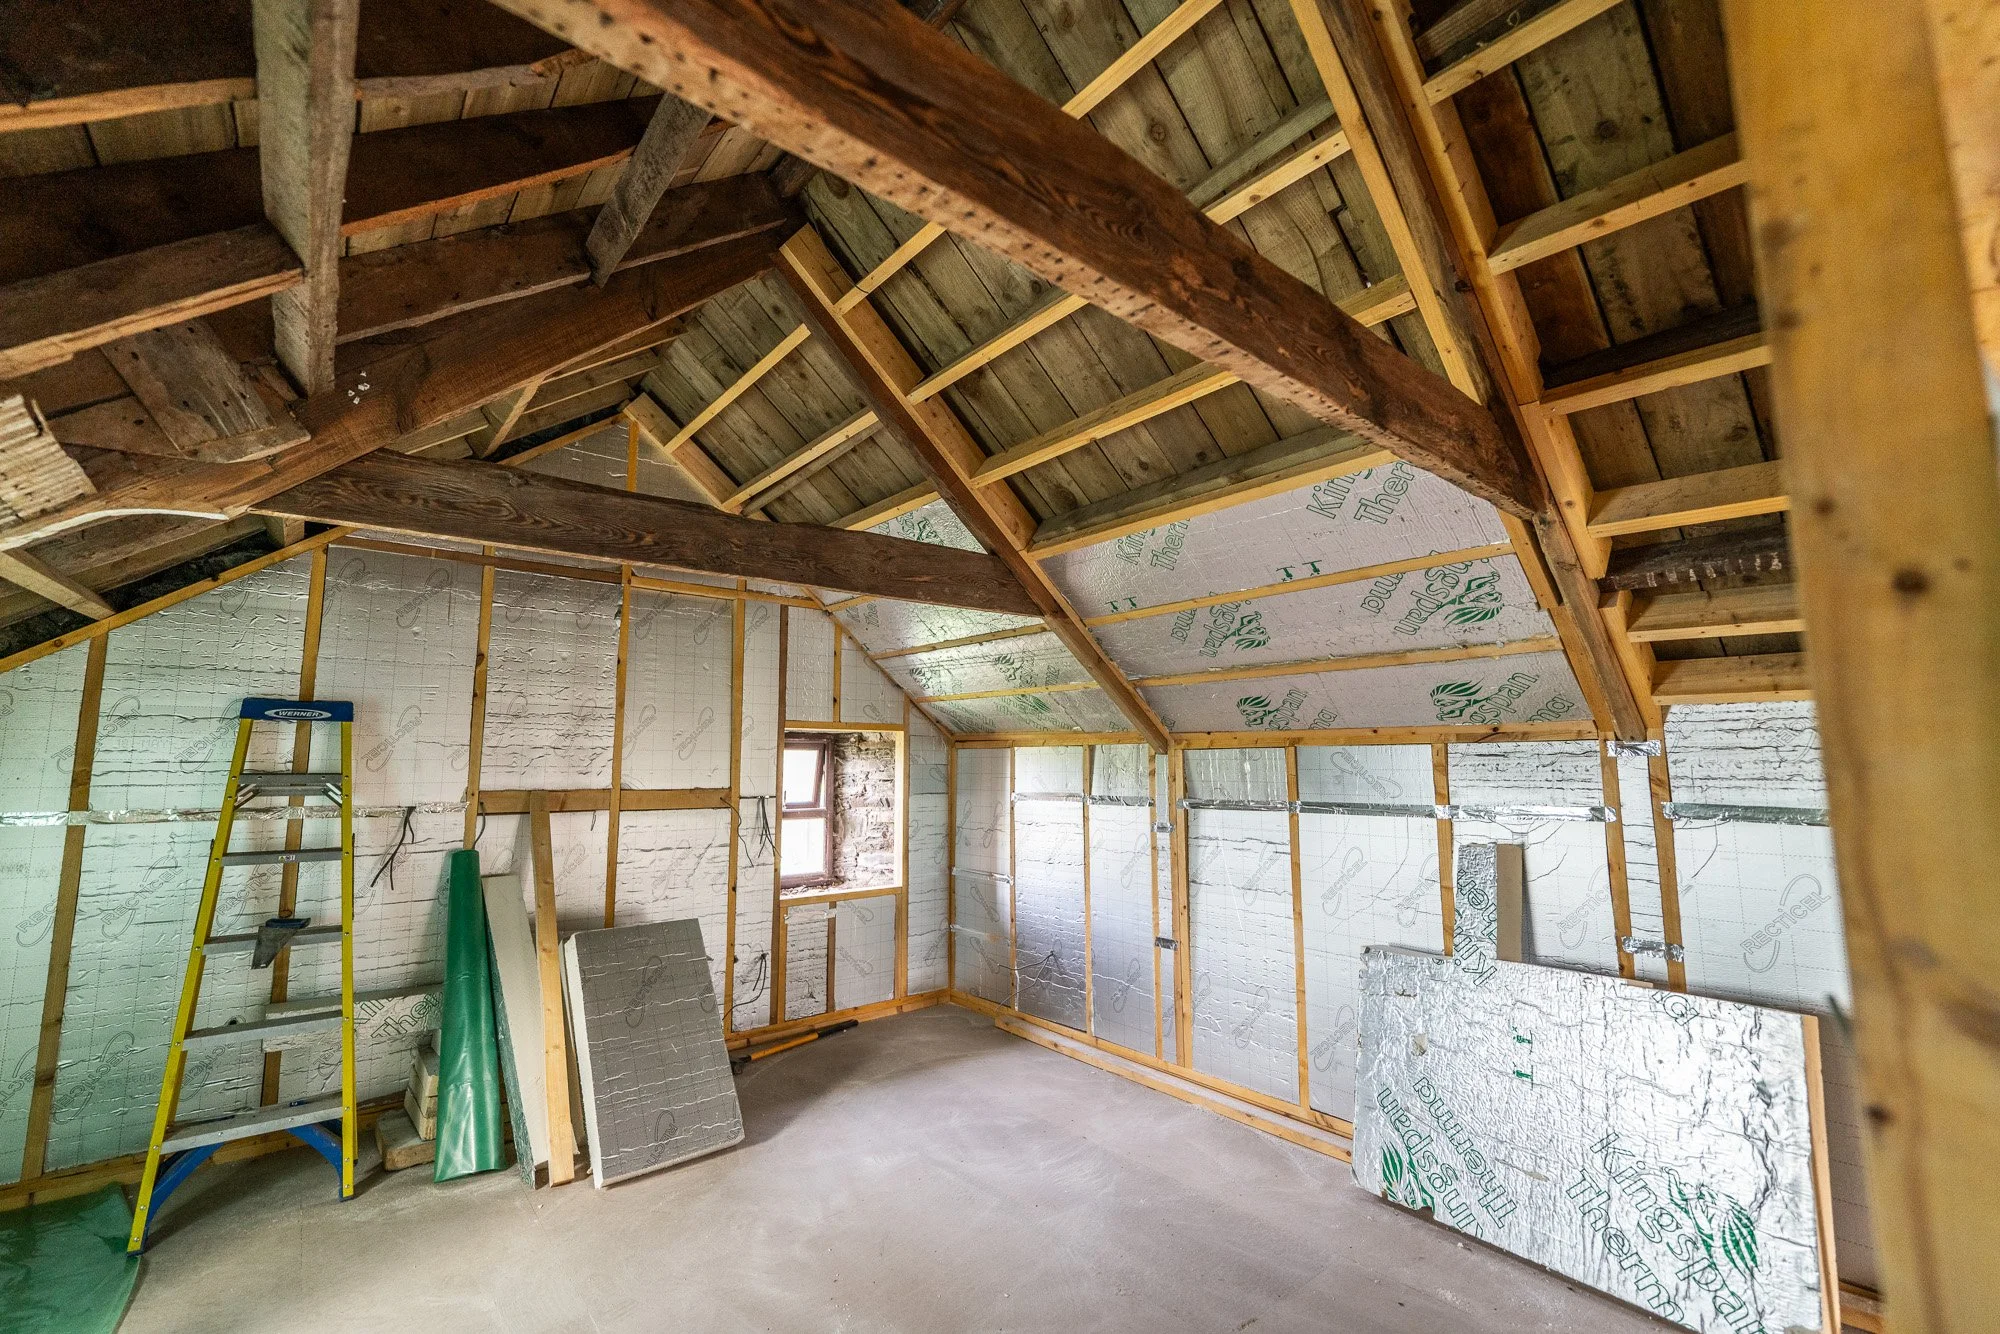
The stud work, by the morning of Wednesday, was all built:


This was, therefore, the commencement of the insulation mission. Josh started in the living room and we’ve gone with 100mm solid foil backed insulation (PIR/Kingspan). Again, it won’t be in contact with the external walls, in any way.
The additional point to note here is that the insulation could have been thicker. There’s a good reason to stop at 100mm, instead of 130mm, or 150mm, or even 200mm, and it isn’t about money. Although thicker insulation is indeed more expensive, and it also takes up more of the internal space too, neither were considerations for us.
100mm PIR is the absolute top of where I felt comfortable leaving the internal temperature of the external walls. It’s probably ever so slightly too thick. I don’t mind a bit of heat getting to the stone wall, it helps with any moisture evaporation and it also helps prolong the lifespan of the external structure.
You absolutely do not want moisture sitting on the inside of the external wall, with zero warmth, because if the dew point hits there in winter, the water can freeze and break down the lime mortar holding the building together. It can also develop into mould without ventilation, so - yep you guessed it - there’s some of that too.
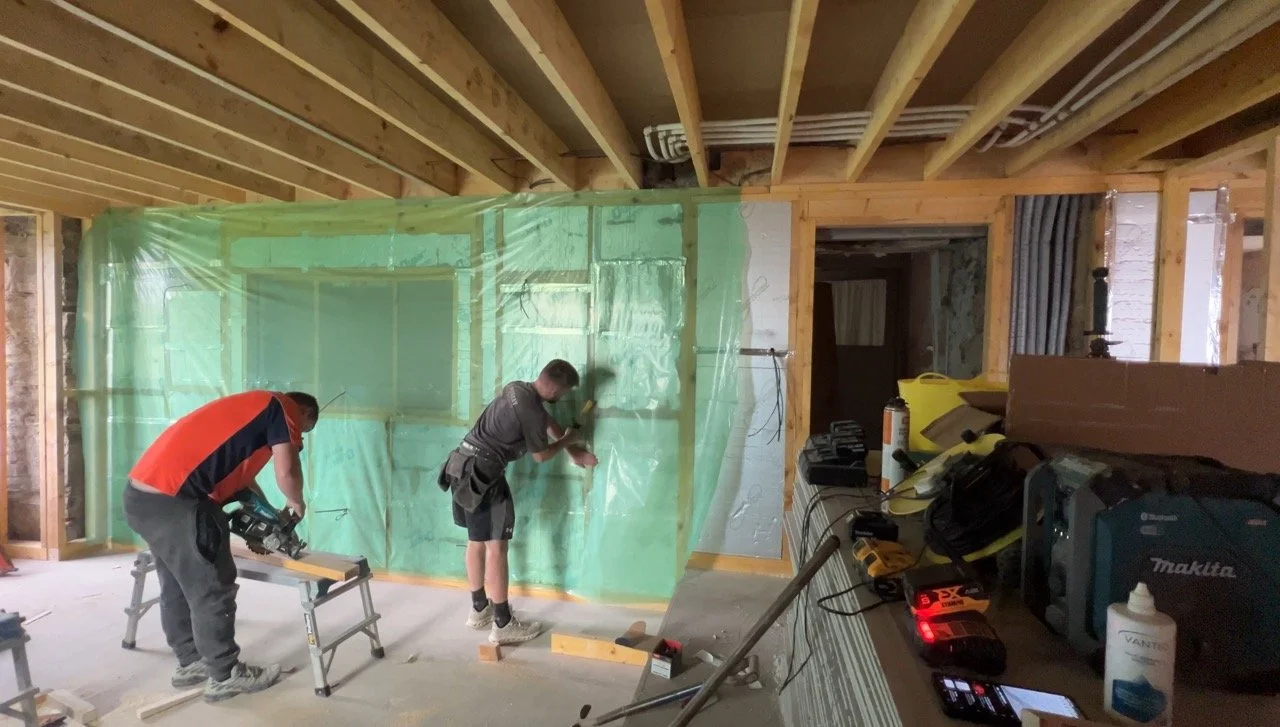
Each board is cut and push fit into the stud work, with any joints taped.
When the insulation is all in situ, the external walls get wrapped like a present. In true building-regs-abiding-form, the method of application here is to put a vapour barrier on the warm side of the insulation (in the past, it was put behind the insulation).
There is logic to this approach:
The vapour barrier stops condensation and water vapour from the internal rooms (breathing, cooking, cleaning, clothes drying, mopping etc) from getting into the insulation, hitting its dew point and making it wet, mouldy, cold and useless.
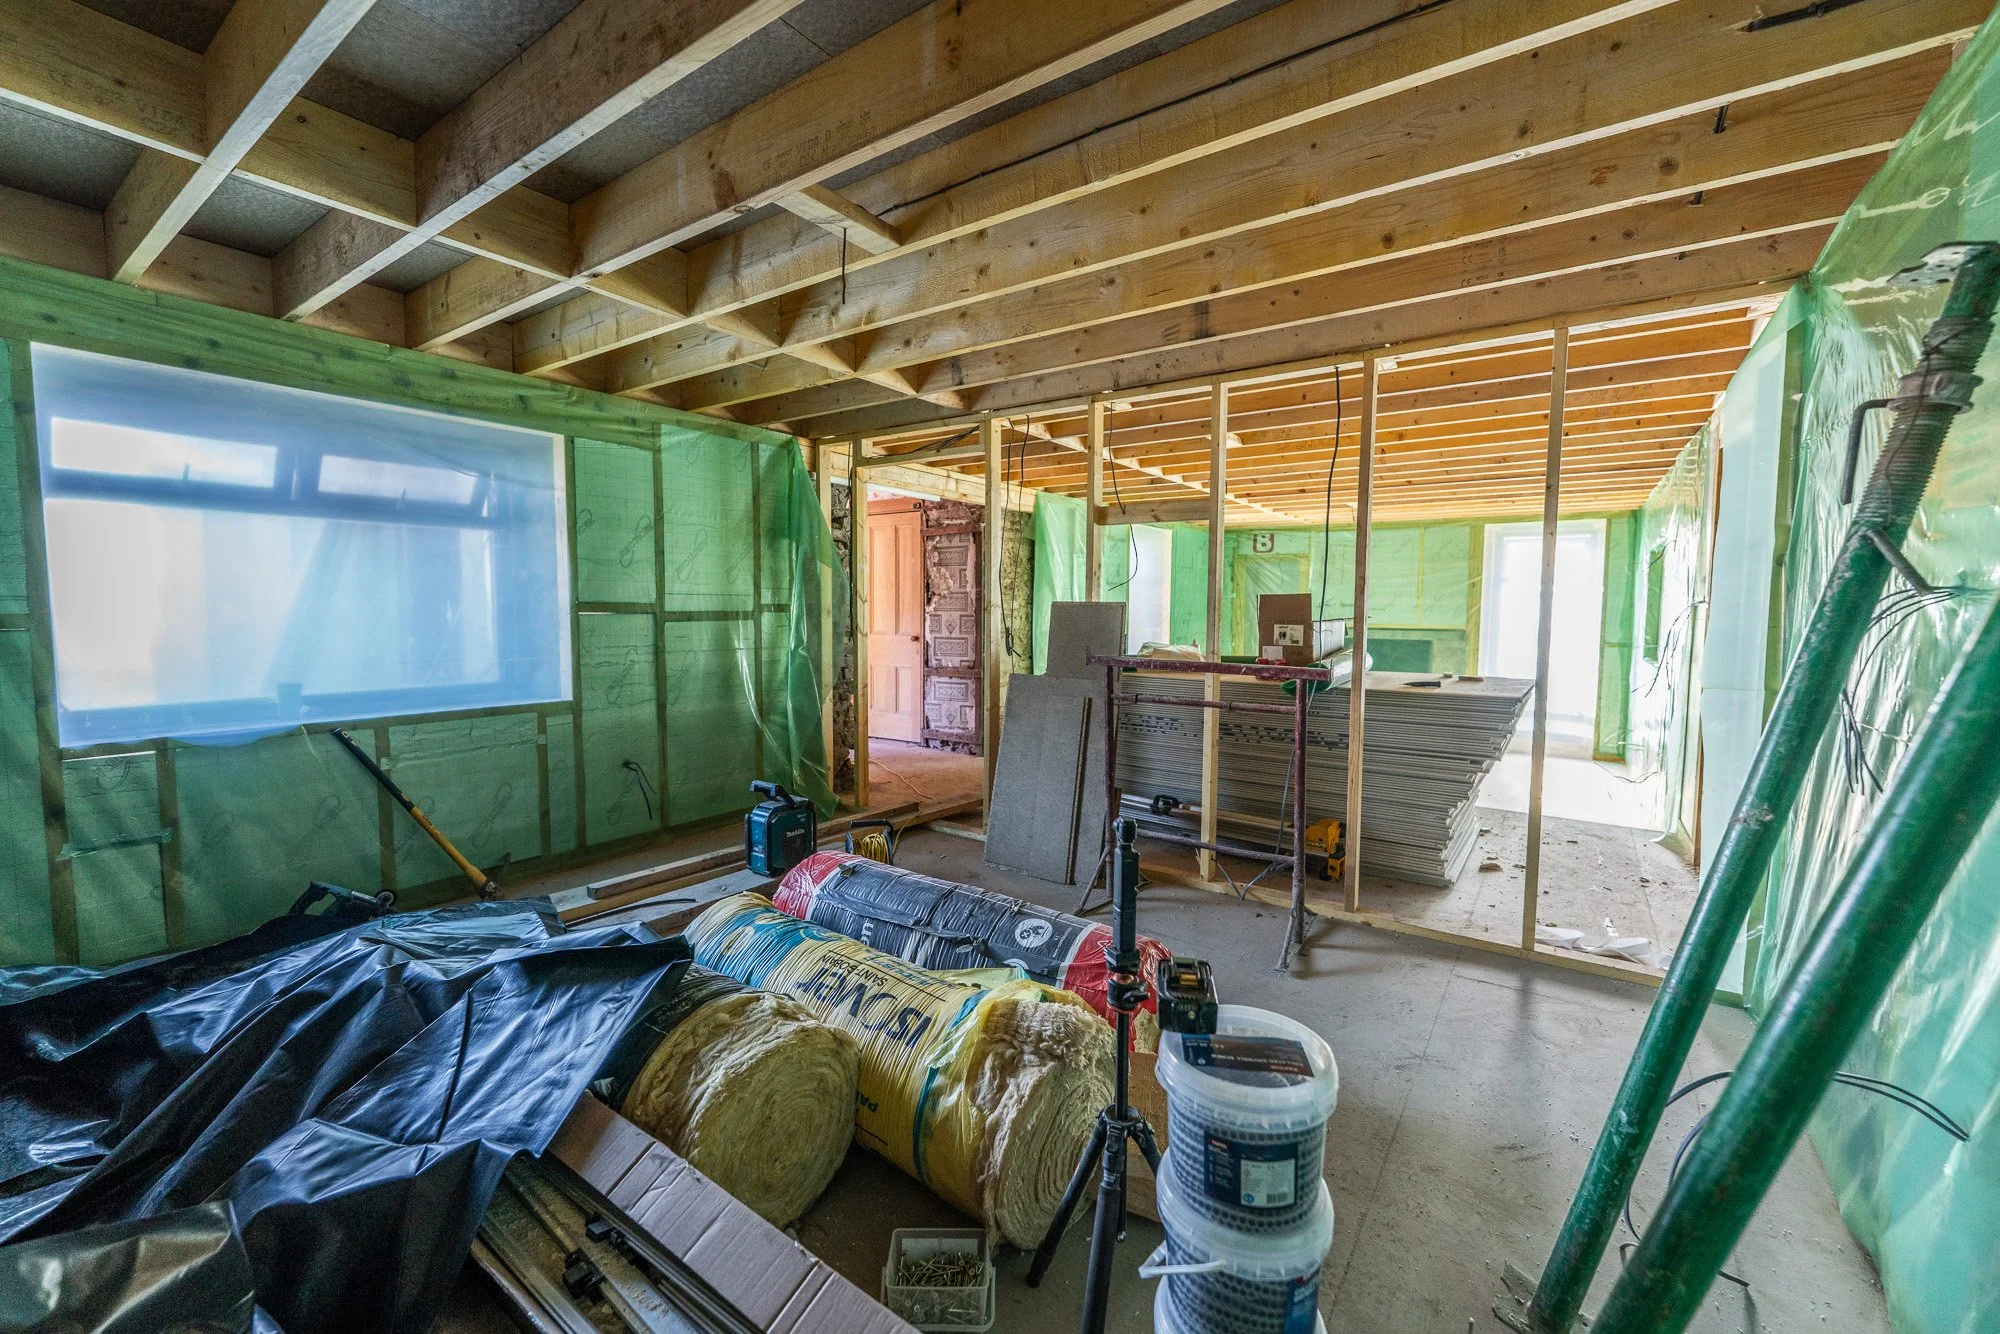
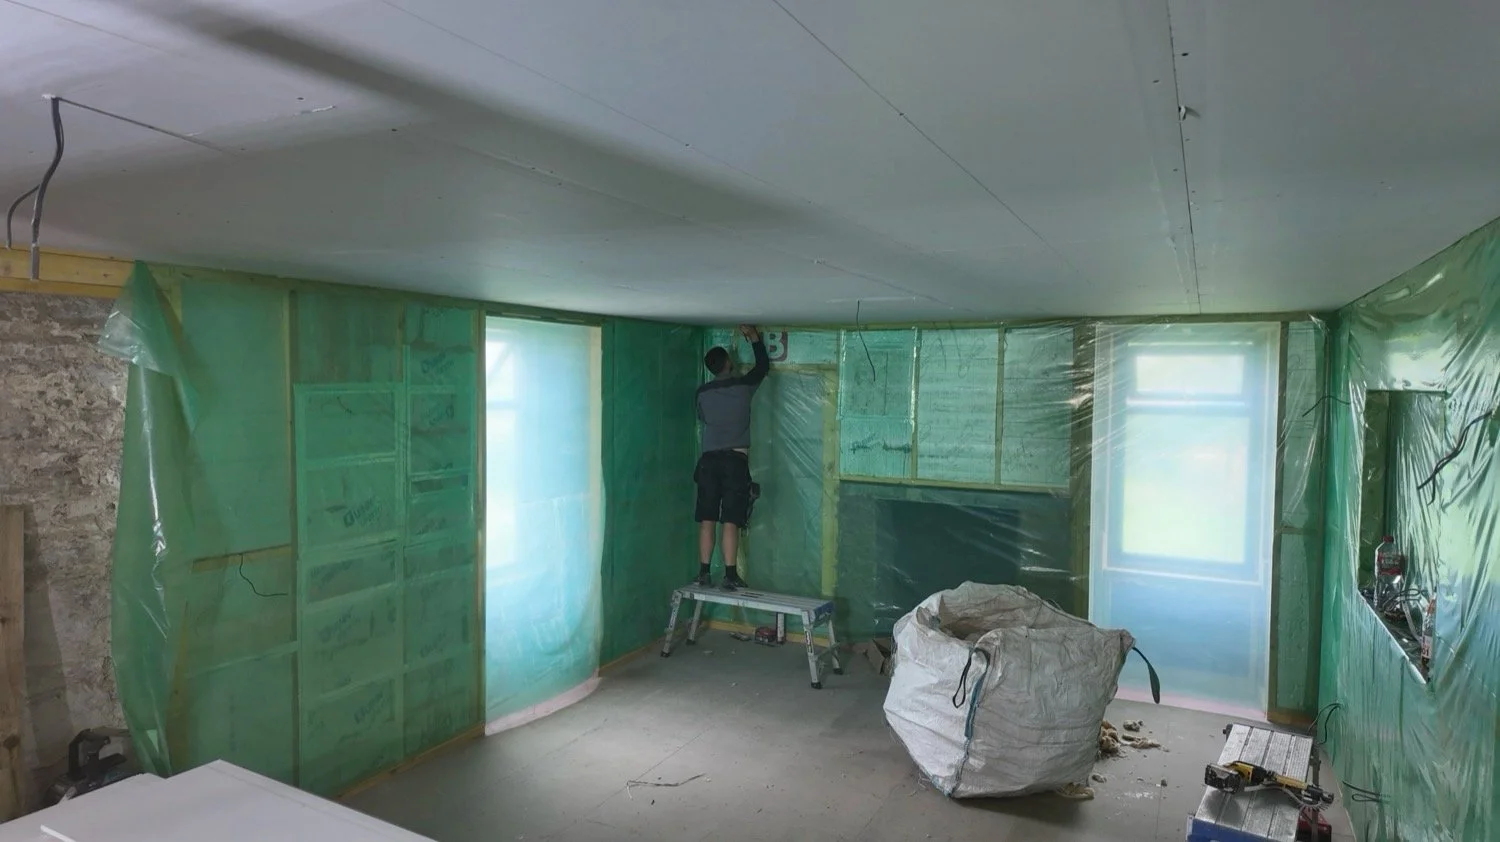
I will admit, the vapour barrier just turned the lounge into a set from Dexter, but alas, by the end of Friday, we looked like this downstairs:


The upstairs isn’t at the same level of progress, but it’ll soon catch up:


As you can see from the previous photos of downstairs though, the internal wall and ceiling insulation is already here on site, along with a full pallet of plasterboard. That tees us up for next week nicely, with the final part of the first fix work, right up until plaster application due soon.
Finishes
We mentioned plasterboard, the modern stuff, and that means gypsum plaster.
Conservationists, I know this will make you highly uncomfortable and I’m sorry you feel that way. As mentioned, this is a test block, and we’ve lived in this construction type before, so we’re running with it for now.
90% of the previously identified “original features” turned out to not be original, and therefore there is no onus on saving them, because the remnants that did remain were already destroyed (not by us). Instead, the finish will be modern materials on the inside, paired with an aesthetic that maintains a nod to traditional features, but not in an overwhelming way.
This block is from around 1812. It is regency era, but nothing from that era remained, not even the floorboards. We’re not creating a museum though, we’re creating our family home within this old farmhouse, and therefore we will decorate it as such in an unstuffy, practical way.
Plus the inglenook; she’s staying.
August Week 4:
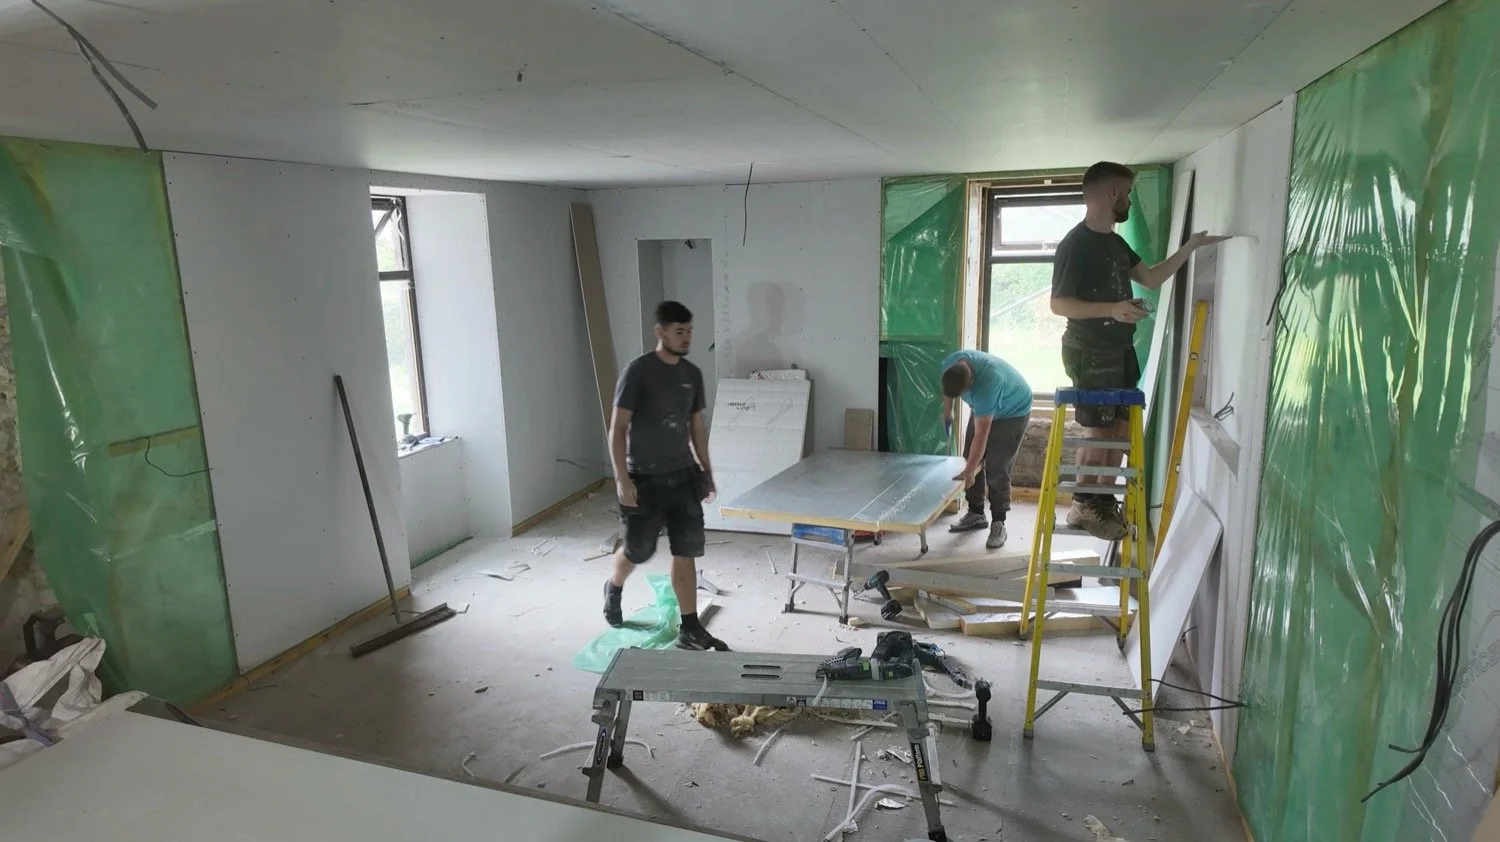
A busy week that I’ve not been around so much for. Gathering these bits from what I have available, even though SO MUCH happened. We left last week as the downstairs turned into a scene from Dexter, but this week, the progress was visibly quite incredible. The joiners prepped for some upstairs framing before pausing whilst we wait for woodworm treatment, and instead cracked on with insulating the ground and first floor divide first:
Next, it was time to board! The ceiling was first up on the entire ground floor of the middle section, and after one layer was all present and correct, the second went over the top. Double boarding the ceiling is part of current building regs for a couple of reasons. Firstly, there is the additional insulation of another board, which is mainly noticeable in noise transfer reductions from upstairs to downstairs and visa versa. The second reason is for better fire resistance, increasing the escape time should the worst happen.
With the ceiling done, the walls were next. These aren’t super easy walls, just because of how many cubby holes, windows, nooks and so on are dotted around. The joiners didn’t hold back, the plasterboard on the walls went up like lightening:
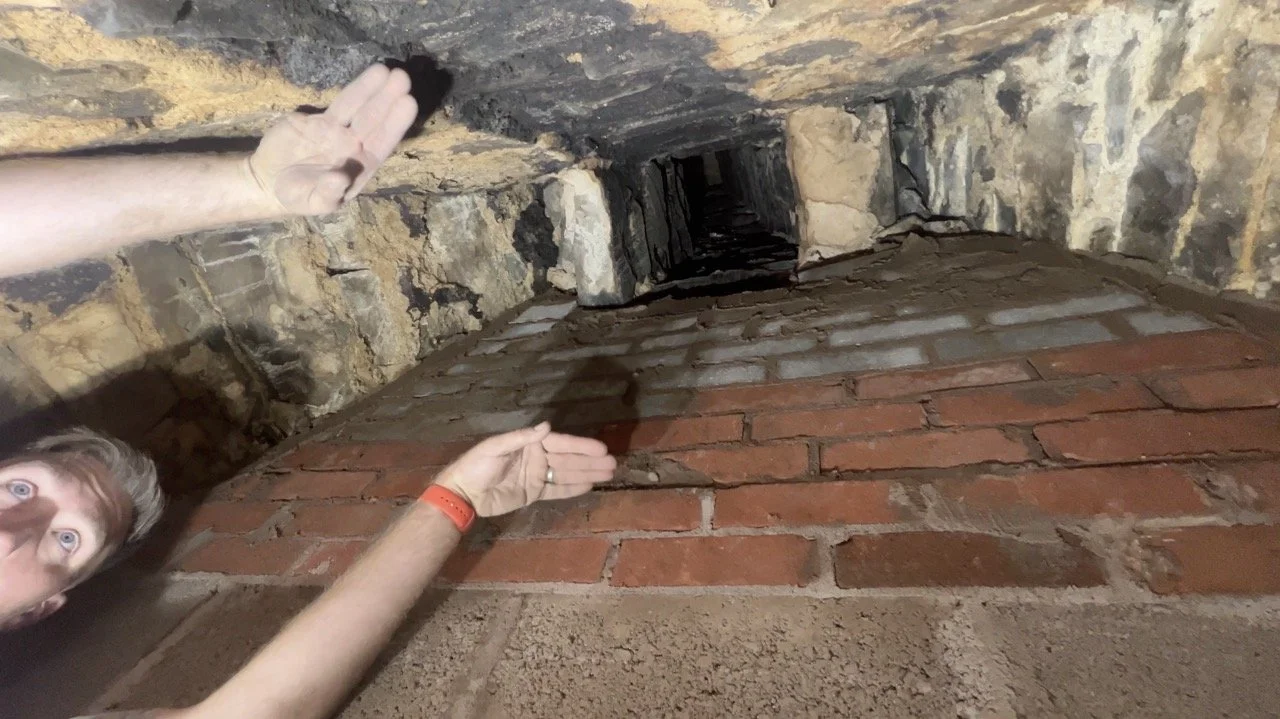
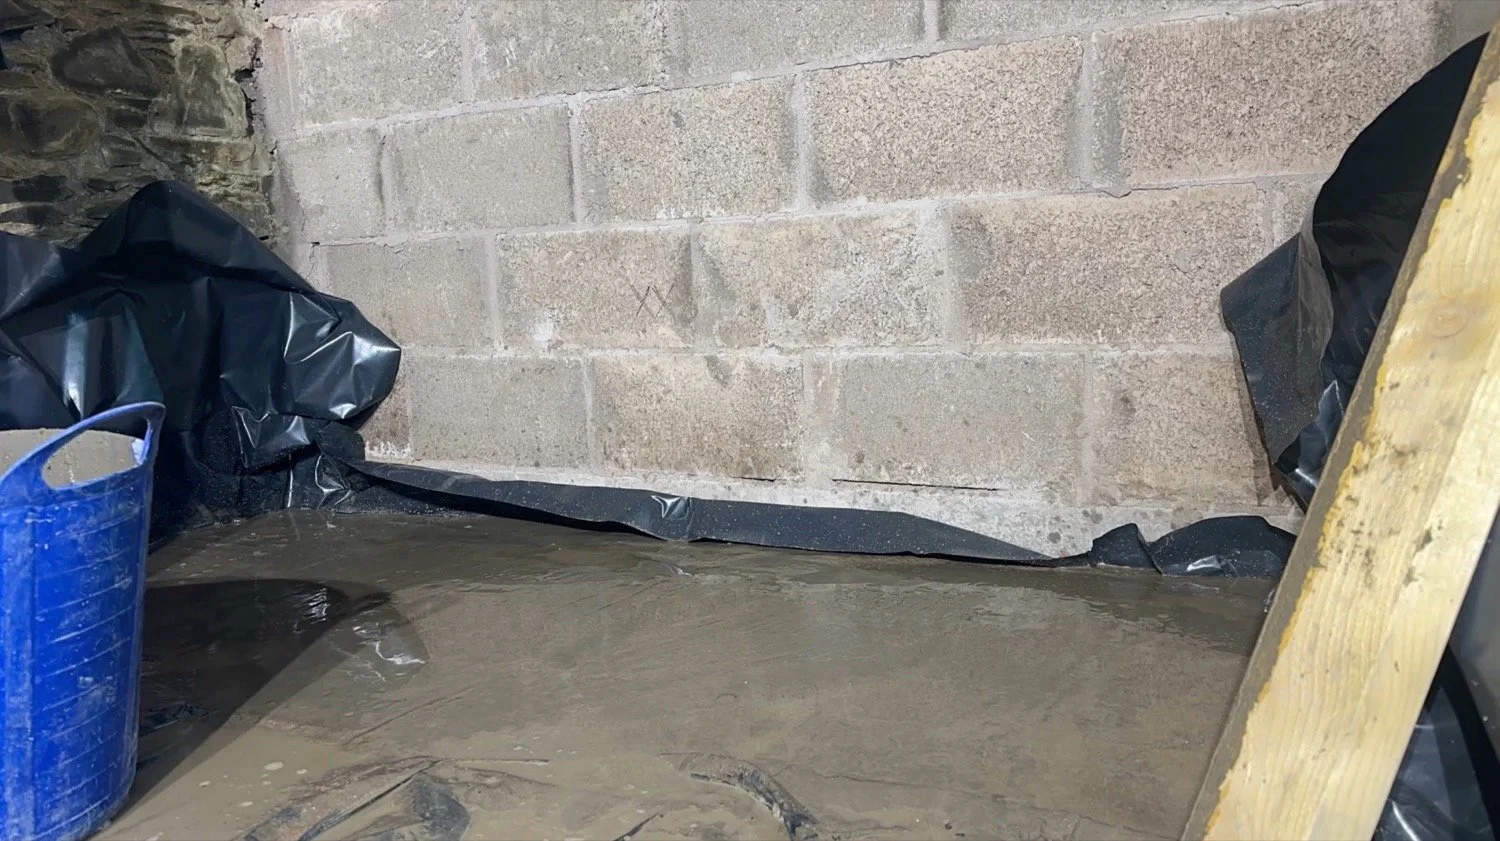
At the same time, in the inglenook, Dan was removing the rubble base, adding a damp proof membrane (DPM) and then pouring some screed mix to even out the floor level. This floor section will be heated along with the suspended timber floor, so we’re hoping cold points won’t exist here.
Then, the woodworm pros came in. All work on site stopped and everyone vacated for a full day, to let these guys work. We knew that woodworm would come up on a mortgage survey. 100%. There were two active infestations in the southernmost section (the “new” part), and evidence of old infestations practically everywhere else, including on those truss beams that will be very much visible for the surveyor when the middle section is actually finished.
This is not something to ignore. We’re in the process of crossing all T’s and dotting all I’s to ensure we hit as few road blocks as possible, and a flag for woodworm after we’ve put so much effort, time and money into finishing the middle section. IF the surveyor/mortgage provider wanted to, they could request that no finance be given until the wood in the roof is exposed, treated and re-finished. That’s a waste of time and money, so it was in our best interests to just have as much of the house treated as possible, right now.
Conveniently, this turned out to be literally almost every piece of wood there, except joists in two smaller sections. Systematically, the guys worked their way round every timber to treat it, including the active infestations. This day spent will give us a piece of paper. The piece of paper will help us get a “yes” from a lender. Perfect.
By Friday, that left the middle section looking like the images below (you can click them to view them bigger).
My office:


The lounge:


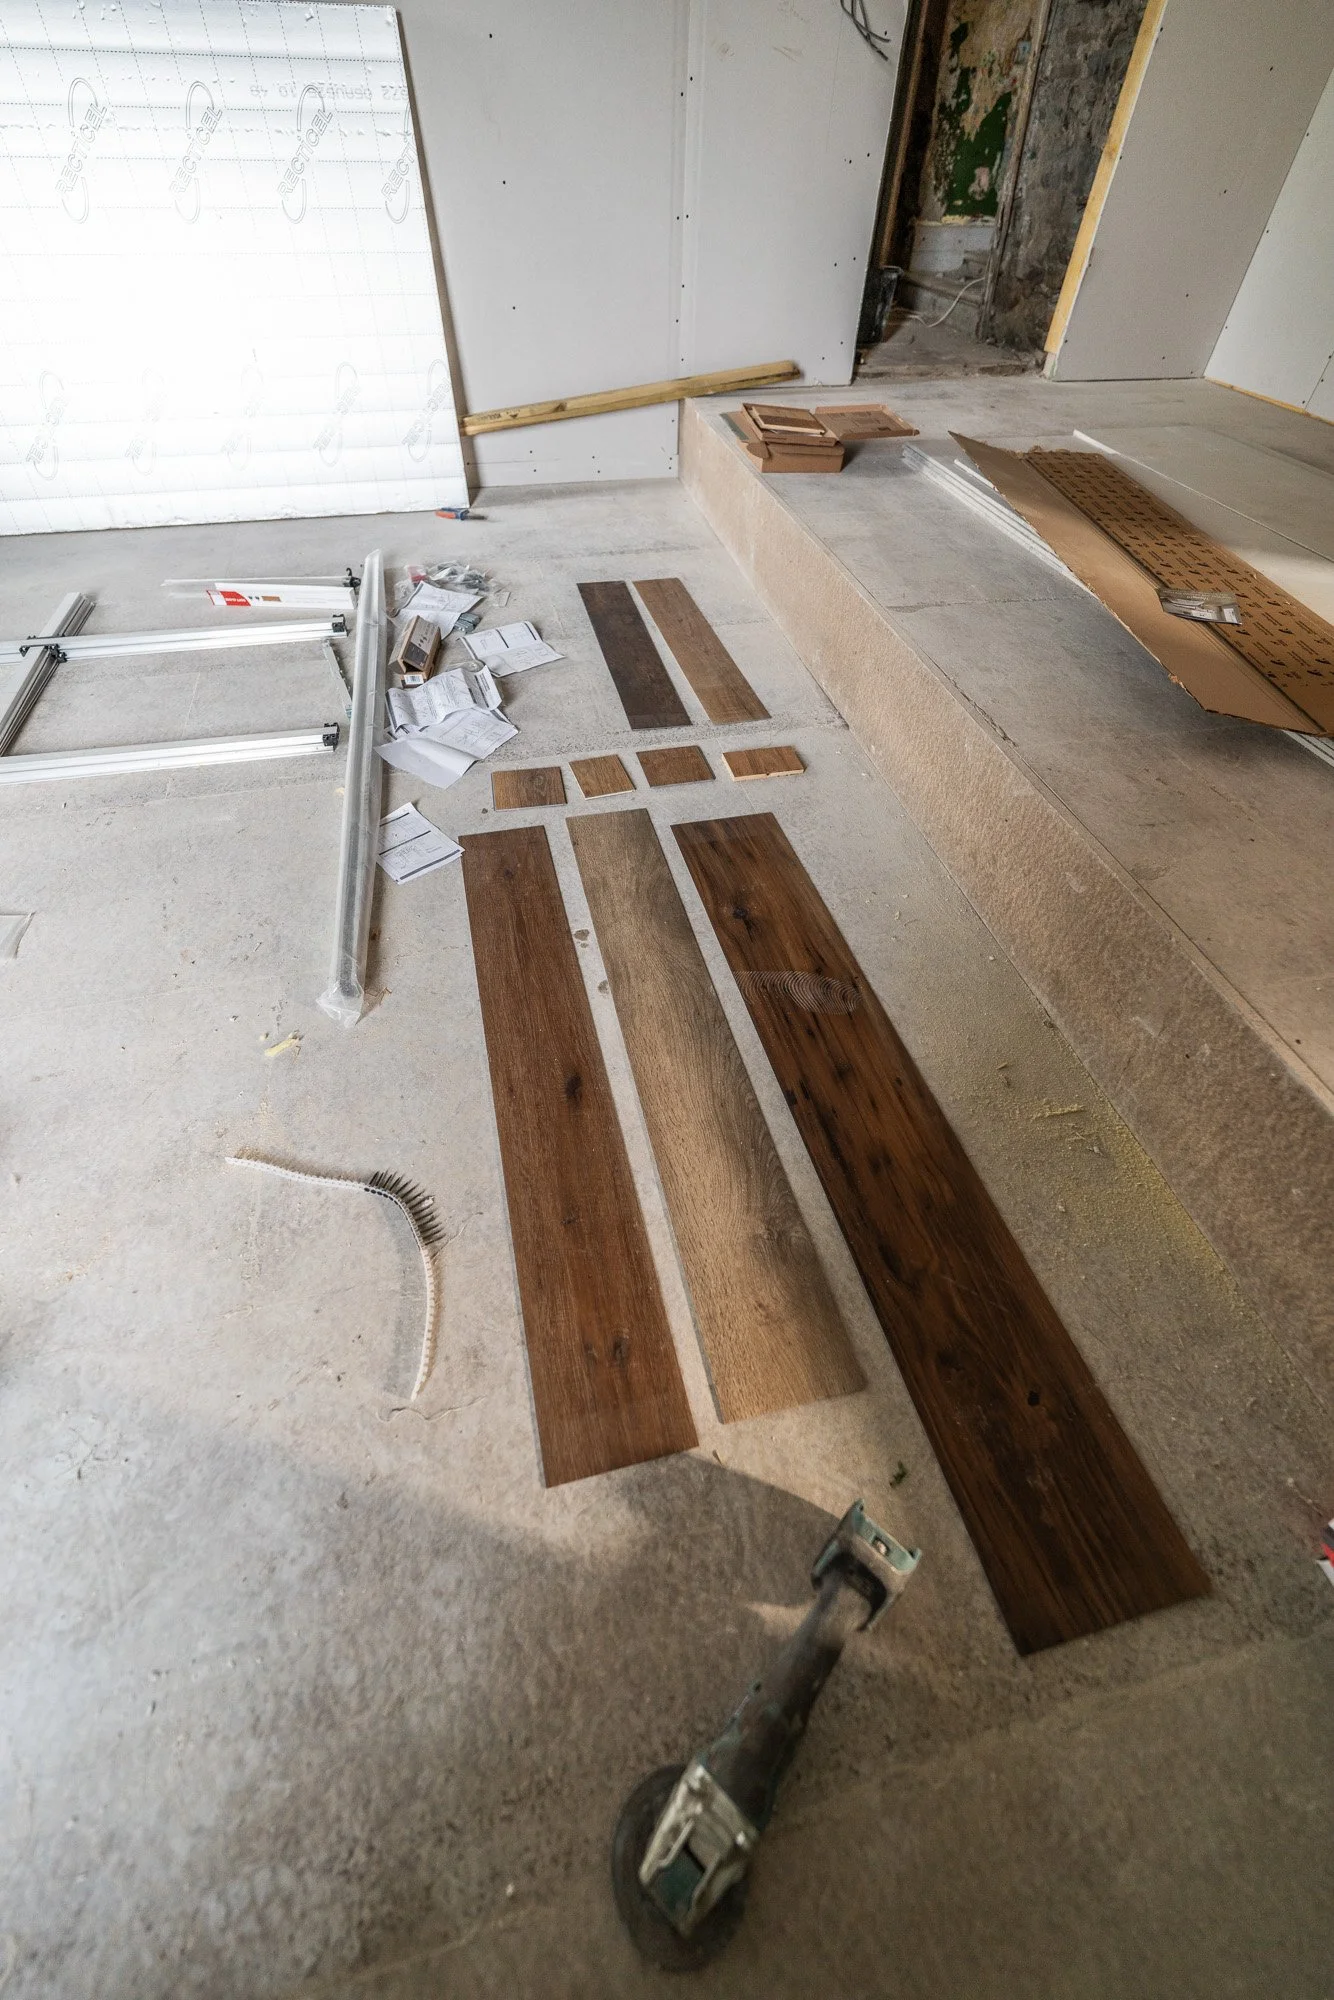
Eagle eyeballs may have spotted some flooring samples. I can confirm that into week 3 of flooring choices, the jury is still out. None of them fit the bill, but I feel we’re getting closer… slowly.
And then Saturday rolled around. This was an exciting day, because our trainee auctioneer friend John said we could find what we were looking for in the store lamb sales. I feel like a rewind is needed!
Our grazing is rough, with some good bits. Horses eat good bits, like, really good bits, and completely abandon everything else. The result is a patchwork field where the bad bits stay bad (rough) and the good bits get overgrazed (if the paddocks are smaller, which ours are for weight control), reducing the quality of the entire field. We’ve had Farmer Ben’s sheep on site for the last year, grazing the entire 20 acre field at times and improving the grass, as well as reducing the weeds and their dispersal.
Ben has grazing elsewhere too, and can’t keep sheep here year round. At the same time, the vet advised cross-grazing sheep with Tuna for additional weight control next spring, and we have some sections that really could to with tiny teeth that like to chow down on all grass and some weeds. We looked at goats and sheep but the goats we wanted were very rare and hard to get, but John put the idea of Dutch Spotted in our head with the lots coming up in the sale, and we went for it.
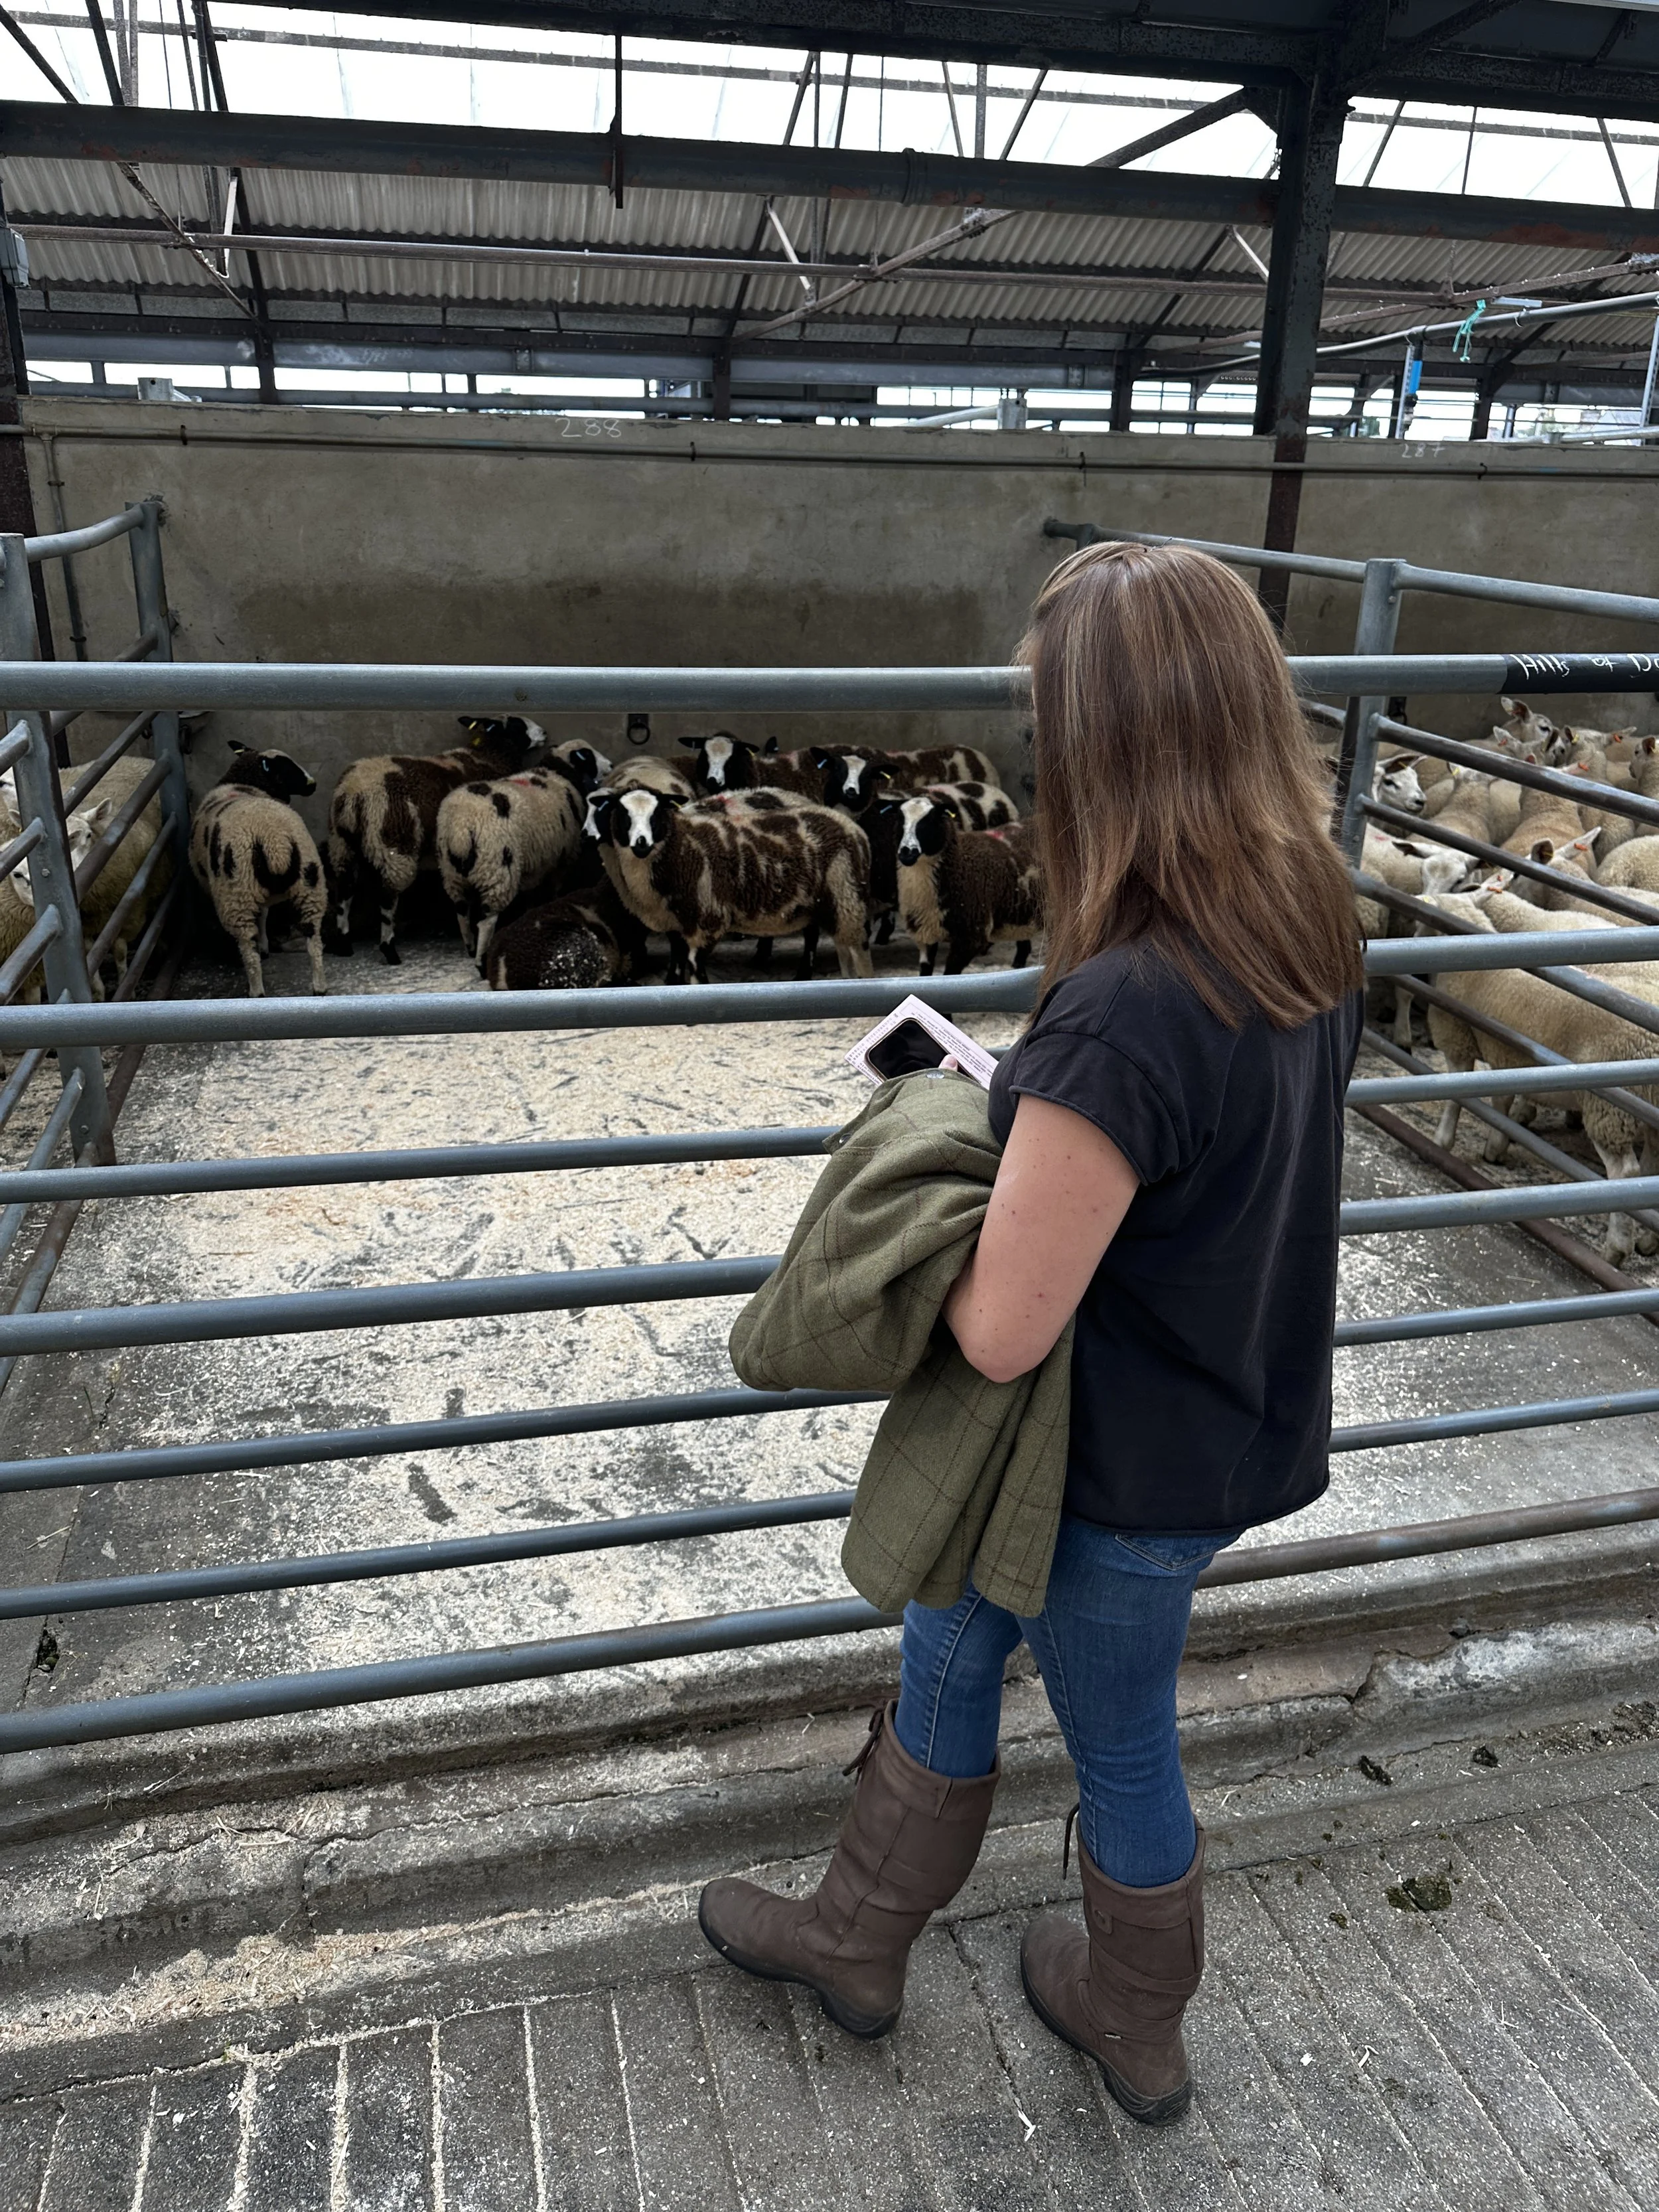
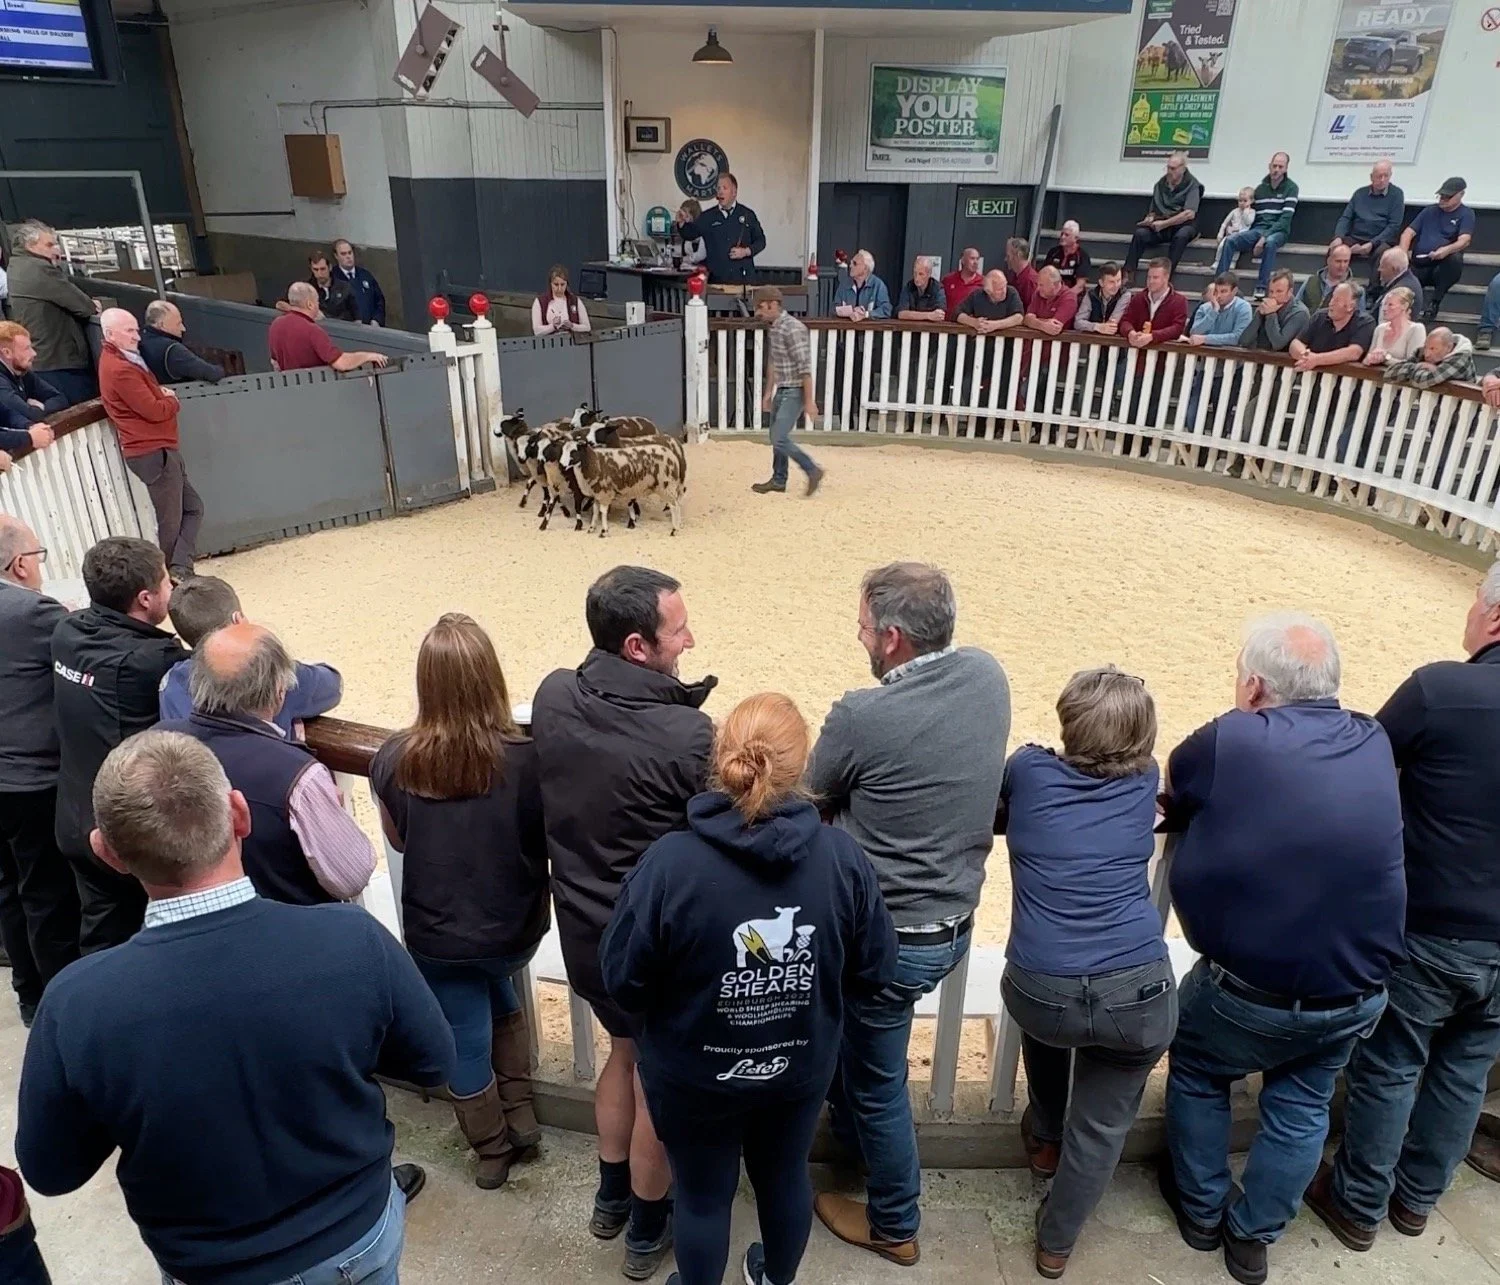
Saturday was sale day, and because we already have a CPH for the stock we had on site last winter, we just went along and did some bidding. First we checked out the store lamb lots and two pens of Dutch Spotted’s were there to check over. In total, there were 19 ewes, and I said the middle sized ones were the ones to go for, because they had good legs and feet and would probably be the safest bet for us and what we need them for. No lamb chops, just lawnmowers, especially for the next few months! Dan also snapped the moment we were successful on that sub lot of 6. A good number to get us started on.
I did completely miss out the late night fencing mission that we did the day before, to run lower lines of electric round the resting pony paddocks, but with two 3am starts this week for morning photoshoots, staying awake was the highest priority! Jock dropped them off to save us the trip after the sale finished and then we headed over to have dinner with friends… another fairly late night 😅
On Sunday, today at the time of writing, our sheepsies are in their field, which they politely stayed in overnight, and are settling in just fine!
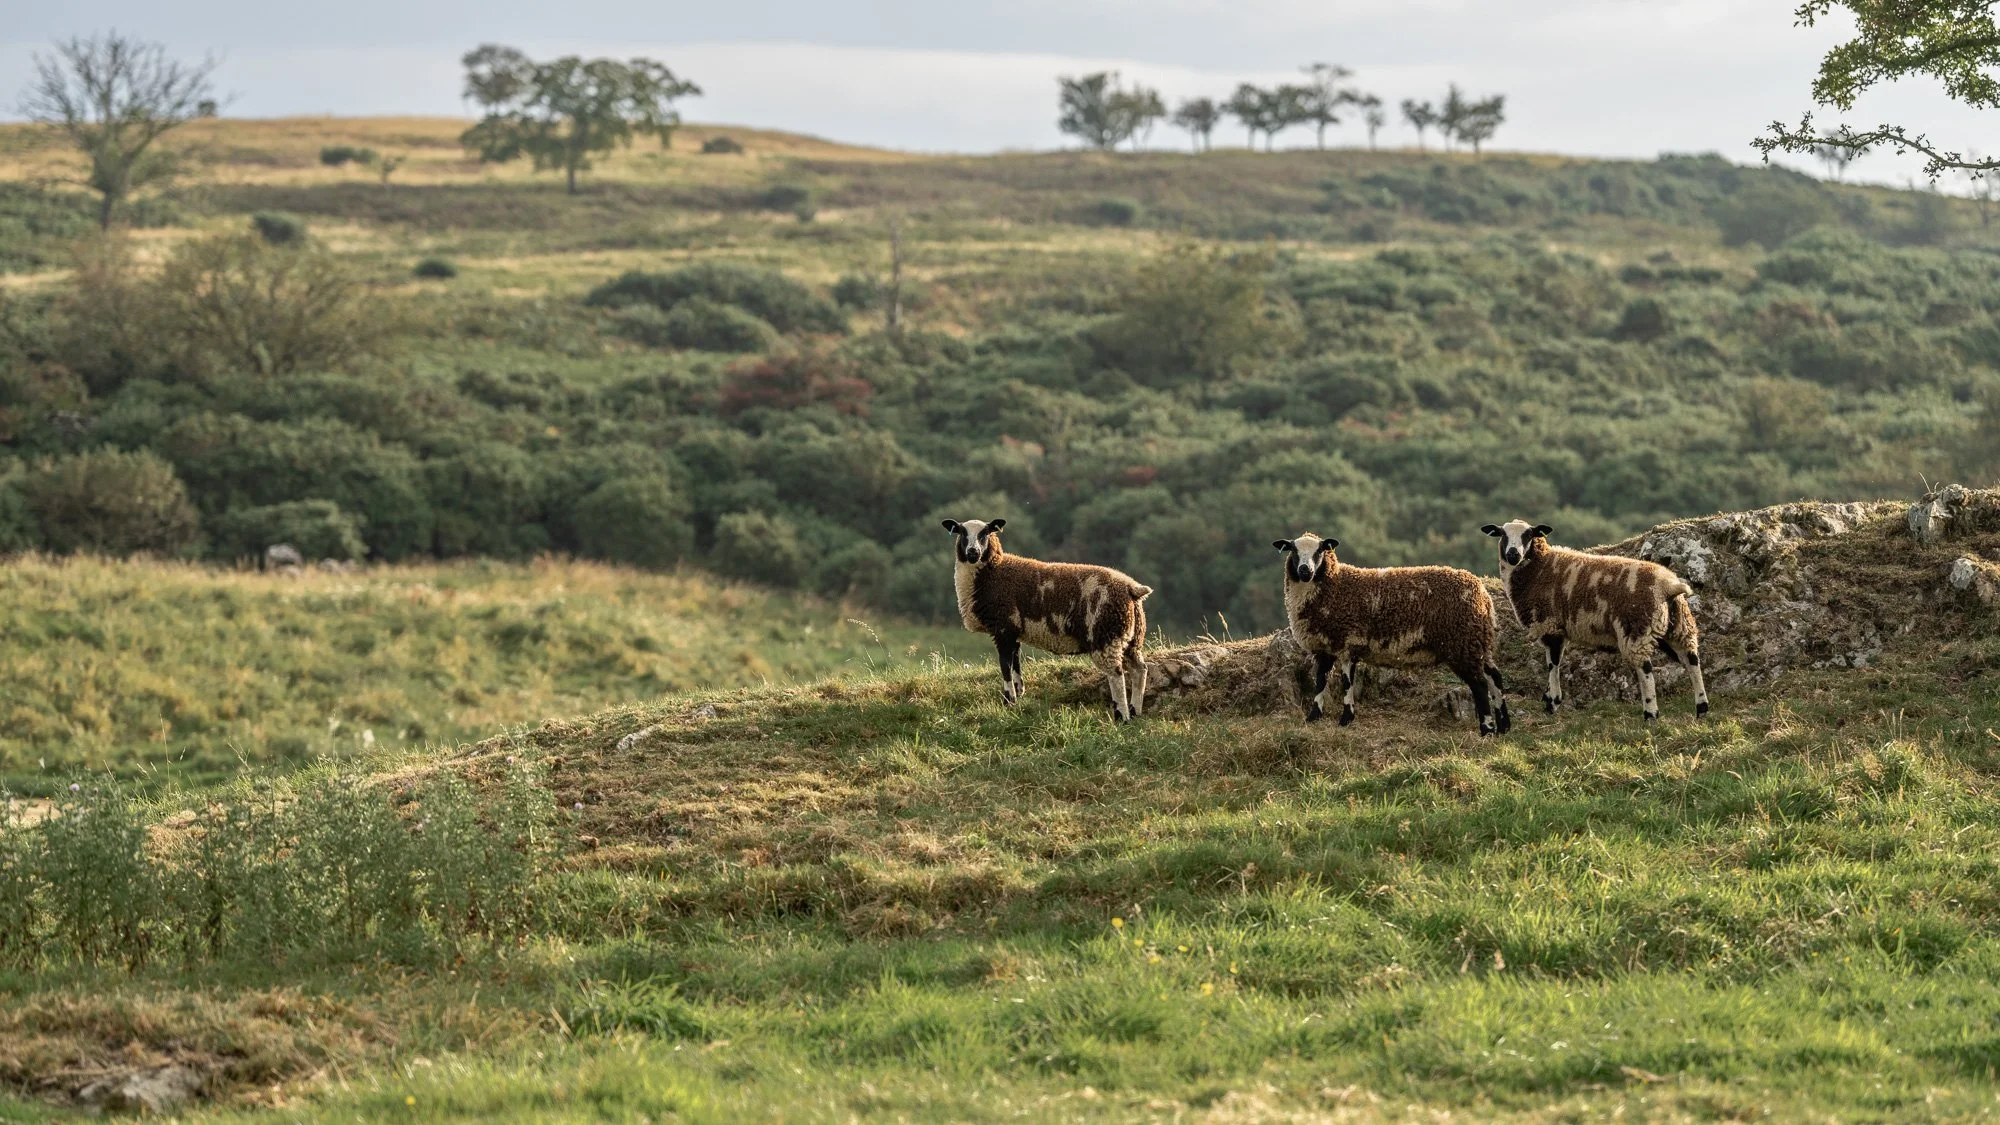

The best part is, the SECOND they went into the field, they went straight to the grass the horses flat out rejected, which means the plan is already working, thank the lord. They’ll top the grass on the rougher parts and encourage new shorter growth and a denser sward.
It’s probably also helpful to mention that sheep are great cross-grazers with horses, because they break the life cycle of each others parasites. Most equine parasites are host-specific, so sheep are immune. The same is true in reverse. The result is lower worm burdens for each, especially if you run sheep on after horses have been moved forward in the paddock rotation. Which is exactly what we’ve done.
Gotta hustle to get some pens and then we can start our mini sheep game with these adorable new friends! Names TBC, I need to be able to tell them apart first, but these 6 at least will have names (old-school grandmother names - like Ethel and Doris - suggestions appreciated!).
It’s nearly time for a day off for me but not quite, so back to work for another 7 days straight then I can have a rest day. Onwards!
August Week 5:
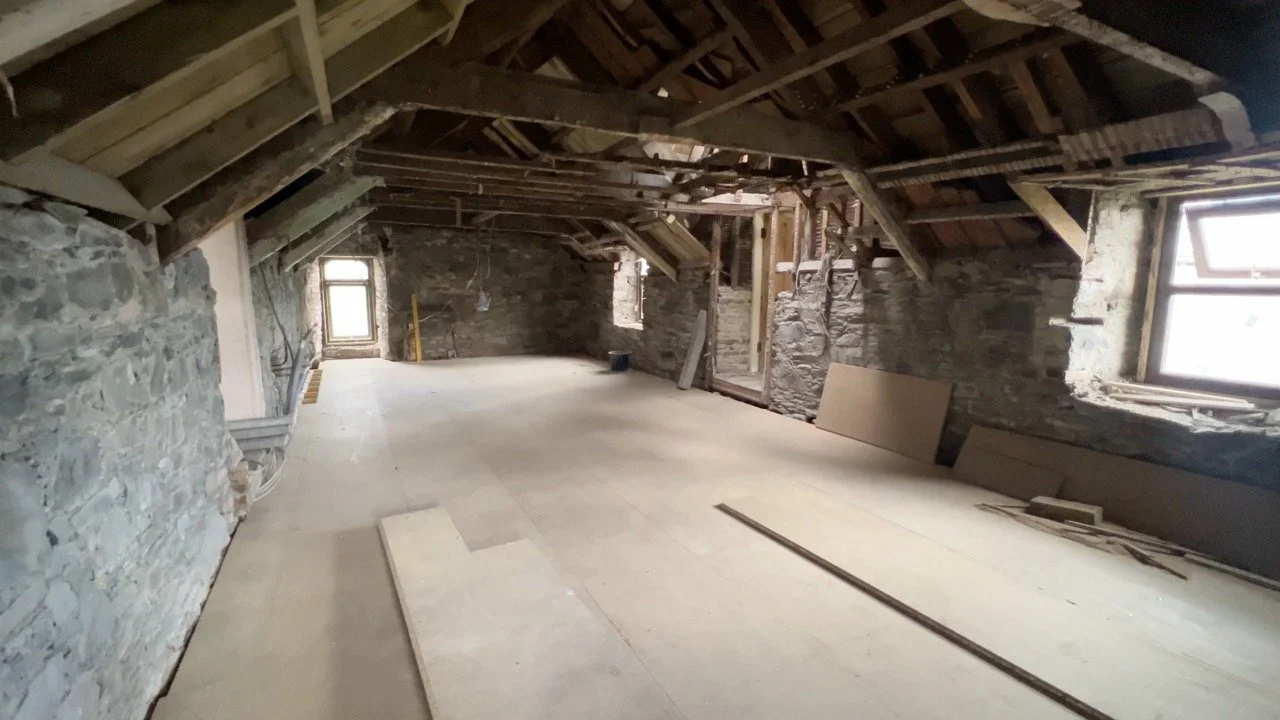
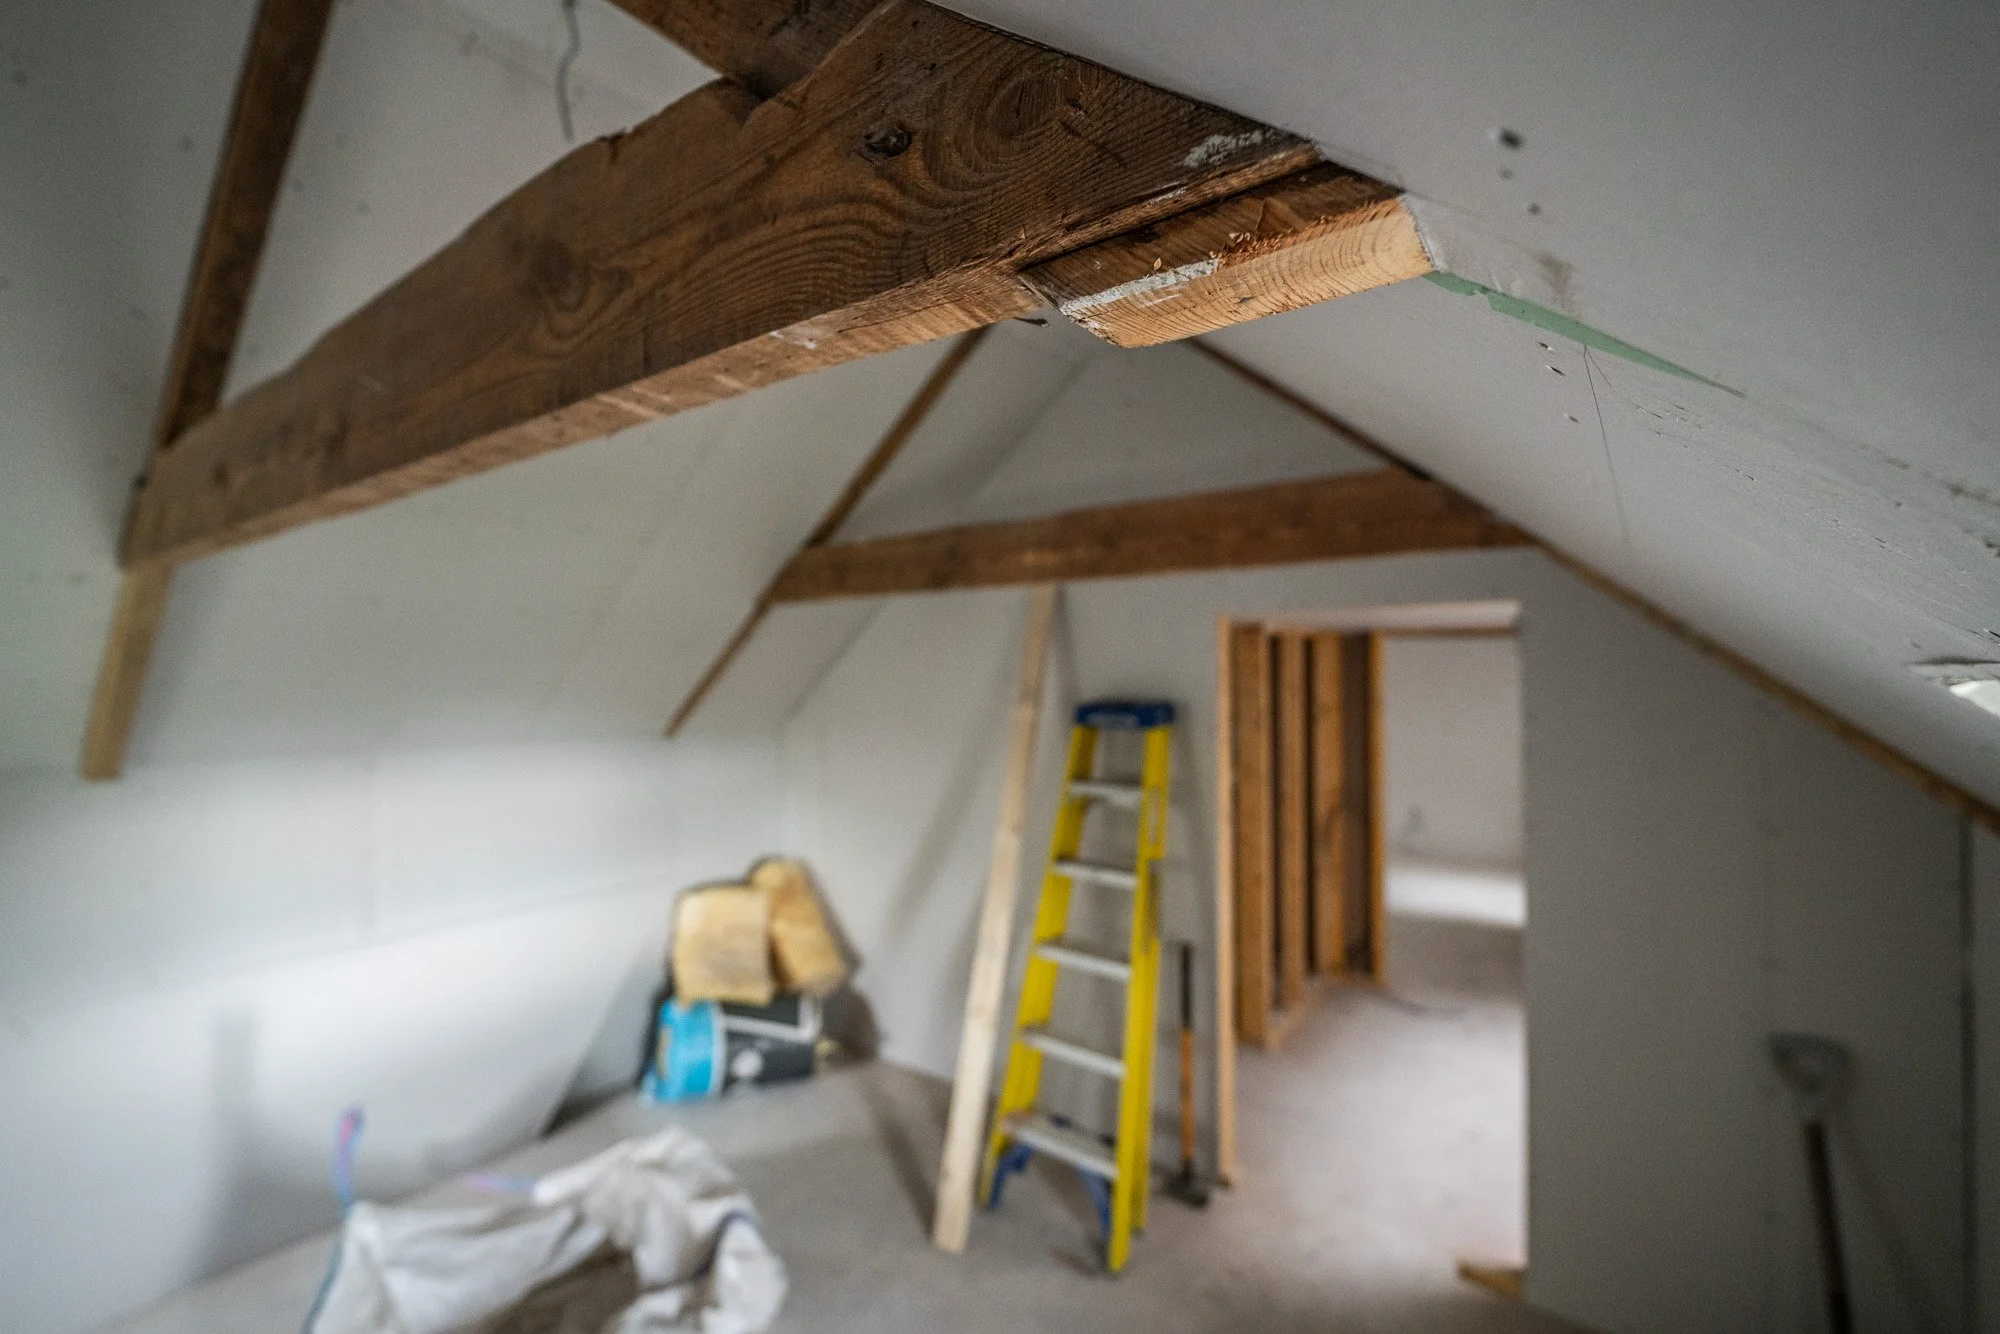
Rolling into the final week of August, it was upstairs turn to follow on with the boarding out procedure. With all of the timbers treated pre-emptively for woodworm, the lads were free to cover everything up and make good. There are a few bits we need to focus on in a bit more detail here, but essentially, they just had to make a very lopsided, old, abnormal roof space fairly presentable. This was no mean feat. At the start of the week, upstairs looked like this:


Now, if you look at the dormer windows (the middle photograph, on the left side), you can see that a structural truss has been amputared below the knee. We need to pause and recap what the heck is going on here because it looks sketchy AF and as such, red flags all round.

The trusses in the original structure obviously were full length, and they sat firmly on the wall head at the opposite side. For some unknown reason, a previous resident decided that it was at exactly this point in the external wall that they needed to install dormer windows. Why right here, we’ll never know, but that led to some fairly complex structural engineering that involved adding a second truss that goes right up to the apex of the roof to extend the pitch further out. This additional truss which is set further back is bolted and notched firmly into the existing (and now decapitated) truss, before lateral/horizontal timbers were added with additional supports onto two supplementary truss anchors that sit neatly on the wall head.
The result is a complete amalgamation of bits of timber that have lasted for 100+ years in this bizarre prothetic limb situation as seen in the before image below shown here, complete with blue net drapes for dating purposes.
We can confirm, for the avoidance of doubt, that although this looks all sorts of wrong, structurally it has been checked and approved.
All this means that the visible section of truss, on the final internal room, will be the decapitated version, the amputee, and that’s going to look a little bit odd.
The second thing we need to address about the trusses is that to get the required air gap around the warm-in-roof insulation, the finished board height will show a variable-but-still-present amount of truss frame up to the apex. However, because not a single wall, roof section or timber is actually straight, the amount of truss on show varies from each truss in the room and each side of the roof too. Quirky, definitely.
And therefore, when this specific room was boarded out, it all ended up looking like this:
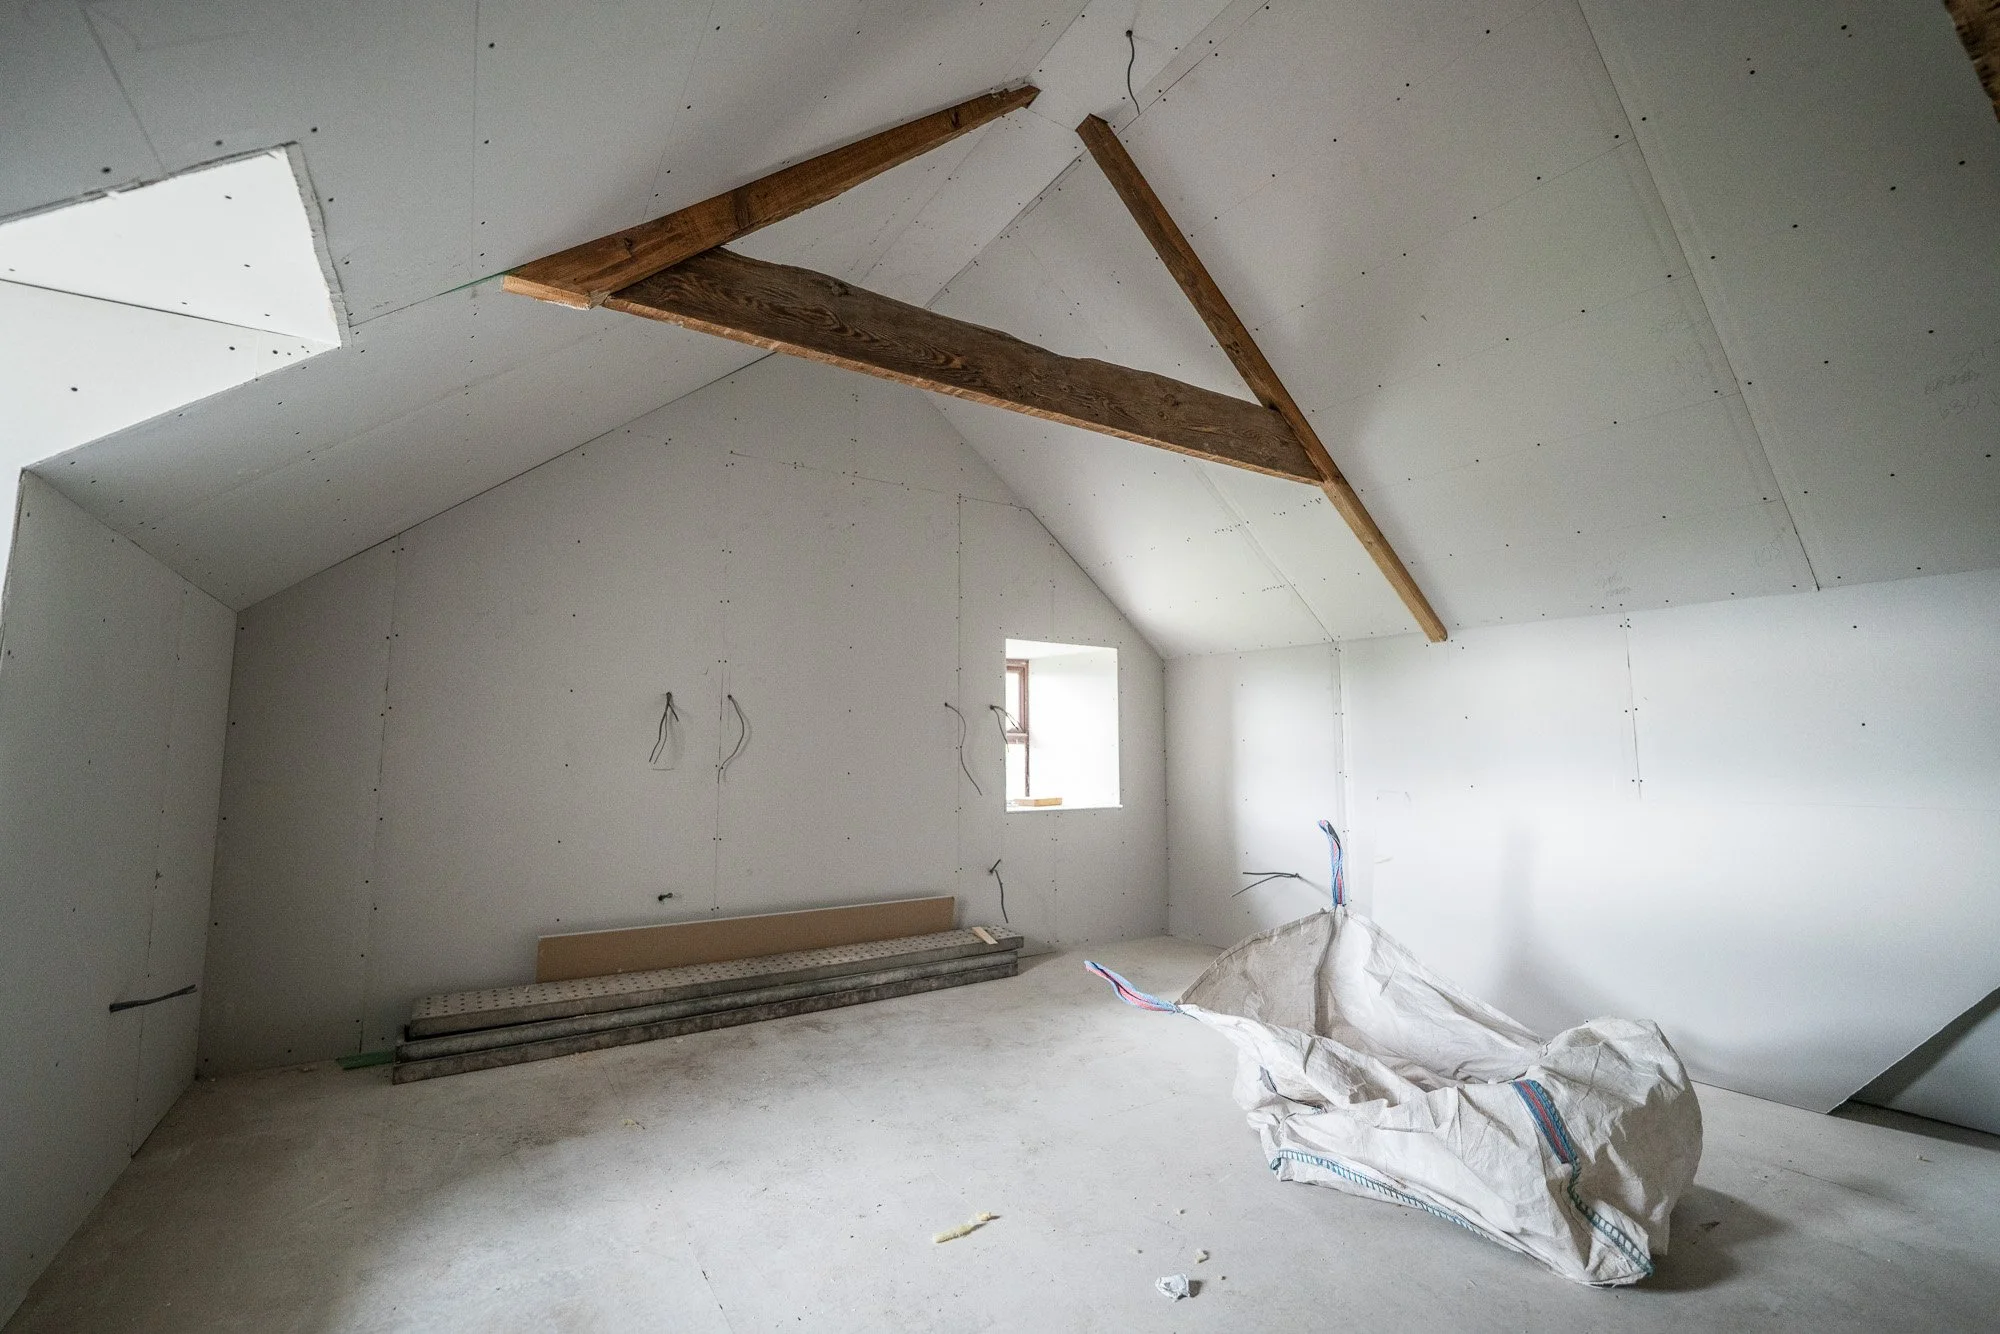
A close up of that end:
As you can see, the sister truss behind is full length, so there is a question over “what do we do” with these visible amputations? They look bad if you don’t know what’s happening behind (from a structural point of view), and they need neatening up to look sharper in the final scheme (aesthetically).
For reference, the other bedroom matches the truss situation, shown below in it’s wonderfully boarded out state (you can click the images to make them bigger):


To me, it makes sense to sand them back to a really nice, neat, rounded end that shapes towards the sloped ceiling. The baffling part for me is still why did dormer windows get put in right there?! It makes very little sense when you think of how much easier it would have been to offset them into a gap between the two trusses present in each room, but hey ho, there you go!
To be honest, the joiners have done the impossible and made the dormer openings themselves look very tidy, despite what they had to work with at the beginning and the lack of space to add insulation as well. This is the same window, before and after (apologies for the quality):


The hallway also took shape, with Dan helping a little, as and when. Really though, the bulk of the work on Friday in the hall was a mission to reframe the roof light. The before-before (pre-roof-works) included a very corroded and leaky metal framed, single glazed, roof light and subsequent water damage to the entire area. The roof light itself was changed when the roof was recovered in 2024, but the internal timber framing was poor at best. Joe reframed all the timber, insulated and then boarded the lightwell completely to its current photo on the right below:


Although not completely finished, by the end of August Week 5 and August in general, the upstairs hallway now looks like this:


Elsewhere, Week 5 was also flue installation week for both new log burners. Remember that the Agatha the Aga (RIP) was removed in Week 2? Well, that chimney has been repaired inside and out, with it’s waterproof topping up on the stack and the Aga flue was replaced on Friday with the burner flue. The tiles have also been removed and a steel plate installed, ready for finishing:


On the same trend, the new lounge fire has had the exact same treatment. Please note that the plasterboard has a substantial overhang here that is ready to be trimmed, the fireplace opening is much larger than it looks here:


And there we have it. August 2025, the month that the old farmhouse went from shell to structurally safe and cosy, all in the space of 5 weeks. What a month, it’s been a journey, and there is so much still left to come! Here’s some of my favourite before and afters, up to the current moment anyway:
The Entryway:
Now light and airy thanks to the removal of the hallway/lounge dividing wall. Awaiting custom made double doors to begin to reframe the archway.


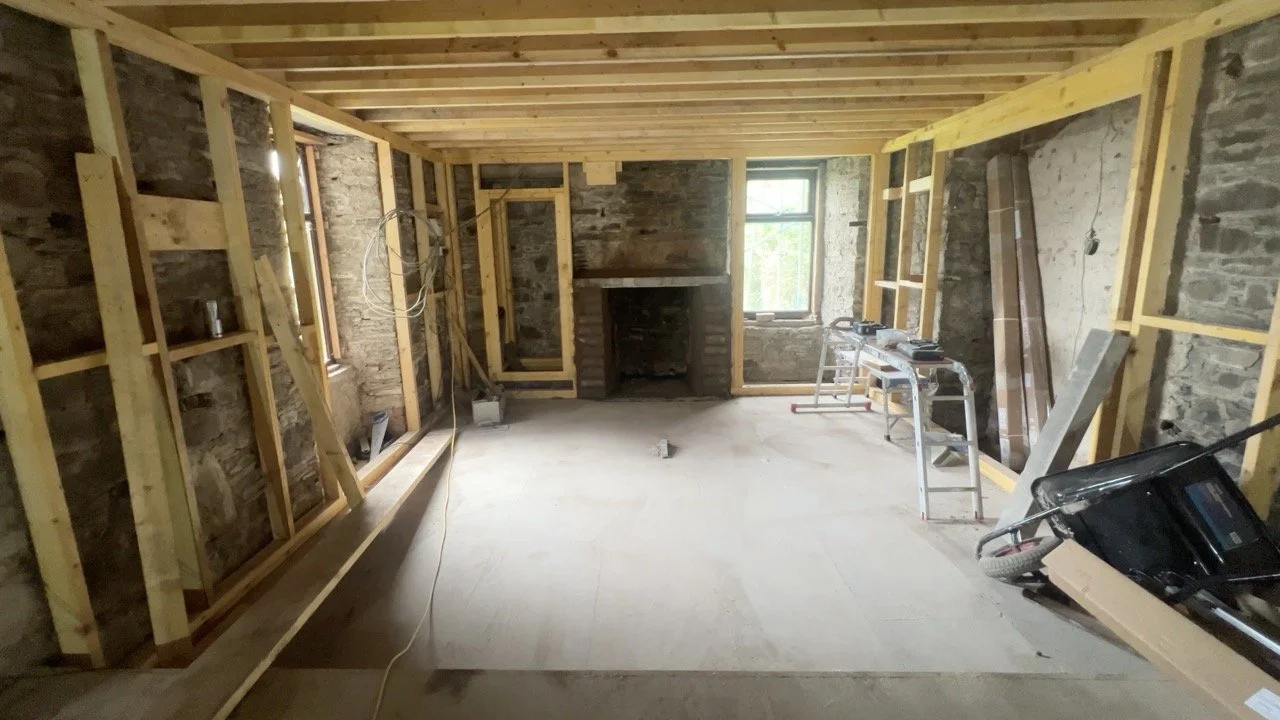
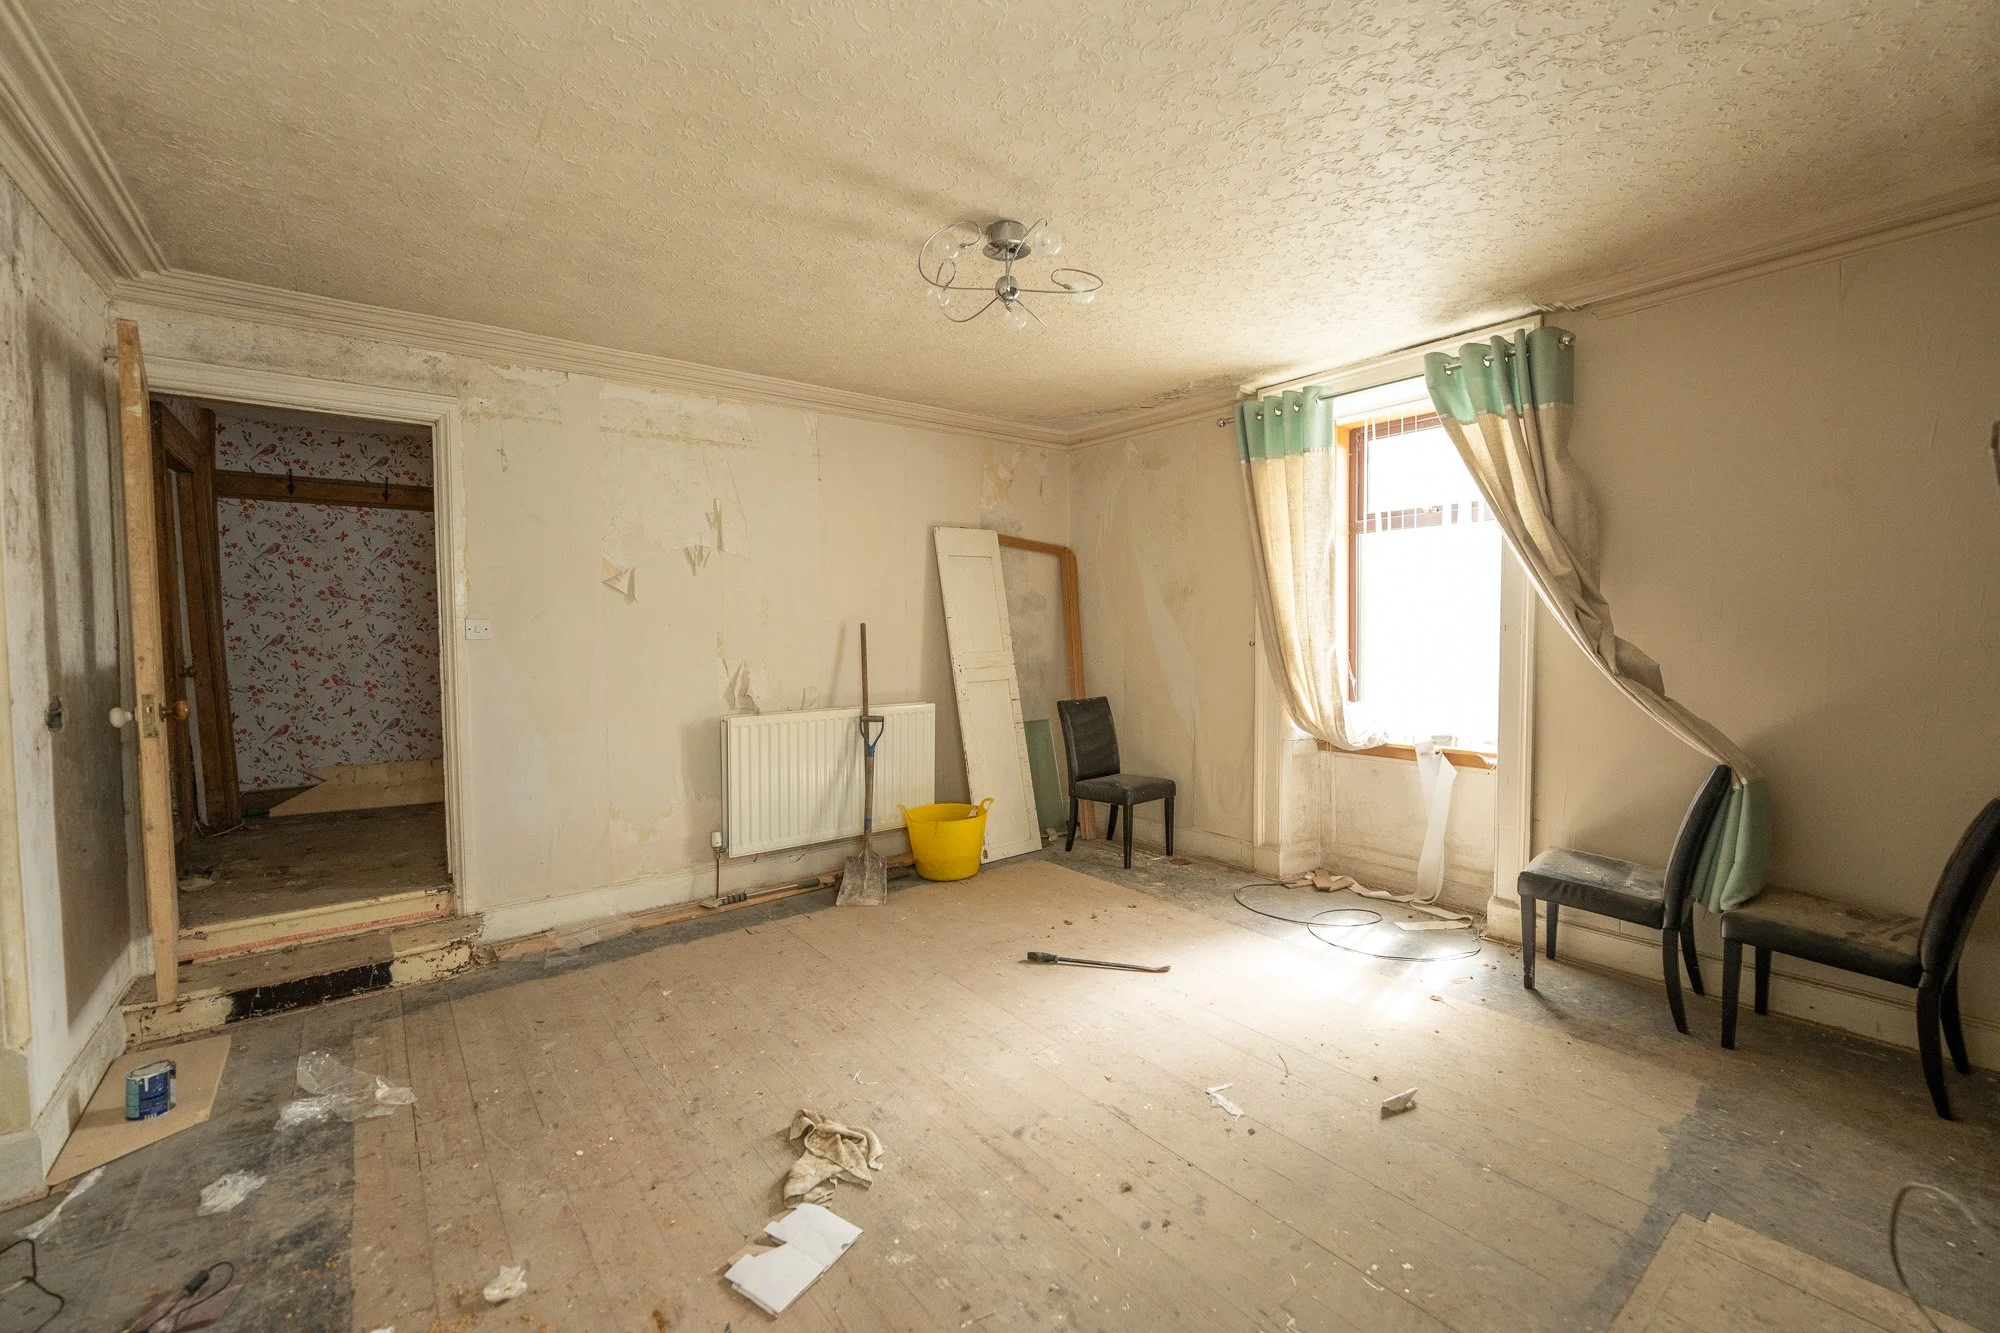
The Living Room:
Now larger, thanks to the hallway addition, and a little grander, with a step down into the main family space:


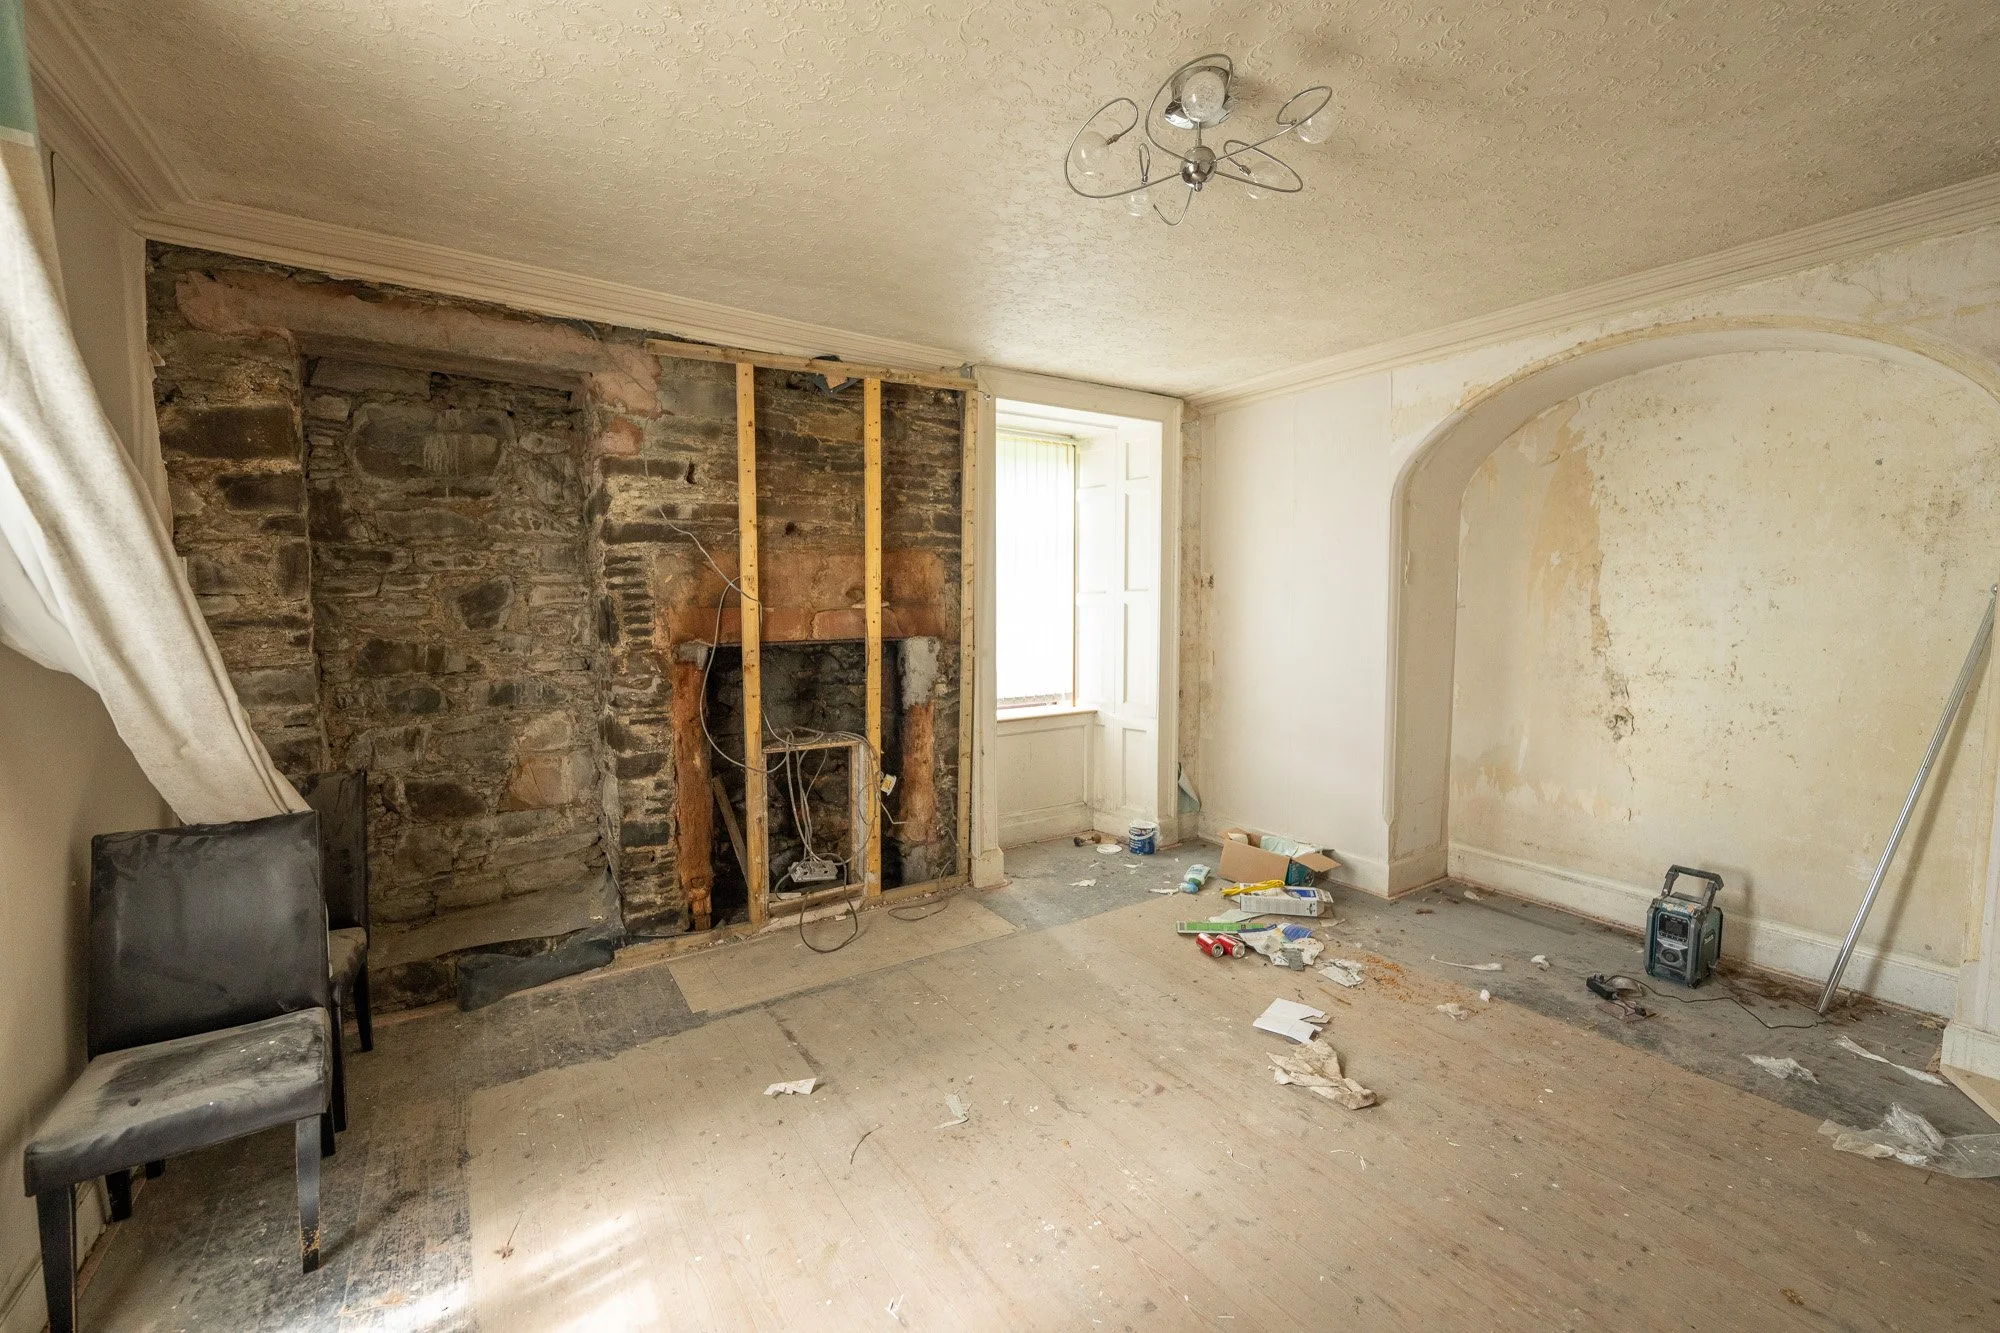

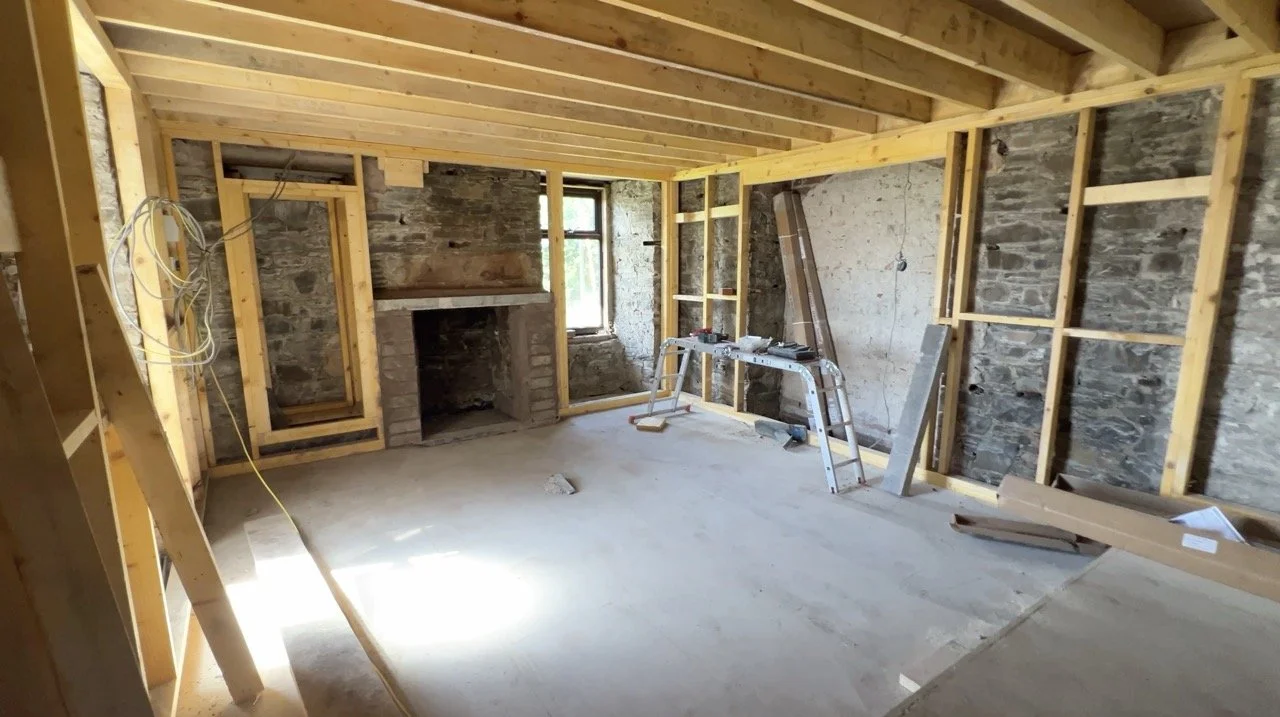
The Office (was Dining Room):
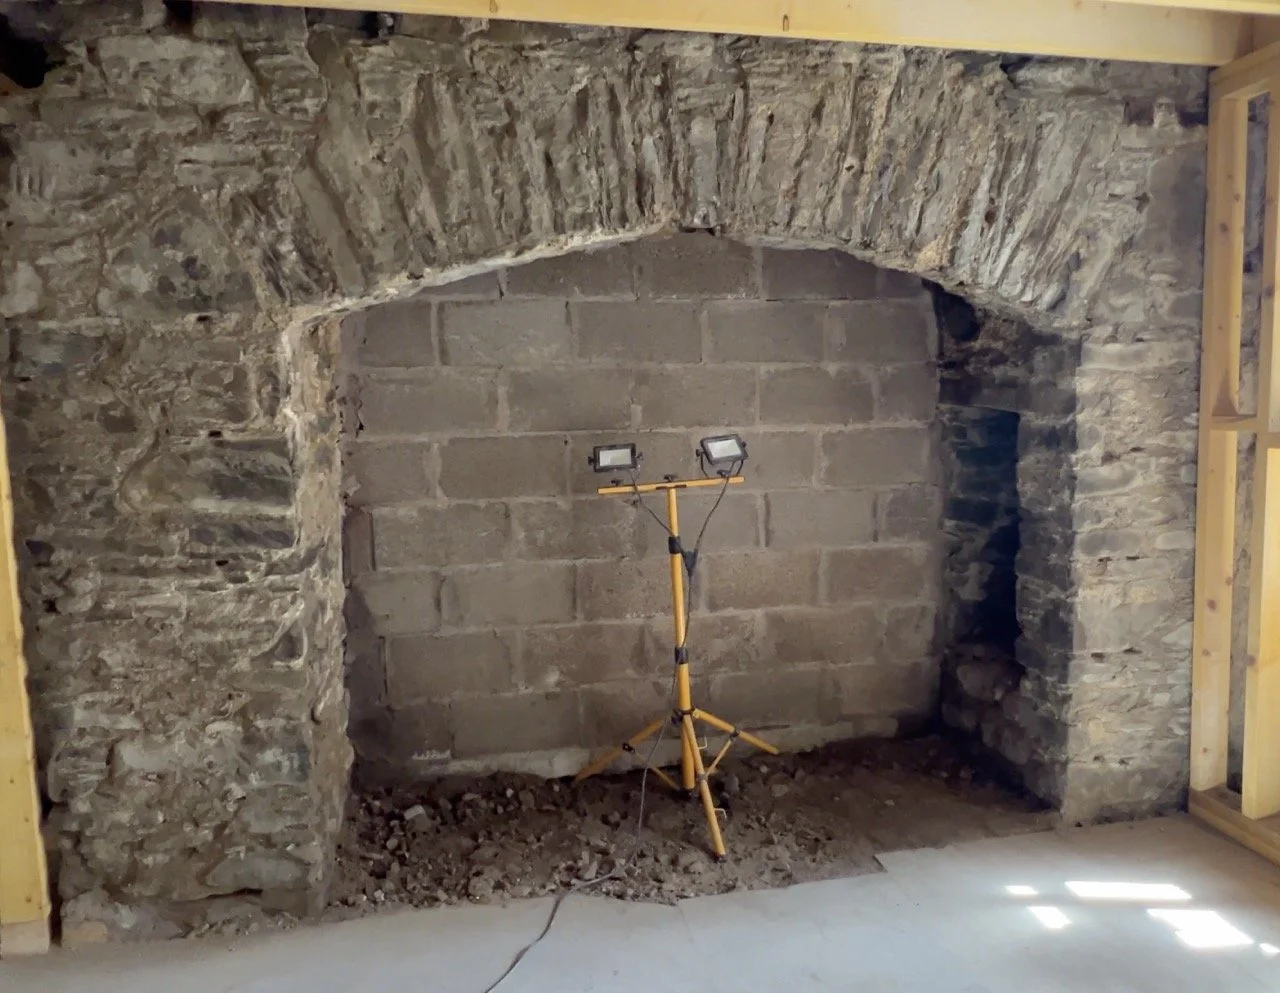
Hatch became door, and that epic secret Inglenook is now the focal point of what was a dark, damp-ridden room with a very warped, weak ceiling:


The Landing:
A floor that has structural supports and doesn’t bend and creak, with dry, woodworm-free timbers, a larger utilities cupboard, full sized bedroom doors and a wider access path to the master suite:


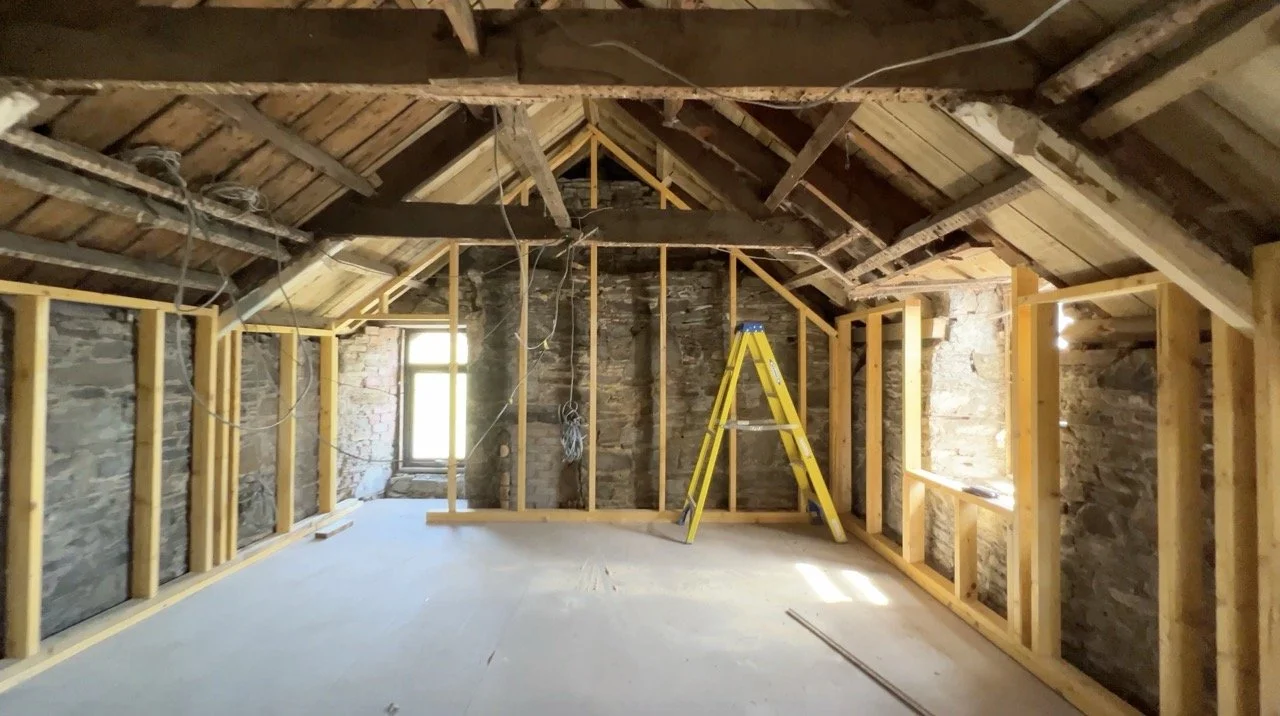
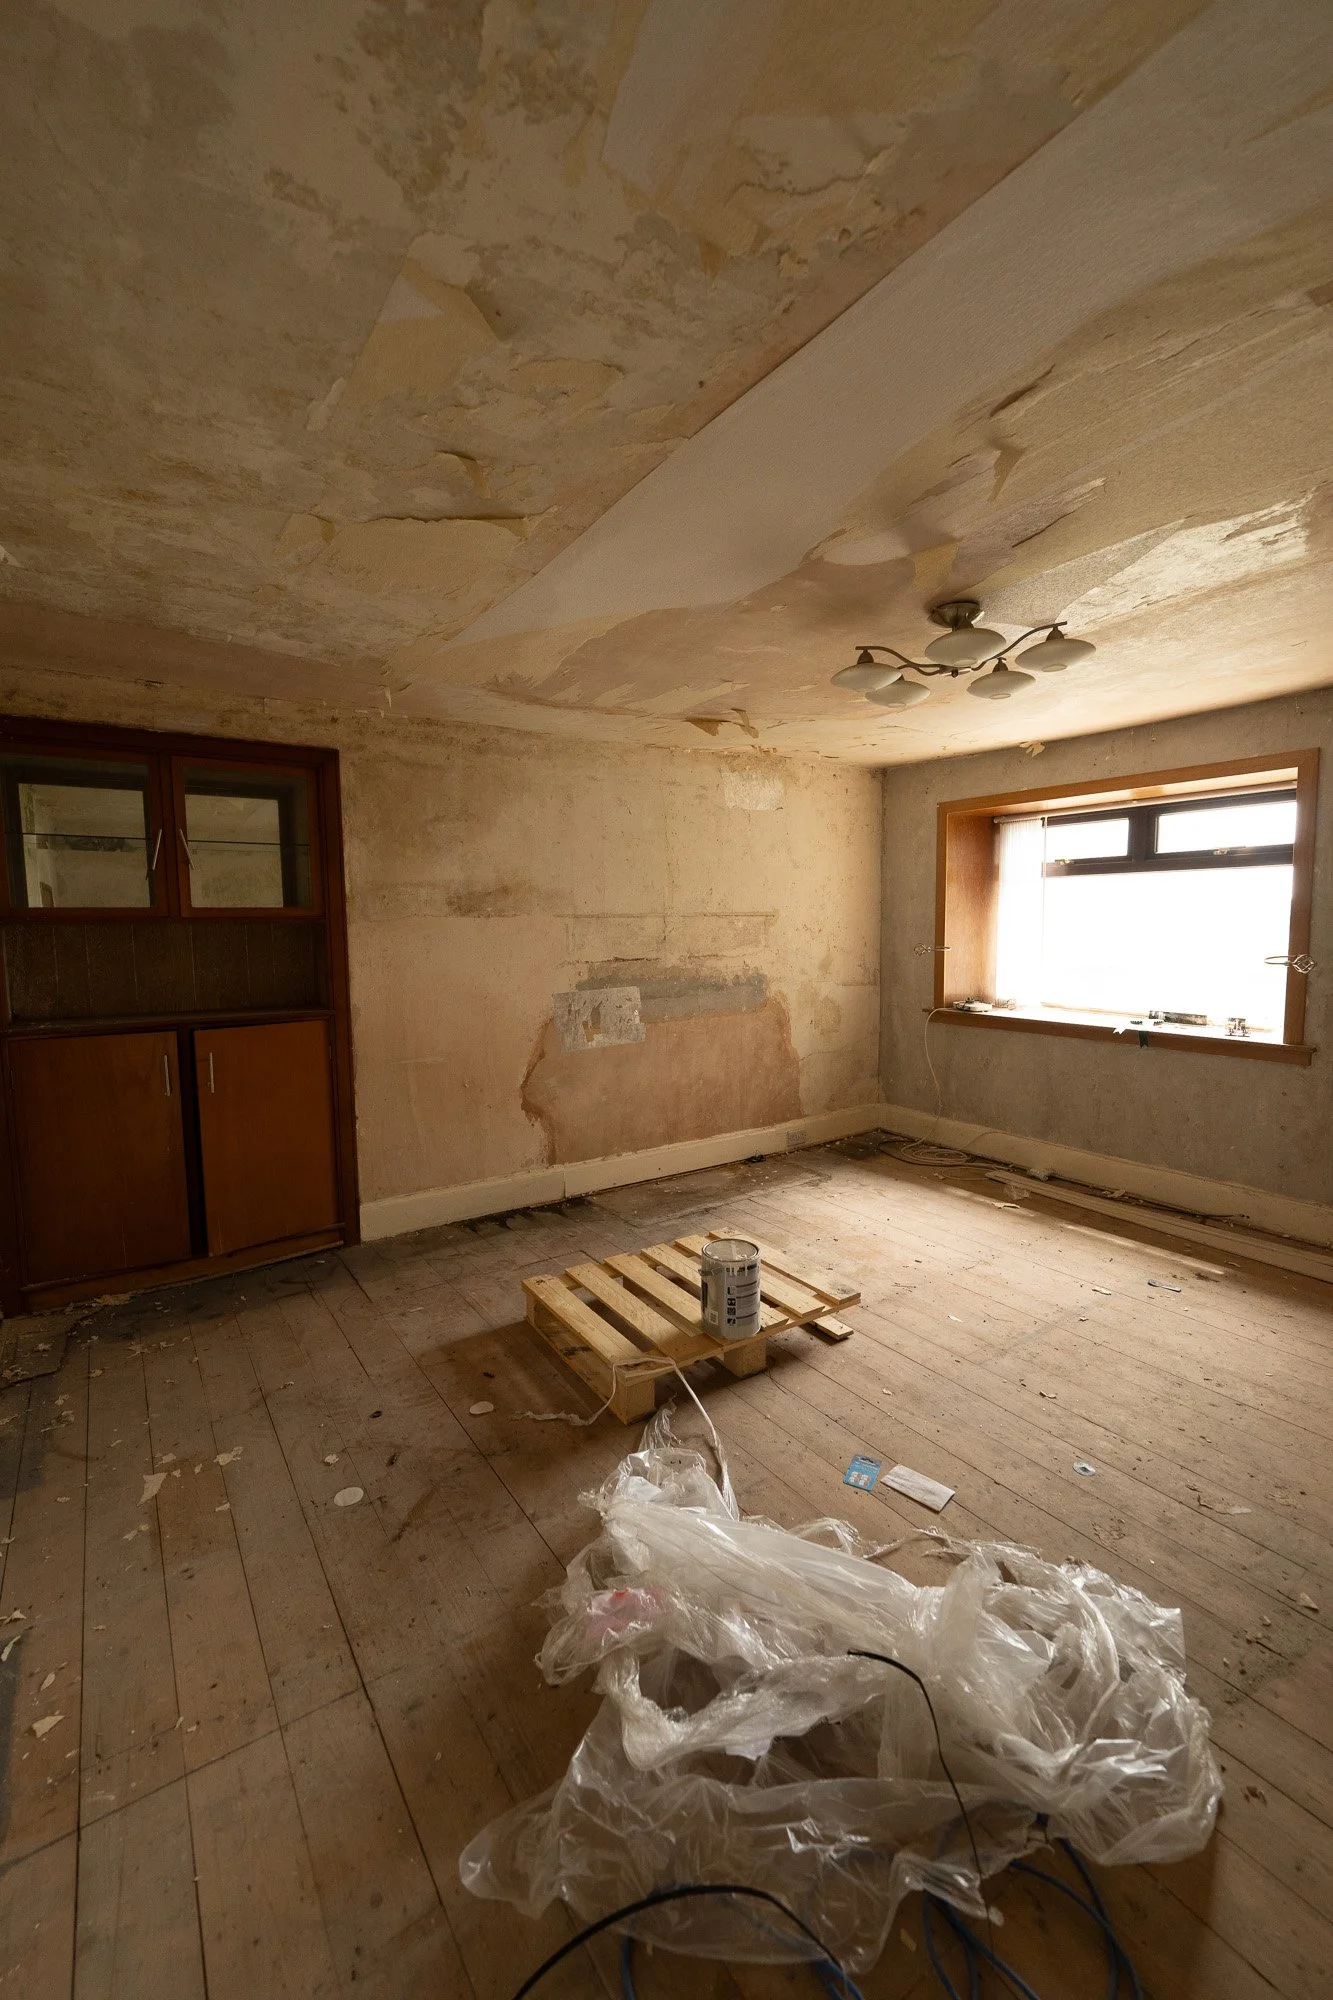
Bedroom 2:
Warm, dry, no longer riddled with damp and mould, complete with vaulted ceiling and functional electrics that have ample outlets and better heating placement too:


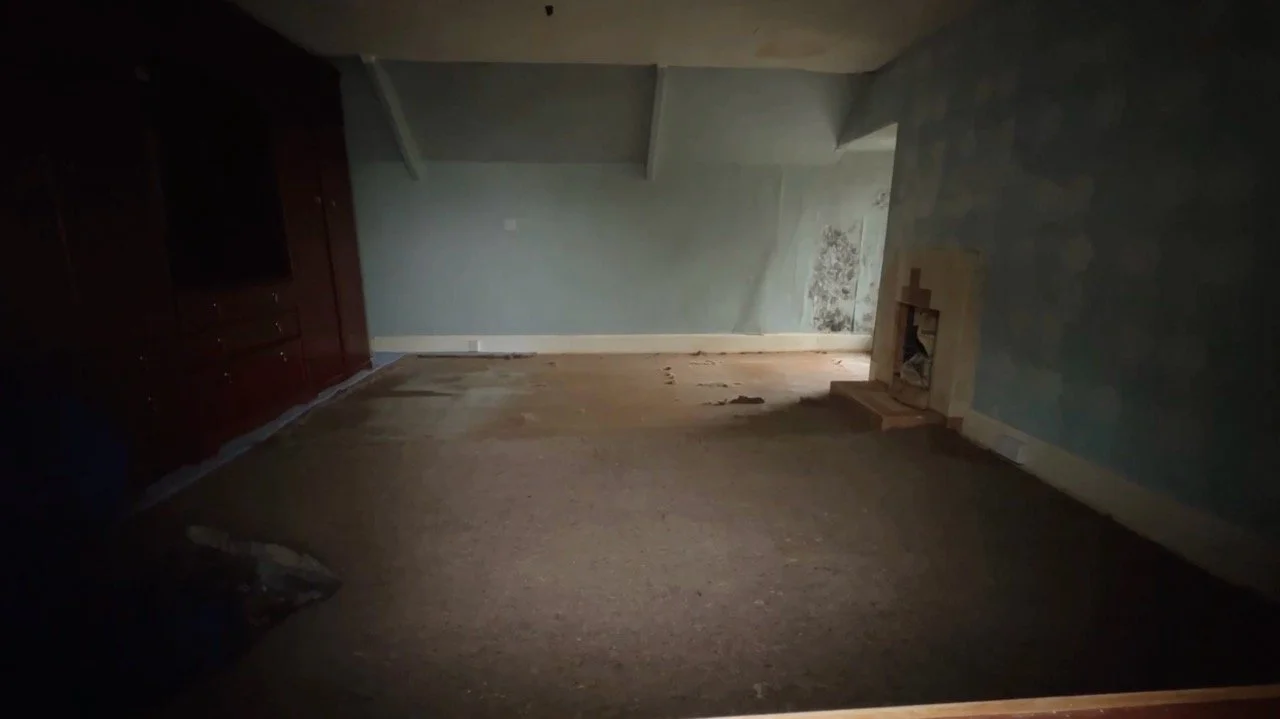
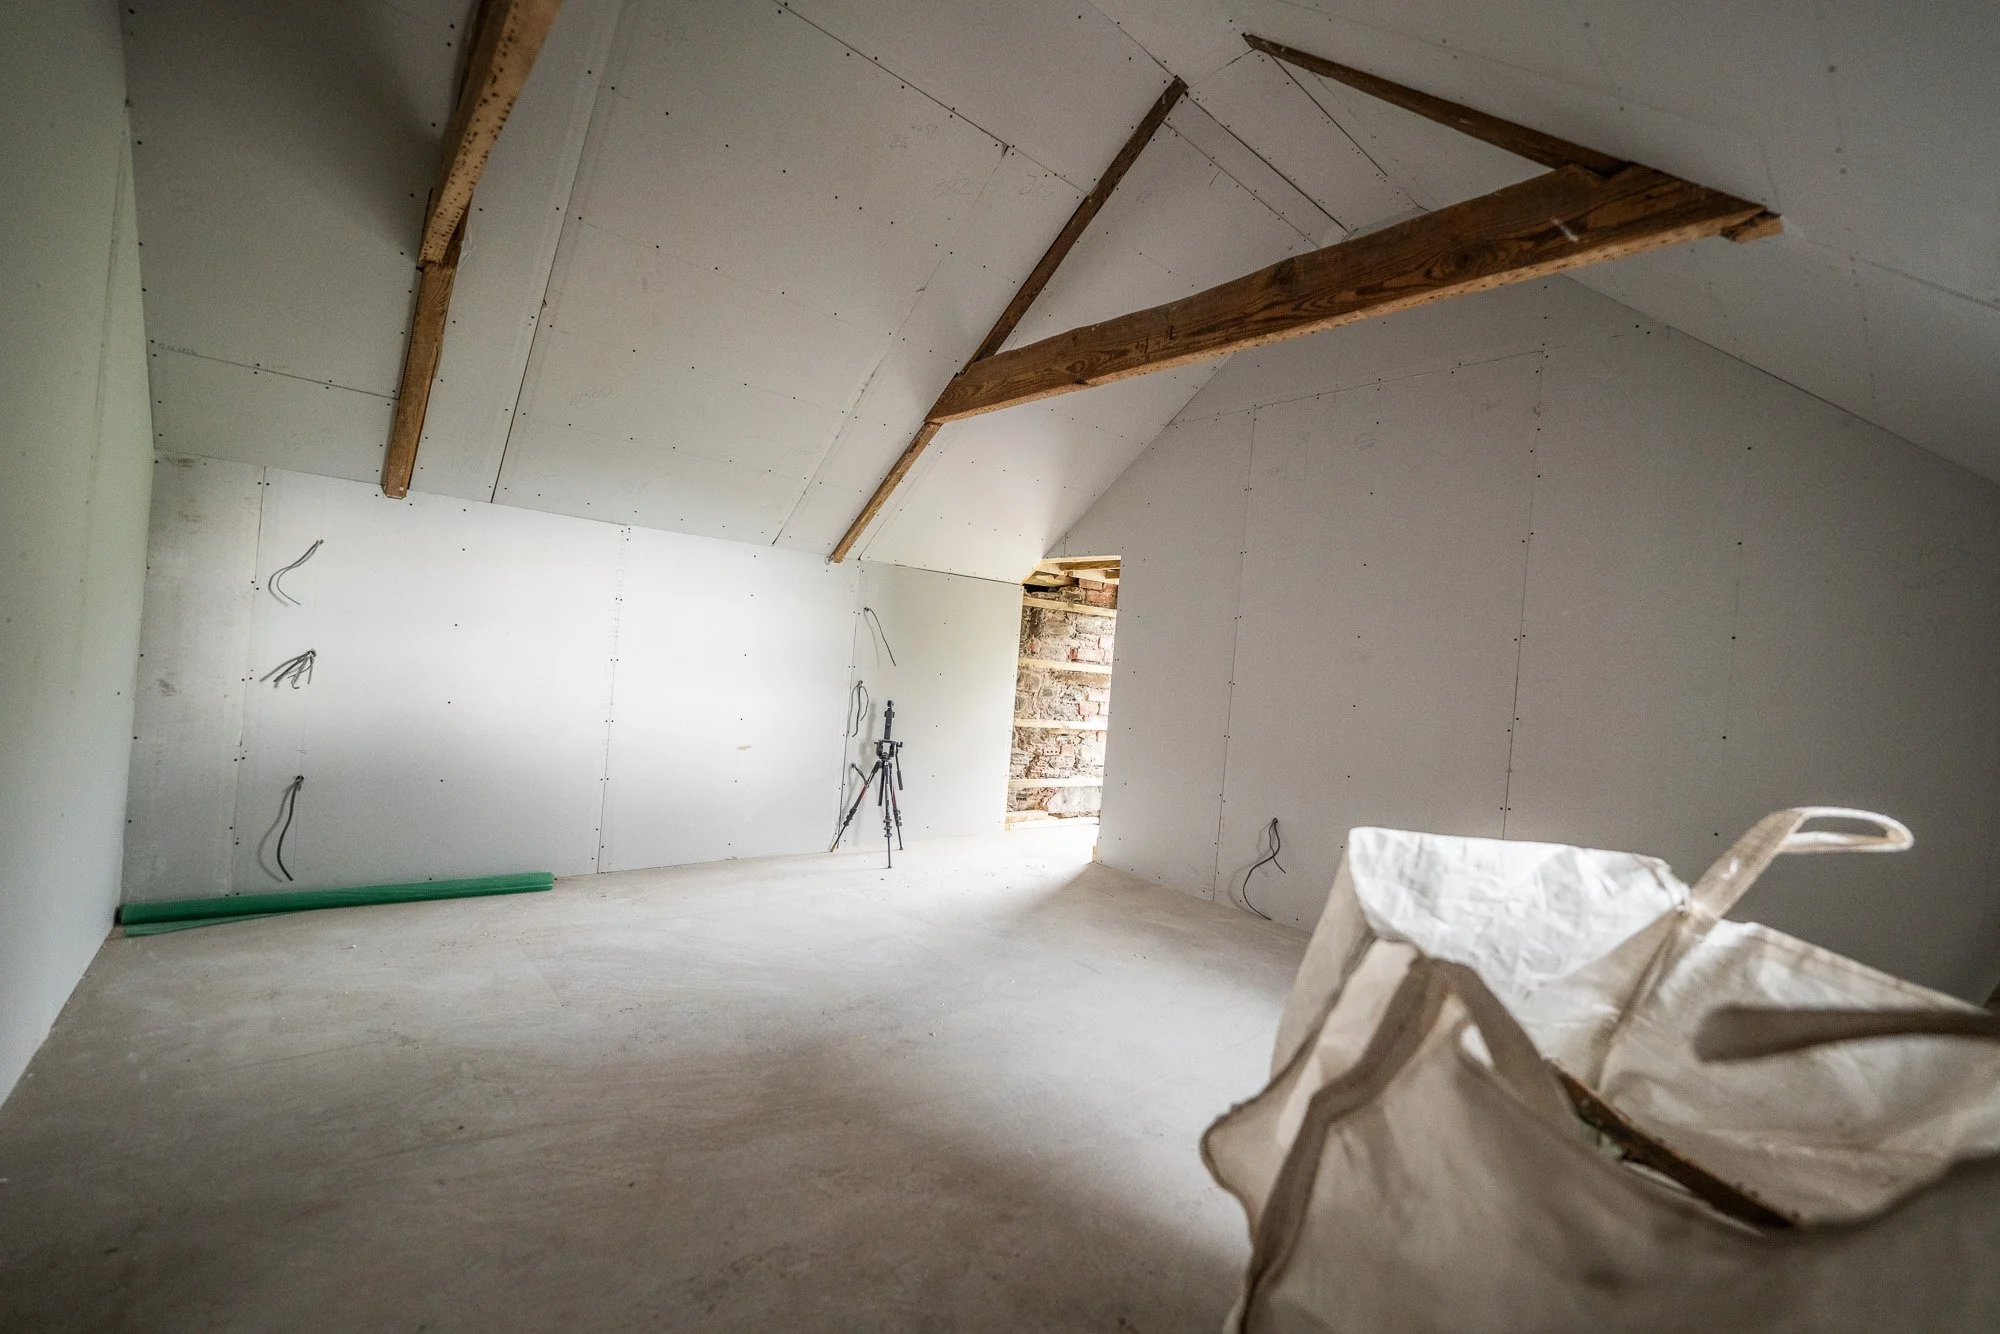
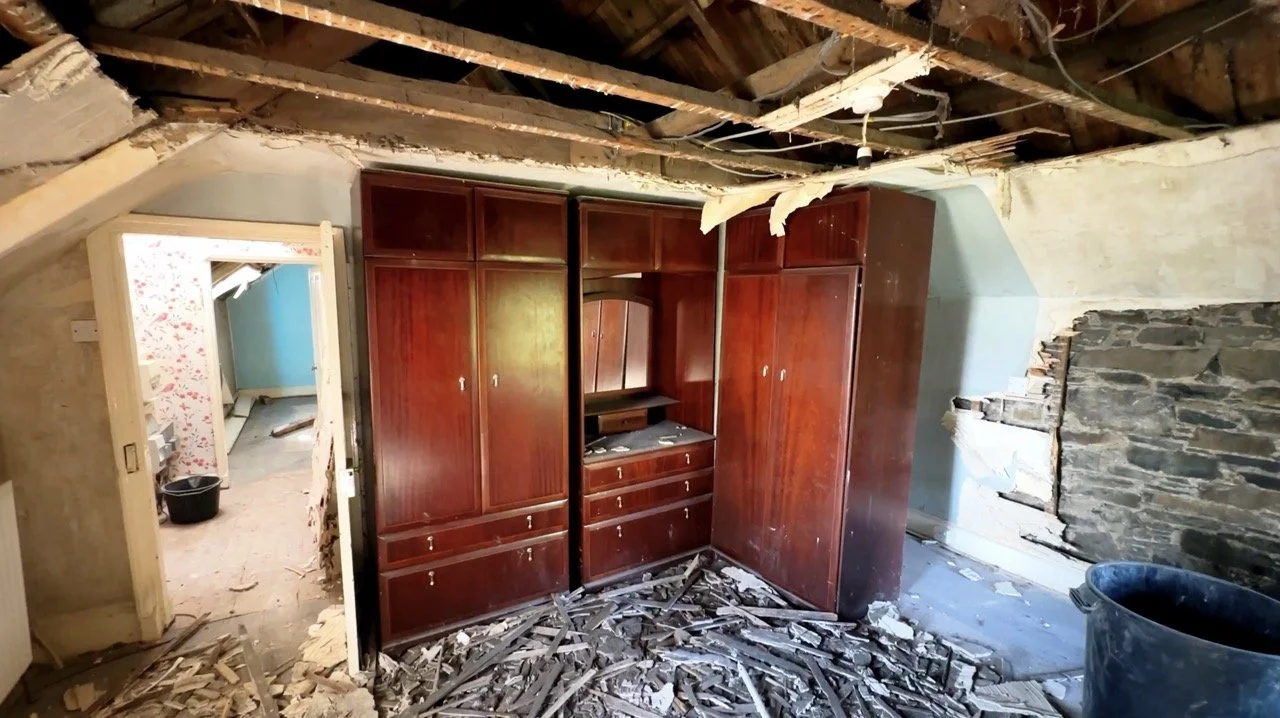
Bedroom 3:
As with Bedroom 2. This was the “blue room” and contained multiple roof leaks plus those giant immovable wardrobes because the ceiling was too damaged to get them out! As a result the before shots are obscured by stuff, but it’s the best I can get, sadly:


Quite a change… and that wraps up our mammoth August update. I’d expect it’ll steady a little for now as we close in on winter.
Onwards!